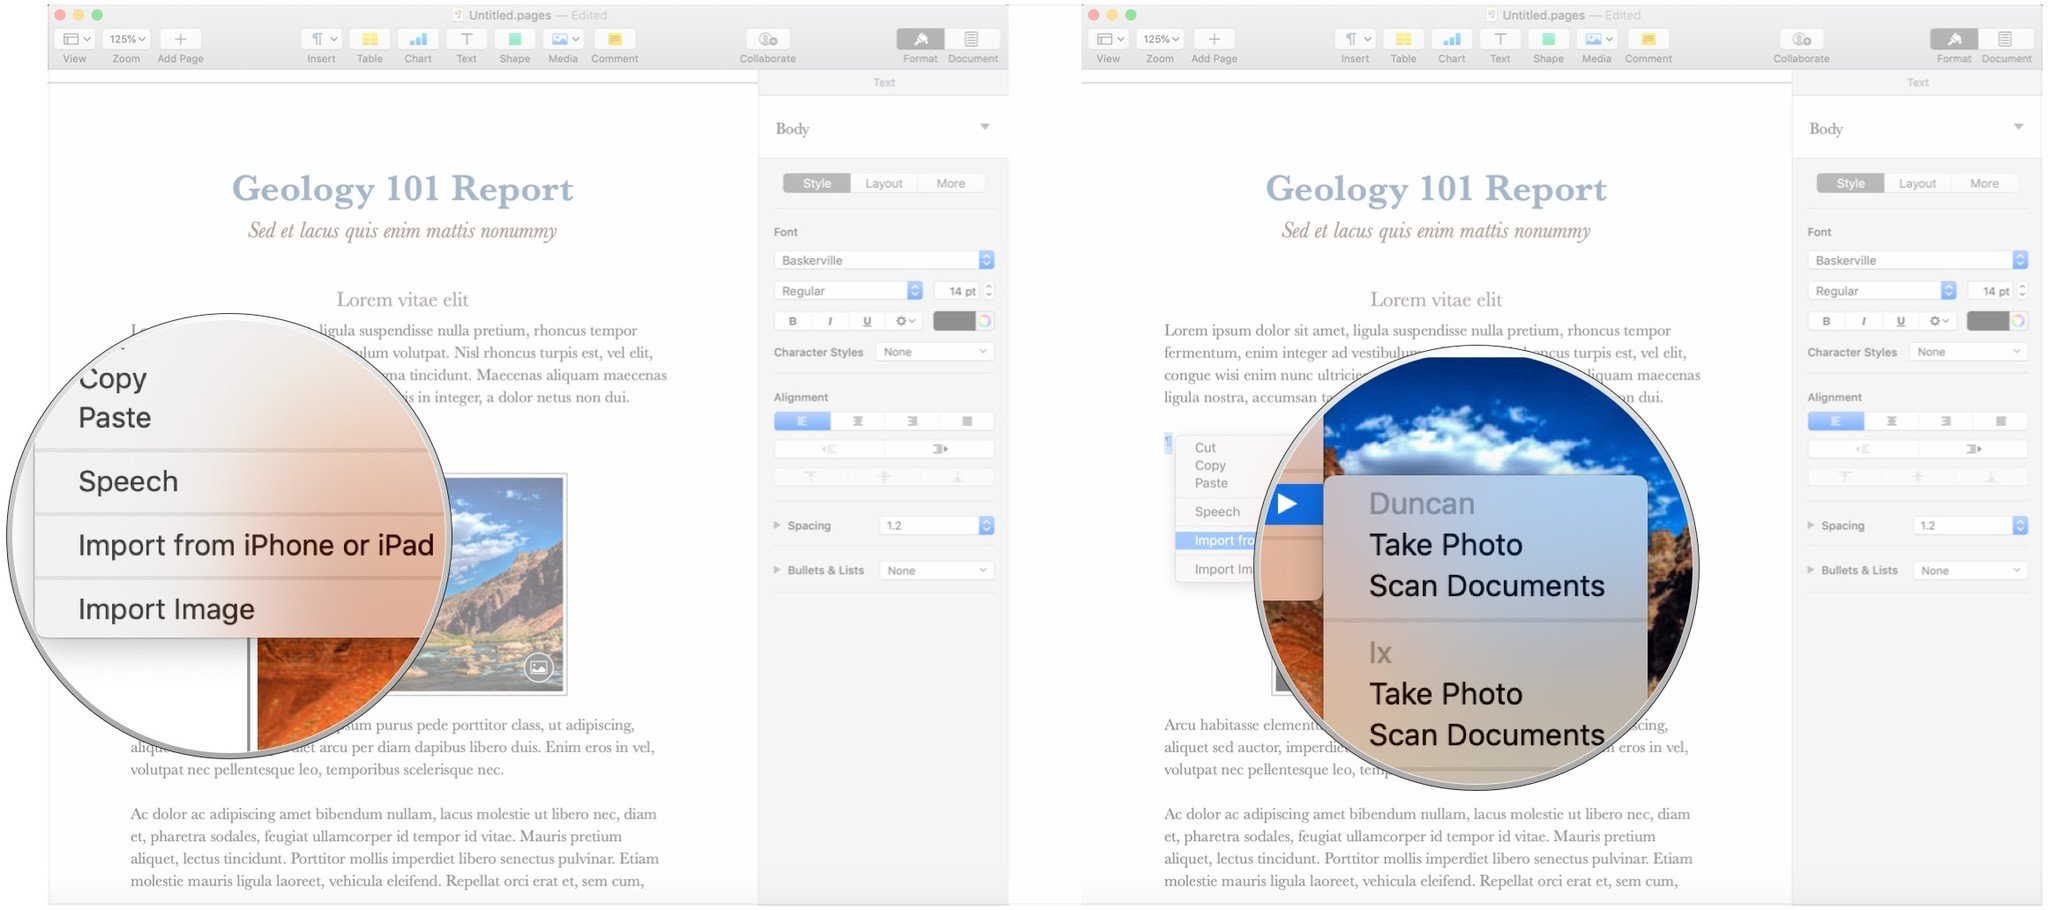
This feature lets you quickly add photos or documents to projects on your Mac using the camera on your iPhone or iPad.
Continuity Camera is a new feature in macOS Mojave and iOS 12 that allows you to open your iOS device's camera from your Mac, then immediately transfer the photo that was taken over to a document that you're working on. So, for instance, if you're working on a Pages document, and you need a photo of something that's nearby, you can activate Continuity Camera, take the photo with your iPhone, then immediately see that photo pop up in the document on your Mac.
How to add a photo with Continuity Camera
In order to use Continuity Camera, you need to be working with an editable document.
- Open your document or project in an app like Pages, Keynote, or TextEdit.
-
Control-click, right-click, or two-finger-click on a space within the document (Note: your photo will end up wherever you end up clicking).
- Hover over Import from iPhone or iPad.
-
Click Take Photo under the name of the iOS device you'll use to take that photo.
- Take a photo using your chosen iPhone or iPad.
-
Tap Use Photo. Your photo will now appear in your document where you clicked.
How to scan a document with Continuity Camera
- Open your document or project in an app like Pages, Keynote, or TextEdit.
-
Control-click, right-click, or two-finger-click on a space within the document (Note: your photo will end up wherever you end up clicking).
- Hover over Import from iPhone or iPad.
-
Click Scan Documents under the name of the iOS device you'll use to scan that document.

- Scan the document using your iPhone or iPad. You decide which one by picking the device up and using it. Repeat to scan multiple documents.
-
Tap Save. Your documents will be inserted into the document on your Mac.


