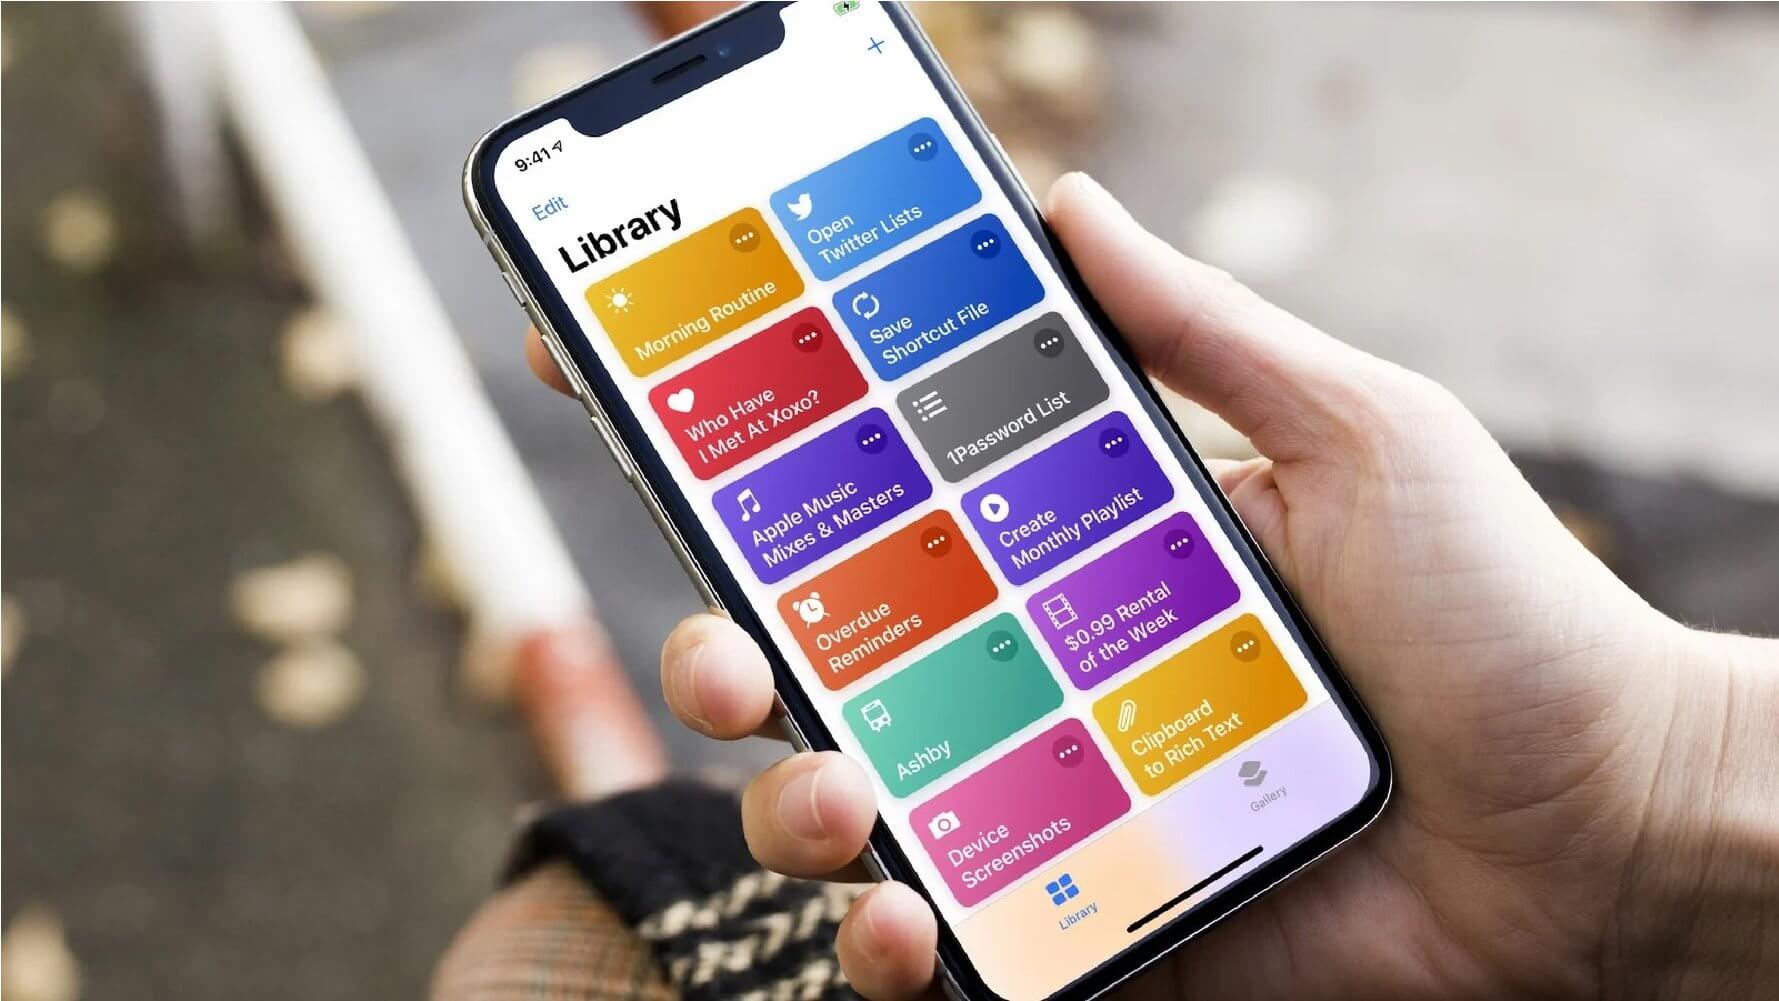
If you're in a situation where you need to take a video and share it with people quickly, the Shortcuts app on your iPhone offers solutions for doing just that. You can build (or download, more on that in a bit) a shortcut that can take a video with the back camera, then automatically save that video to iCloud or Dropbox, then, again automatically, send the link to a pre-specified contact or group of contacts.
While I would typically go through step by step to teach you how to build these shortcuts for yourself, they're kind of involved. What I am going to do is take you through the shortcut and tell you how to set it up for your particular needs.
But first, you need to download it and add it to your shortcuts library. If you've already downloaded shortcuts from outside of the app, and thus have activated the "Allow Untrusted Shortcuts" setting, then you can skip to the setup phase. If you're a first-time Shortcuts app user, however, there are some steps you need to take to be able to add shortcuts created by other people.
How to download a shortcut
To download external shortcuts, you need to activate the "Allow Untrusted Shortcuts" option in Settings. But to see that option, first, you need to run a shortcut from the app. I suggest grabbing one from the Gallery.
- Open Shortcuts on your iPhone or iPad.
- Tap on the Gallery tab.
-
Tap on a shortcut that you want to add to your library.
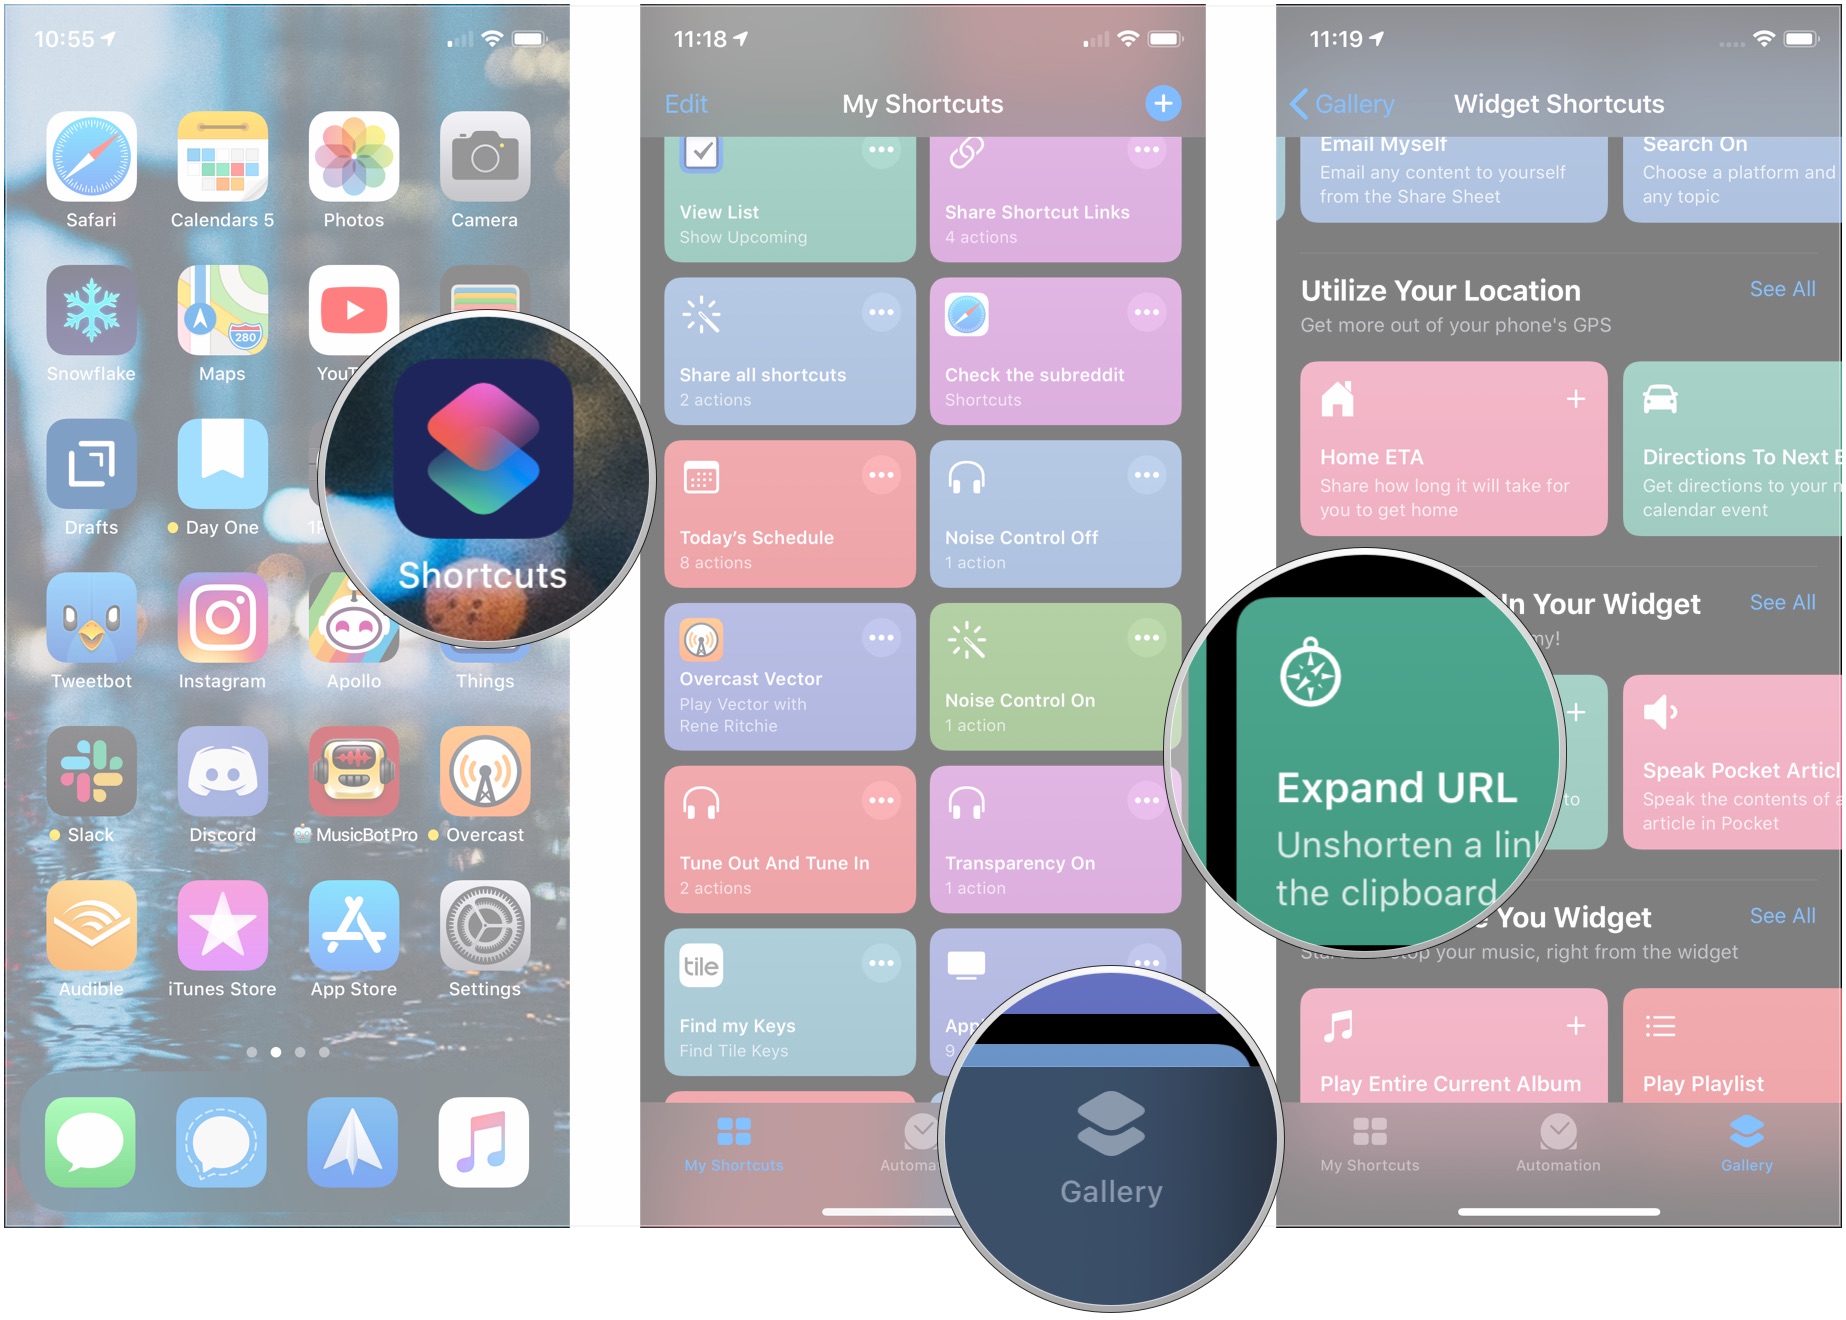
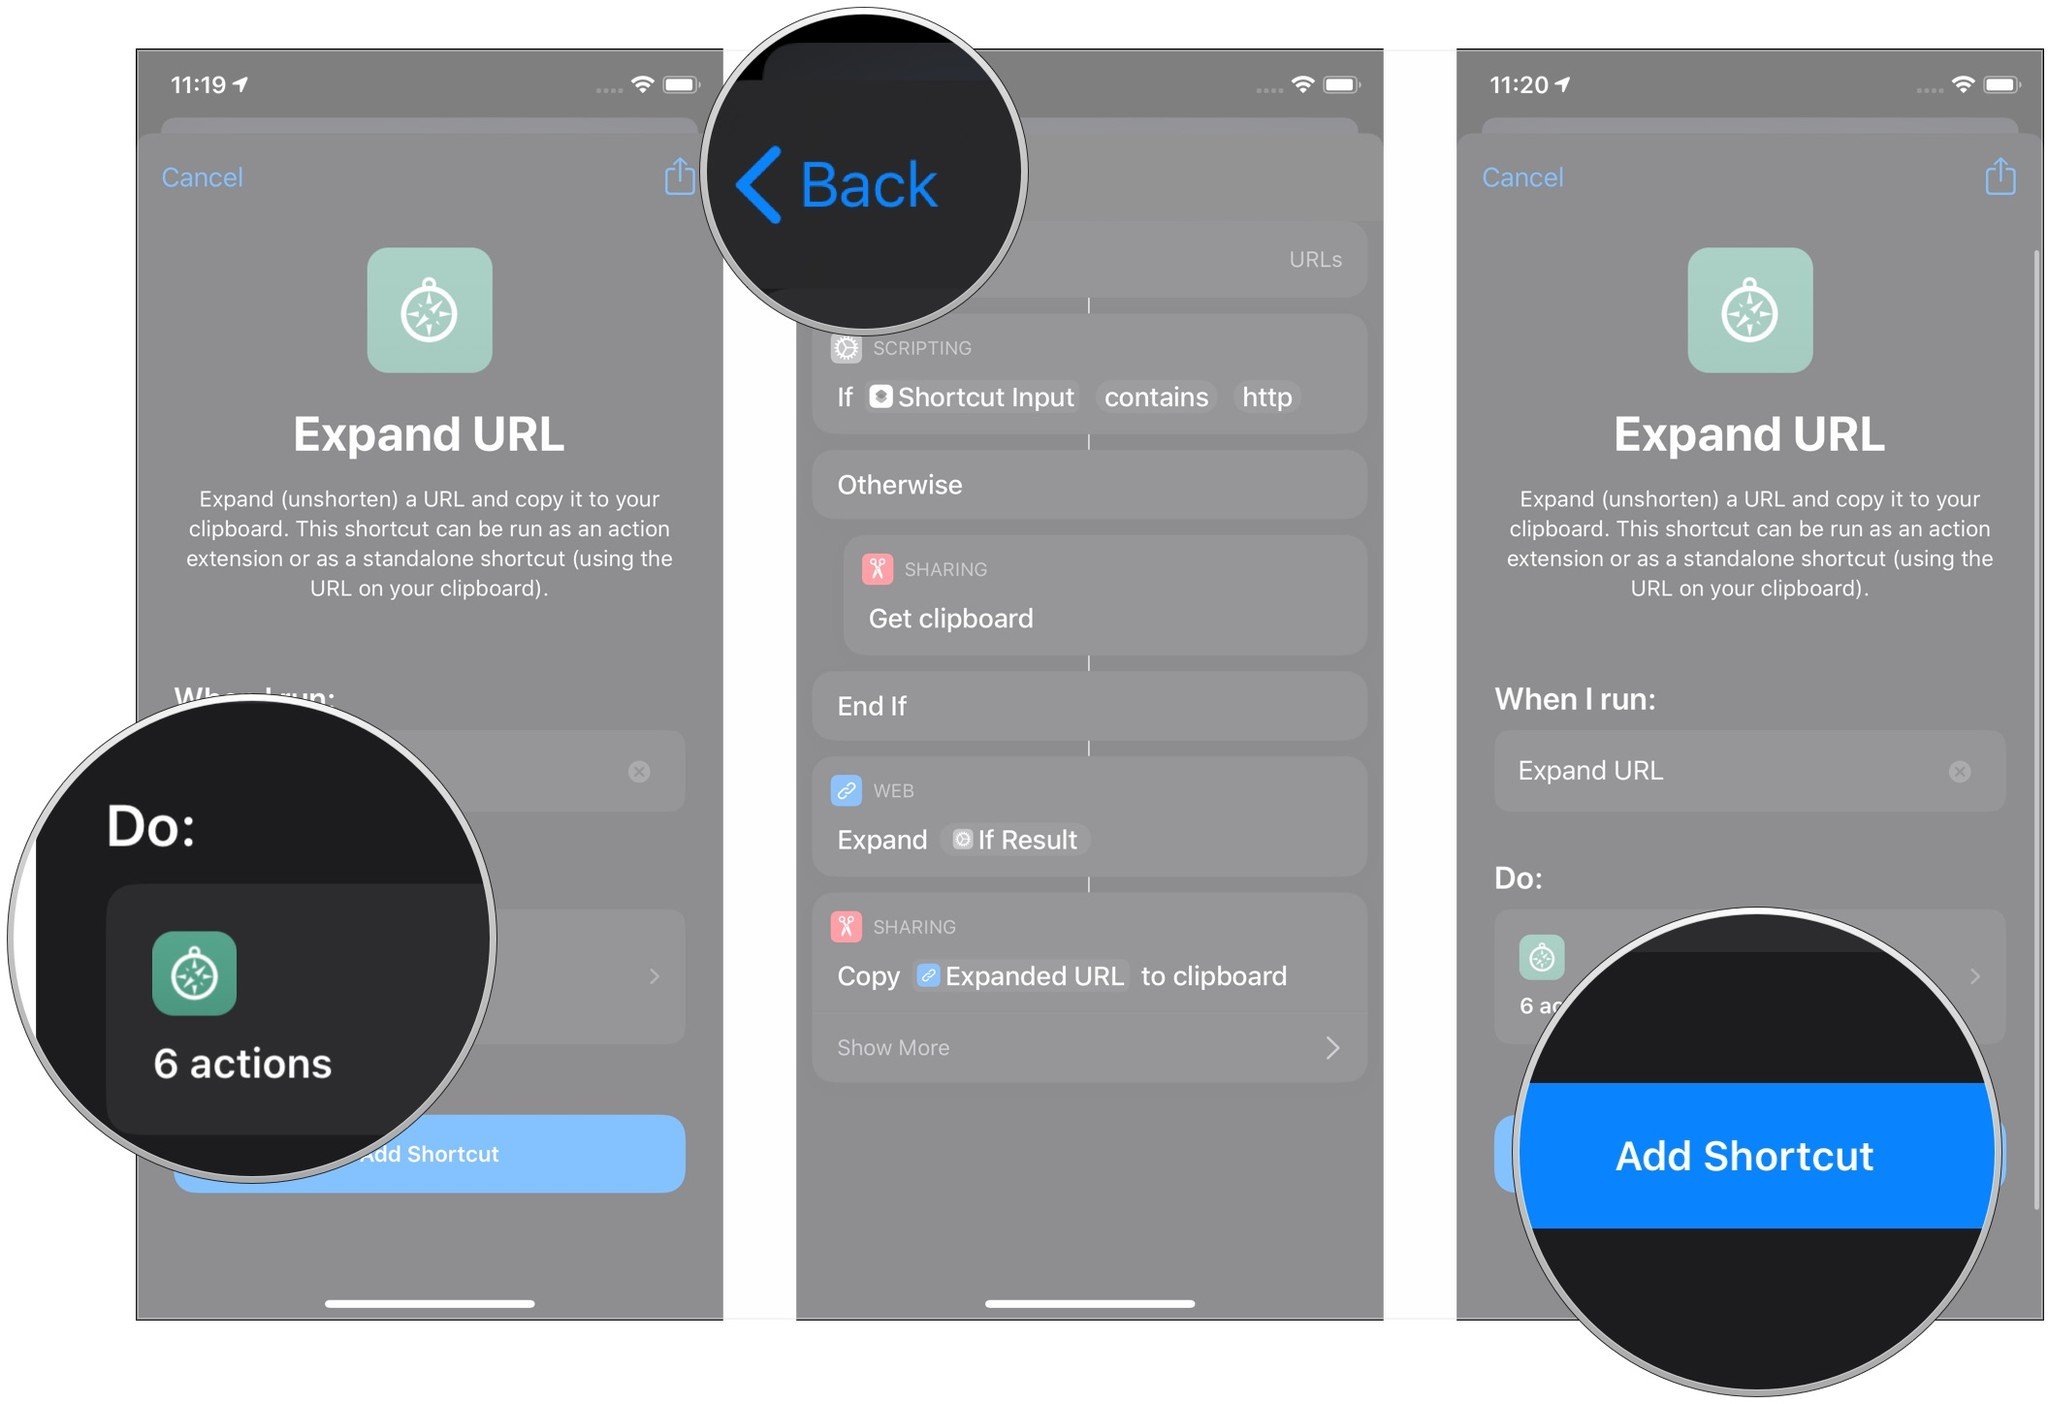
- Optionally, tap the action list under the Do section to view a list of actions the shortcut will execute upon activation.
- Tap Back.
-
Tap Add Shortcut.


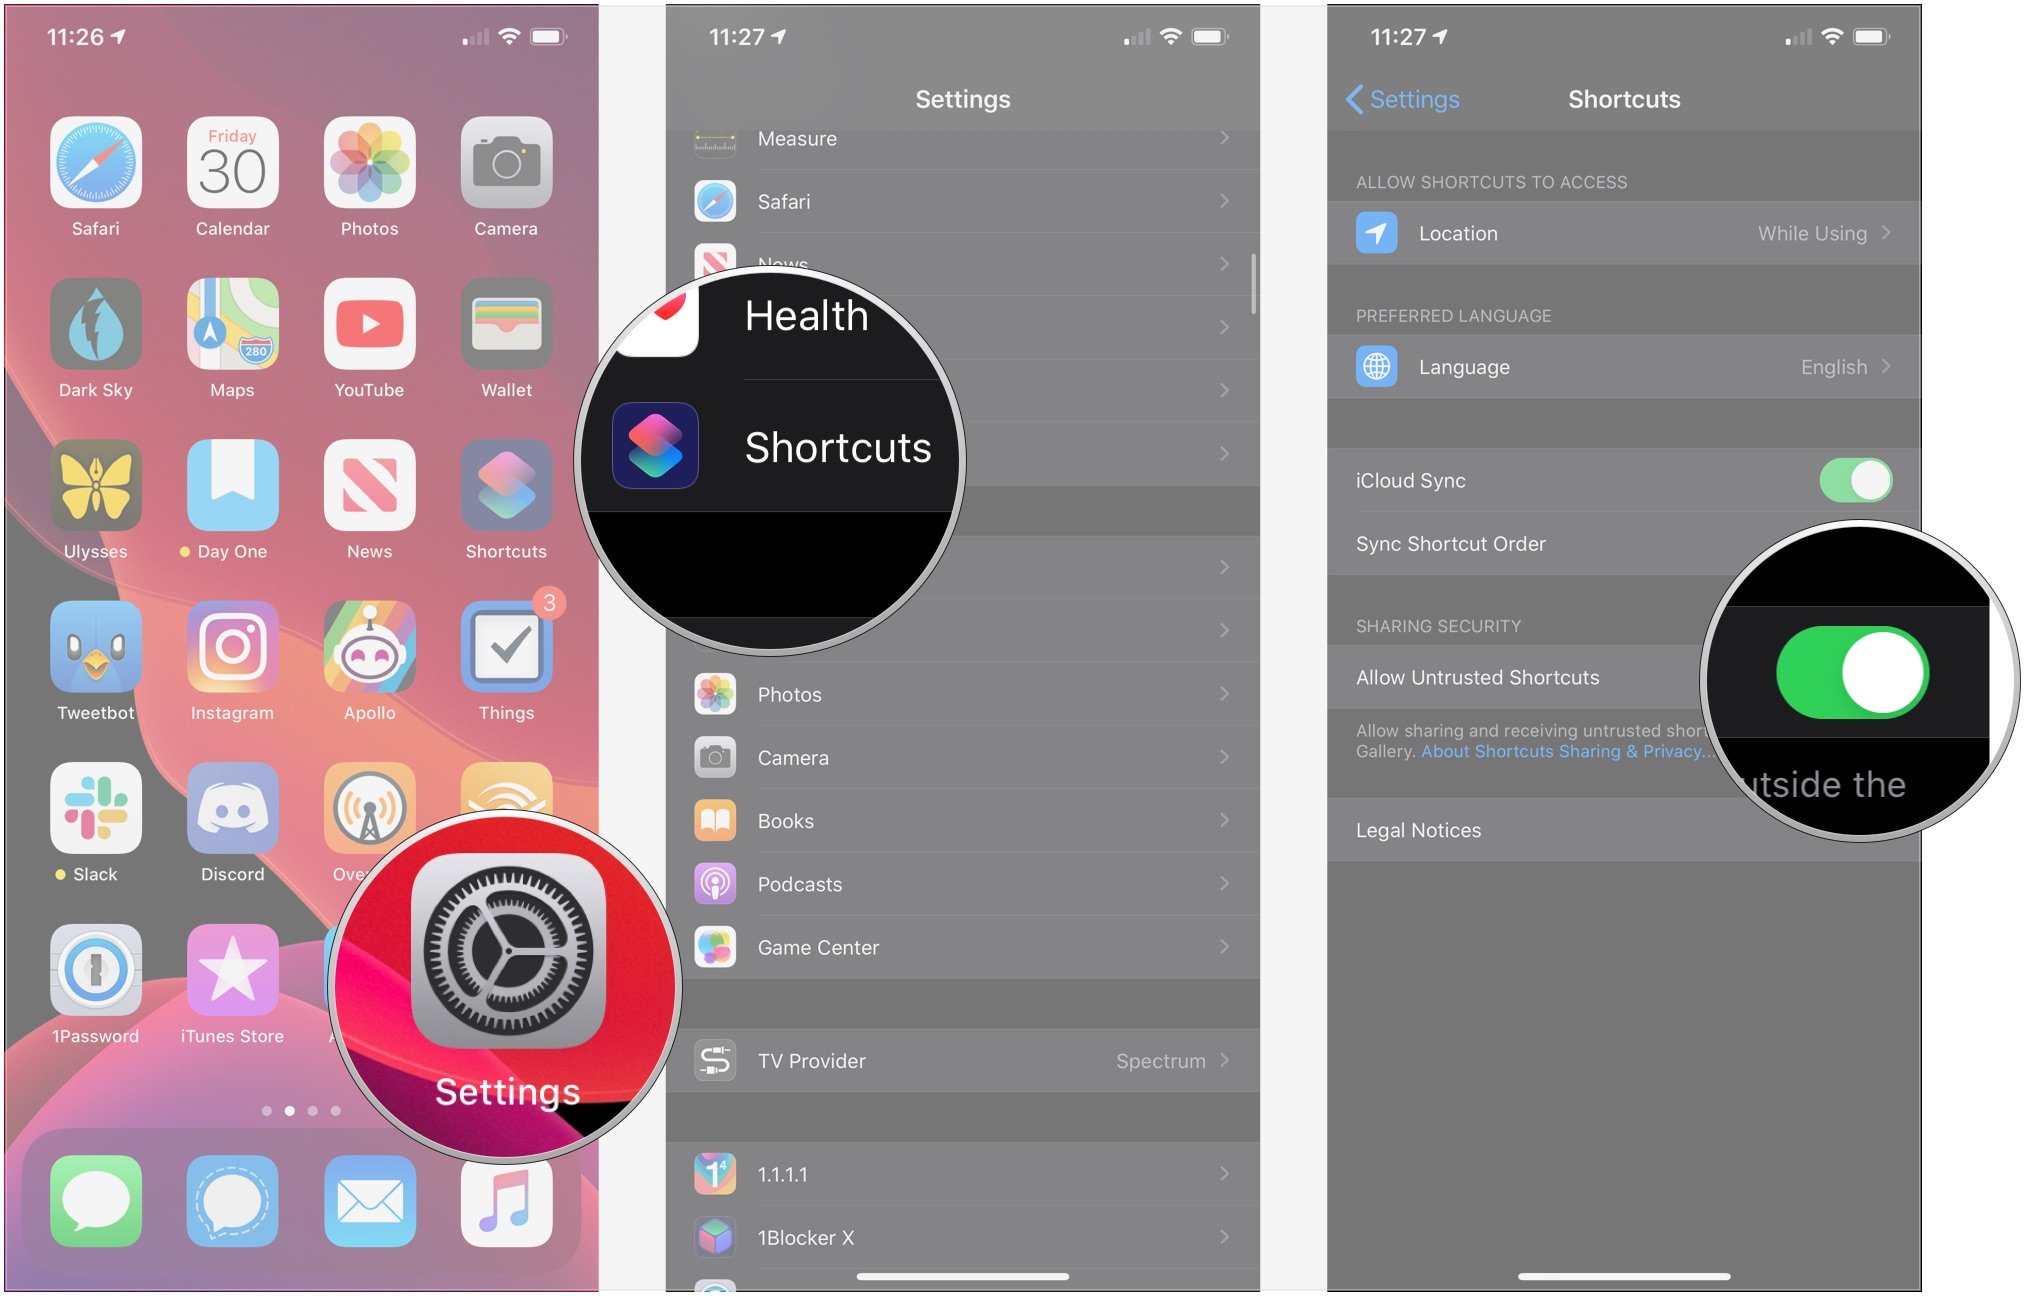
Now, you just need to allow untrusted shortcuts, which you do like this:
- Open Settings on your iPhone or iPad.
- Tap Shortcuts.
-
Tap the switch for Allow Untrusted Shortcuts so it's in the green 'on' position.

After that, you can add this Record & Share shortcut. Just tap on the link, then tap on the red Allow Untrusted Shortcut button when it pops up in the Shortcuts app.
How to set up the Record & Share shortcut
Now a caveat about this shortcut: if you're using iCloud, you need to build in a wait time. The default in the linked shortcut is 10 seconds, but you can experiment with shorter or longer times. The goal is to give the file enough time to upload to iCloud.
The following instructions are for setting up the iCloud version of the shortcut, but the Dropbox version is the same, minus the Wait action, which isn't necessary, based on how Dropbox creates links.
While I've provided a link so you can download this shortcut that I've already made, here's how you can set it up for yourself.
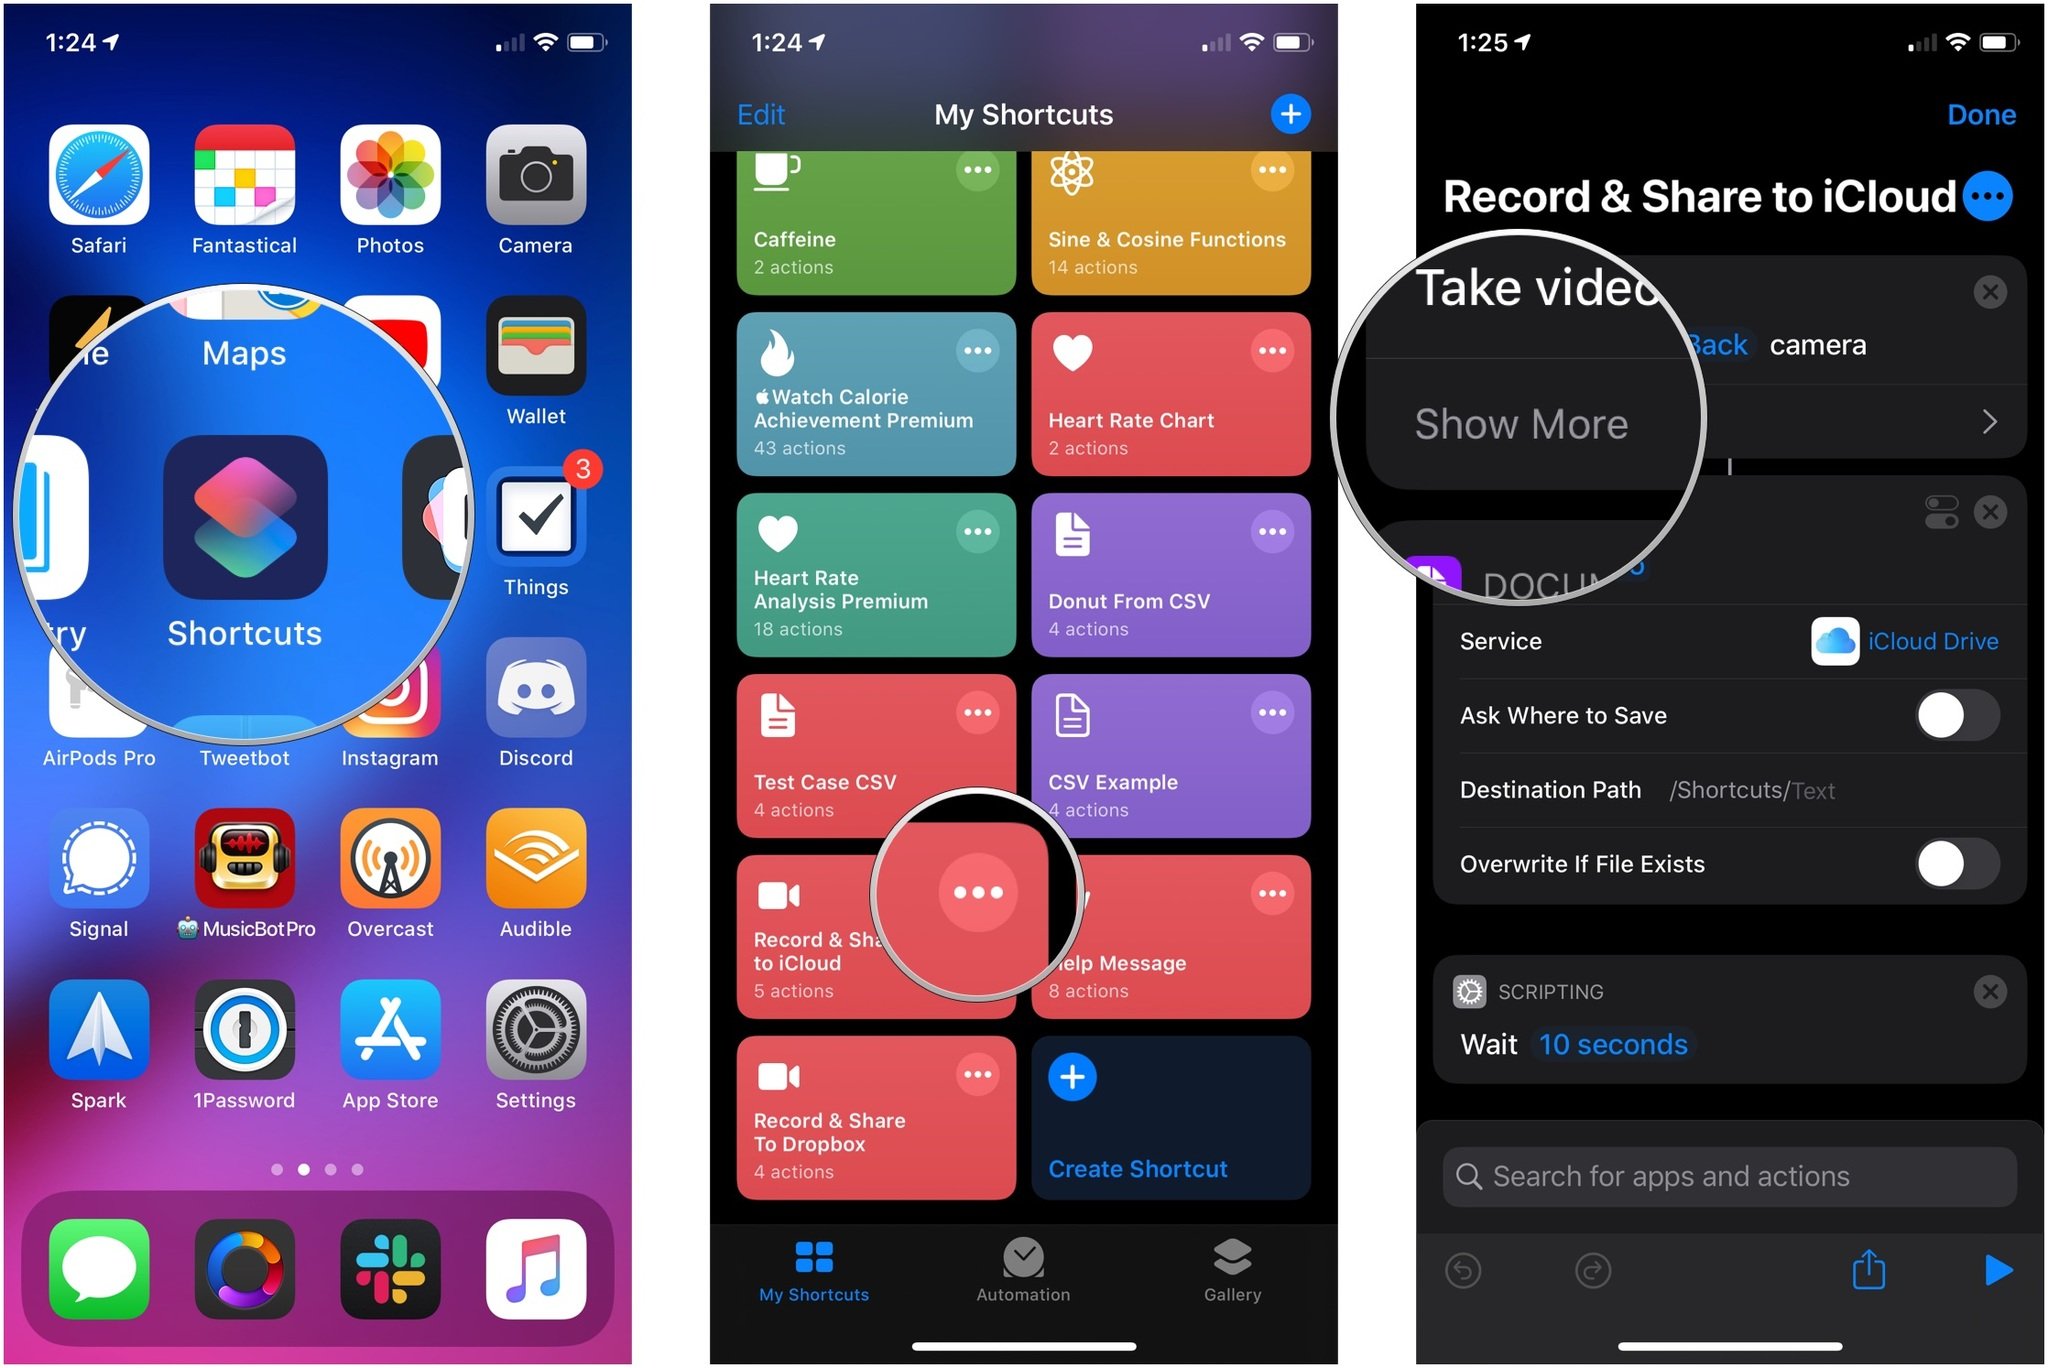
- Open Shortcuts.
- Tap the ... in the upper-right corner of the Record & Share shortcut that you've downloaded. These instructions use the iCloud version.
-
Tap Show More on the Camera action.
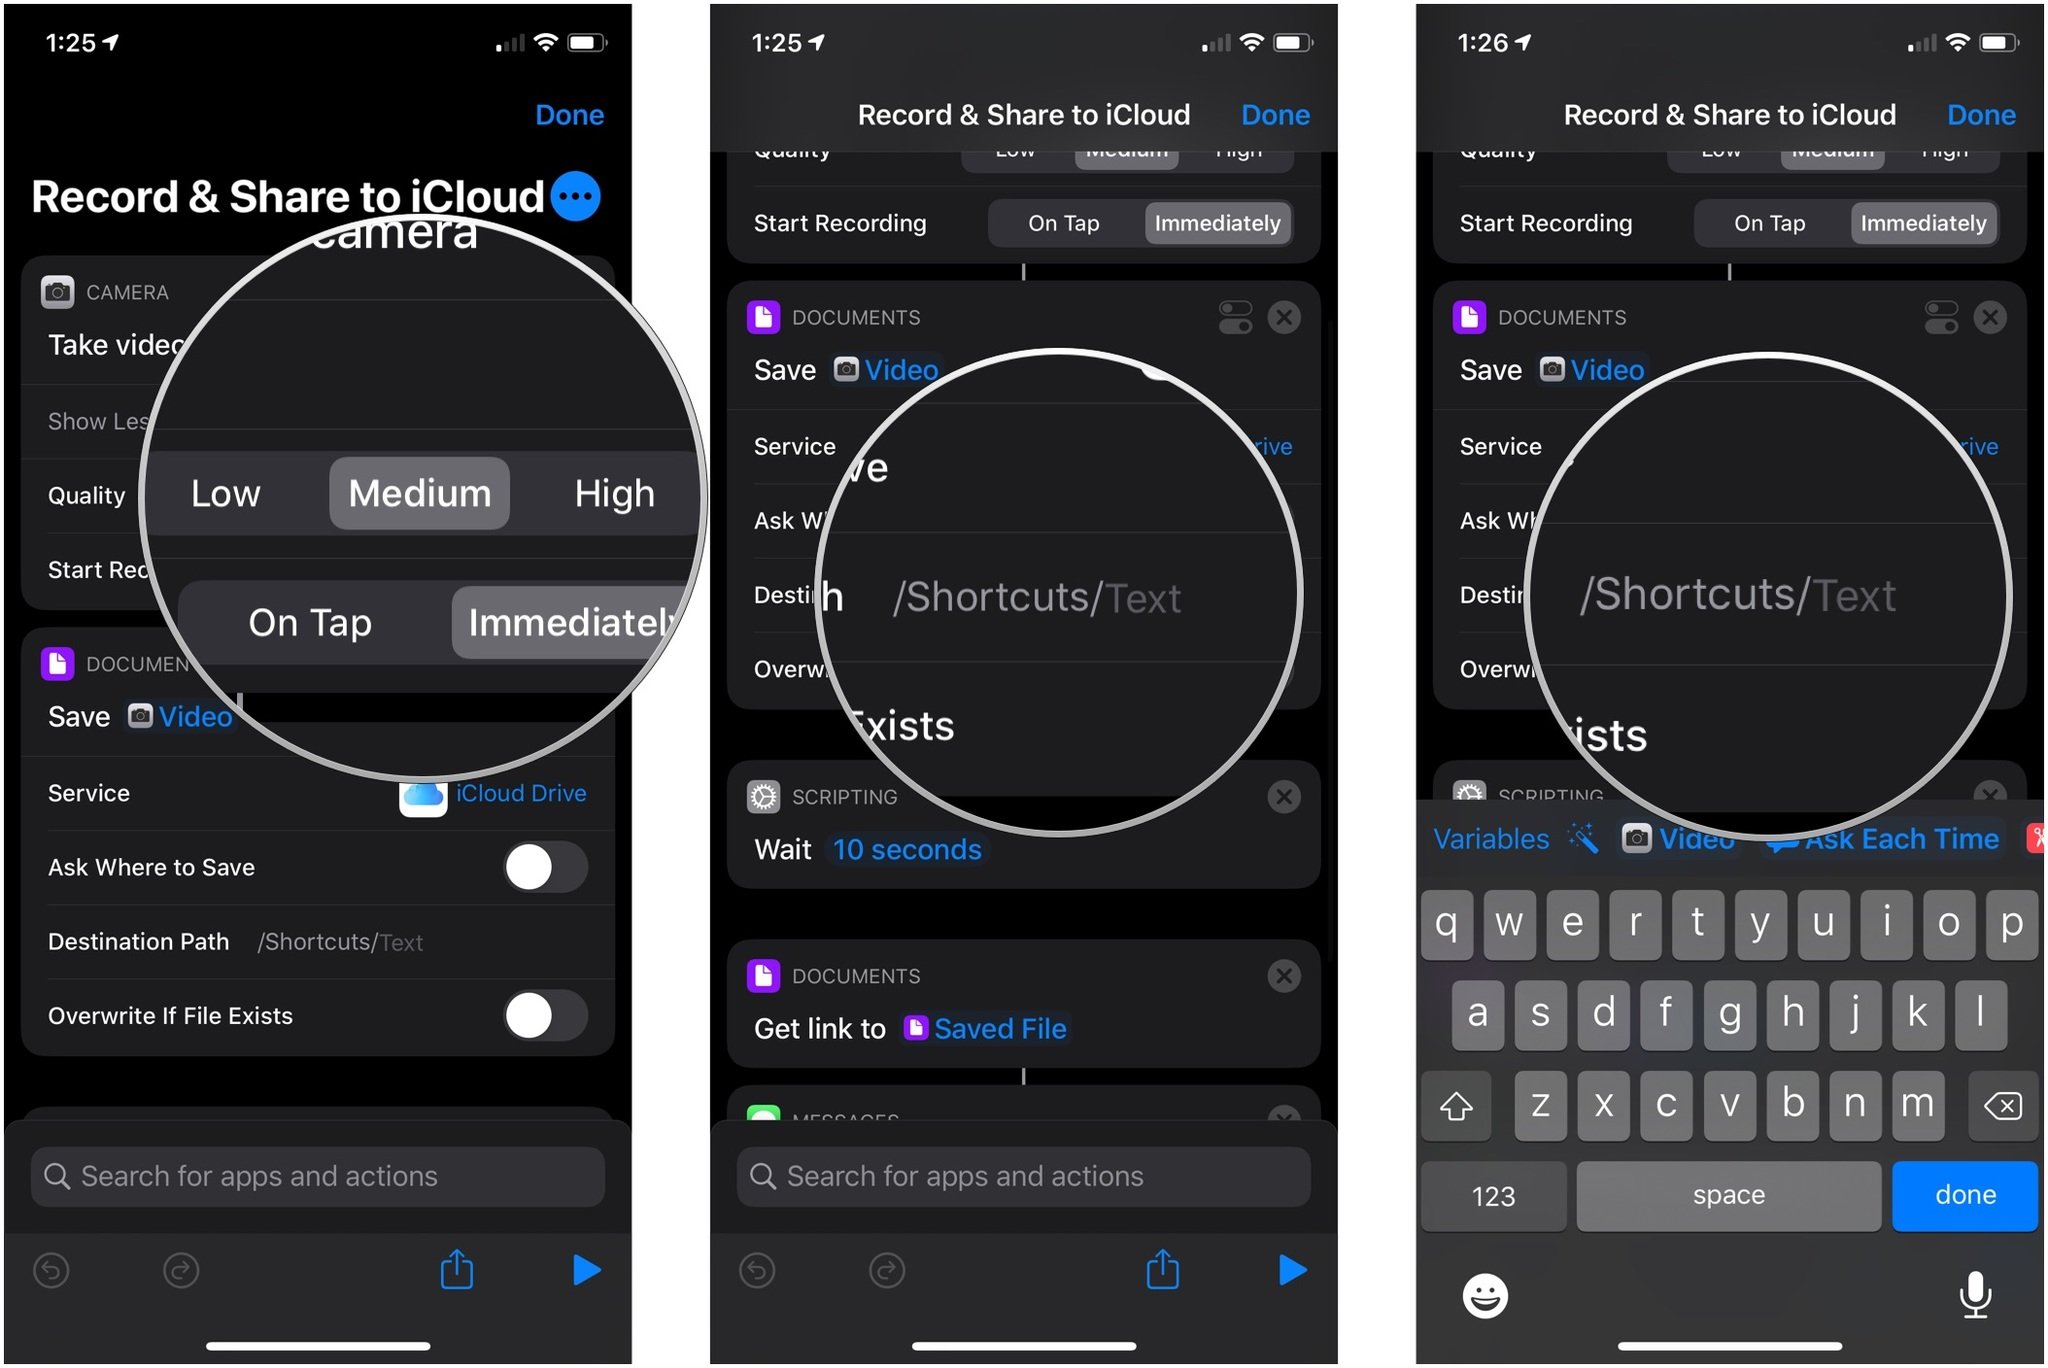
- Tap a quality level for your video. The default is Medium, but you can also choose High or Low. Do not change the Start Recording button parameter. Keep it on "Immediately."
- Tap the Destination Path line.
-
Specify a destination for your video in iCloud or Dropbox if it's different than the default. If you're using iCloud, the file will go somewhere in the Shortcuts folder, which can be found later in the Files app.

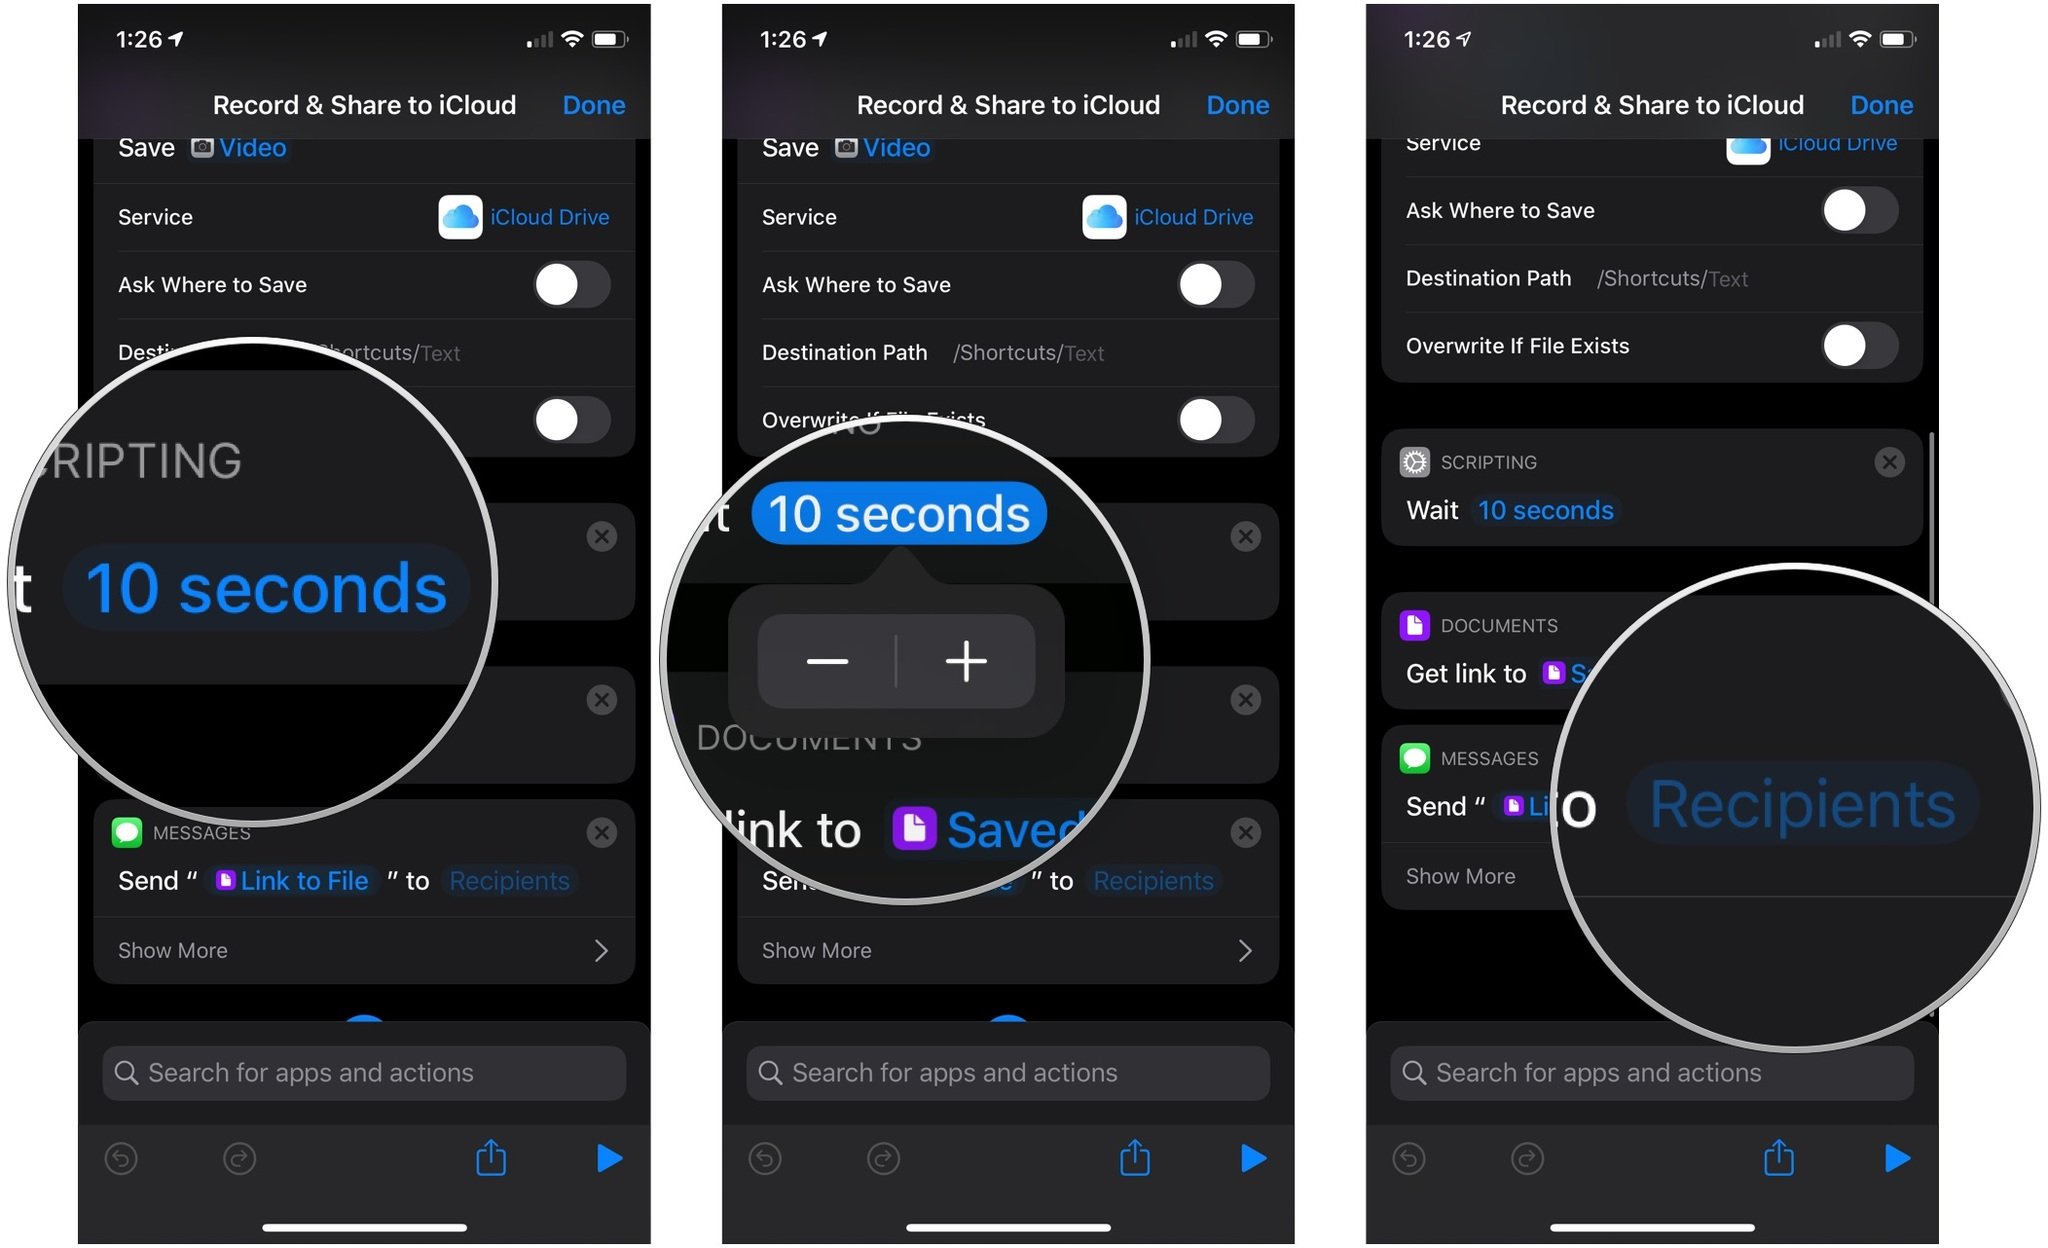
- Tap the waiting time on the Wait action of the iCloud version of the shortcut if you want to change how long the shortcut waits to proceed.
- Tap the + button or - button to increase or decrease the wait time.
-
Tap Recipients in the Send Message tab.
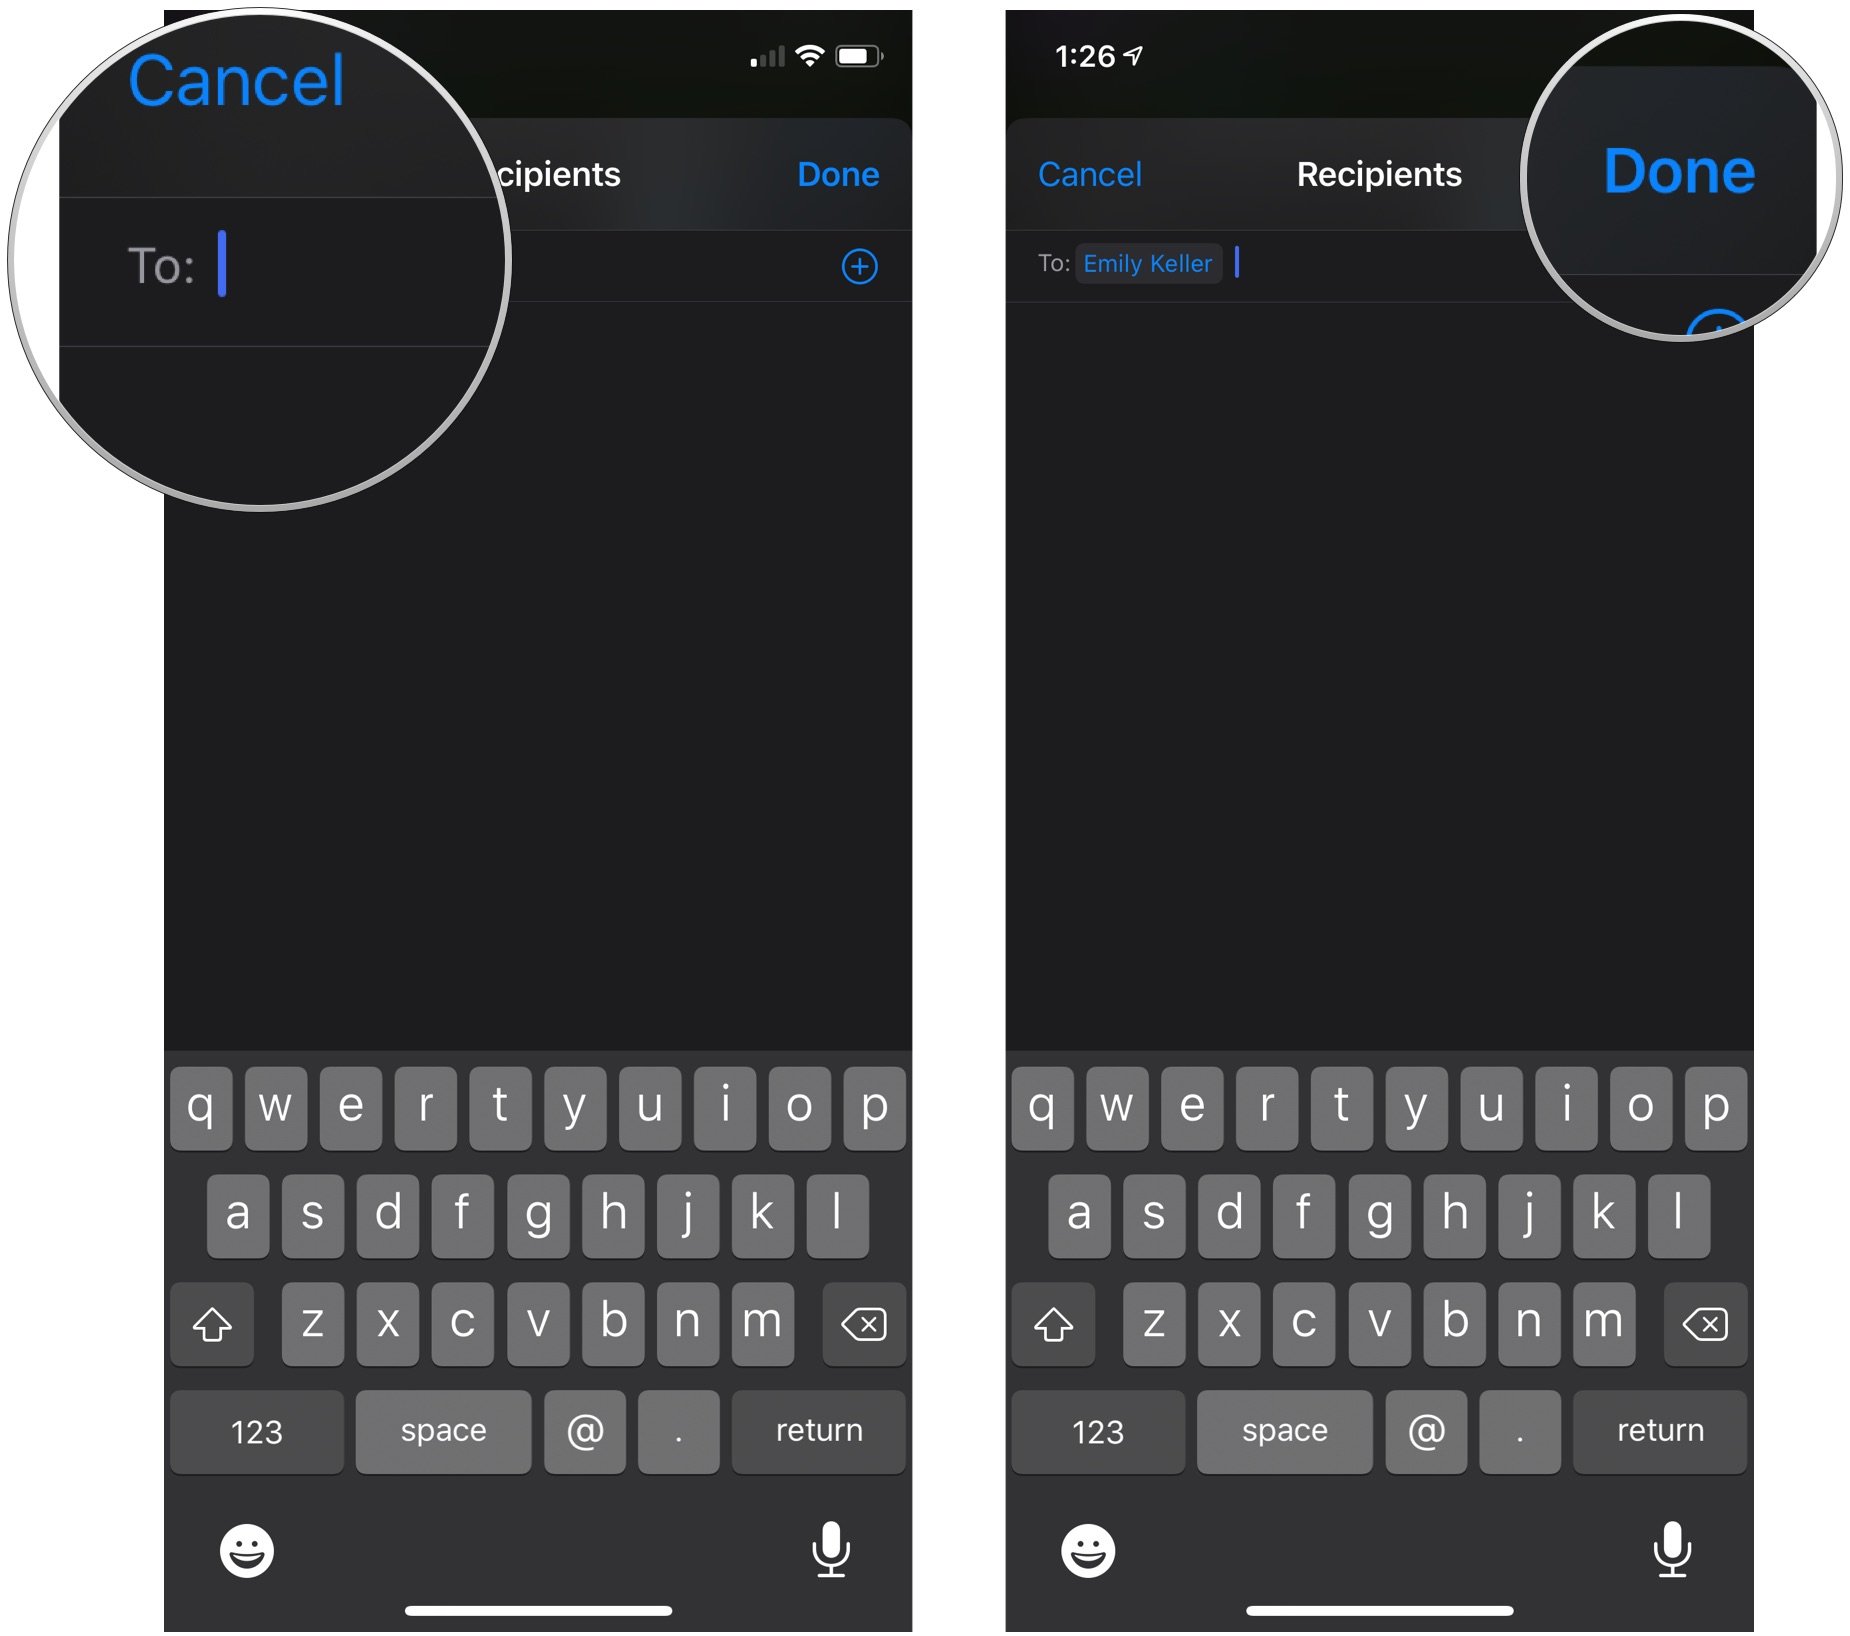
- Enter the contacts to whom you want to send the video
-
Tap Done once you've added all of the recipients that you want to.


A couple of notes on this shortcut: you'll want to keep the "Ask Where to Save" switch in the Save action in the 'off' position. If it's on, the shortcut will ask where you want to save your video each time it's run. Because we just want to upload it and share the link, it's better to have the destination predetermined.
Additionally, to maximize the utility of this shortcut, you might want to add it to your Home screen, where it will appear like an app icon. Once you tap that icon, the shortcut will run as usual.
What these shortcuts do
These shortcuts are as close as you can get to automatically taking and sharing a video with a button. When you go to use the shortcut, here's what you have to actively do:
- Activate the shortcut (either in the shortcuts app or from a Home screen icon). Your video recording will begin automatically.
- Tap the record button to STOP recording.
-
Tap Use Video.


And that's it. Once you've tapped "Use Video," the rest of the shortcut, from saving the video to iCloud or Dropbox, to getting the link, to sending that link to your contacts, gets taken care of automatically in the background. You shouldn't need to do anything else.
Buy used, save big
jemjem makes it safe and easy to save money buying gently used technology for home and family.