
AssistiveTouch is an accessibility feature that can help people with motor skill impairments get the most out of their iPhone or iPad. With AssistiveTouch enabled, you'll be able to perform actions like pinching to zoom or 3D Touch with just a tap instead.
How to enable AssistiveTouch
- Launch Settings from your Home screen.
- Tap Accessibility.
-
Choose Touch.
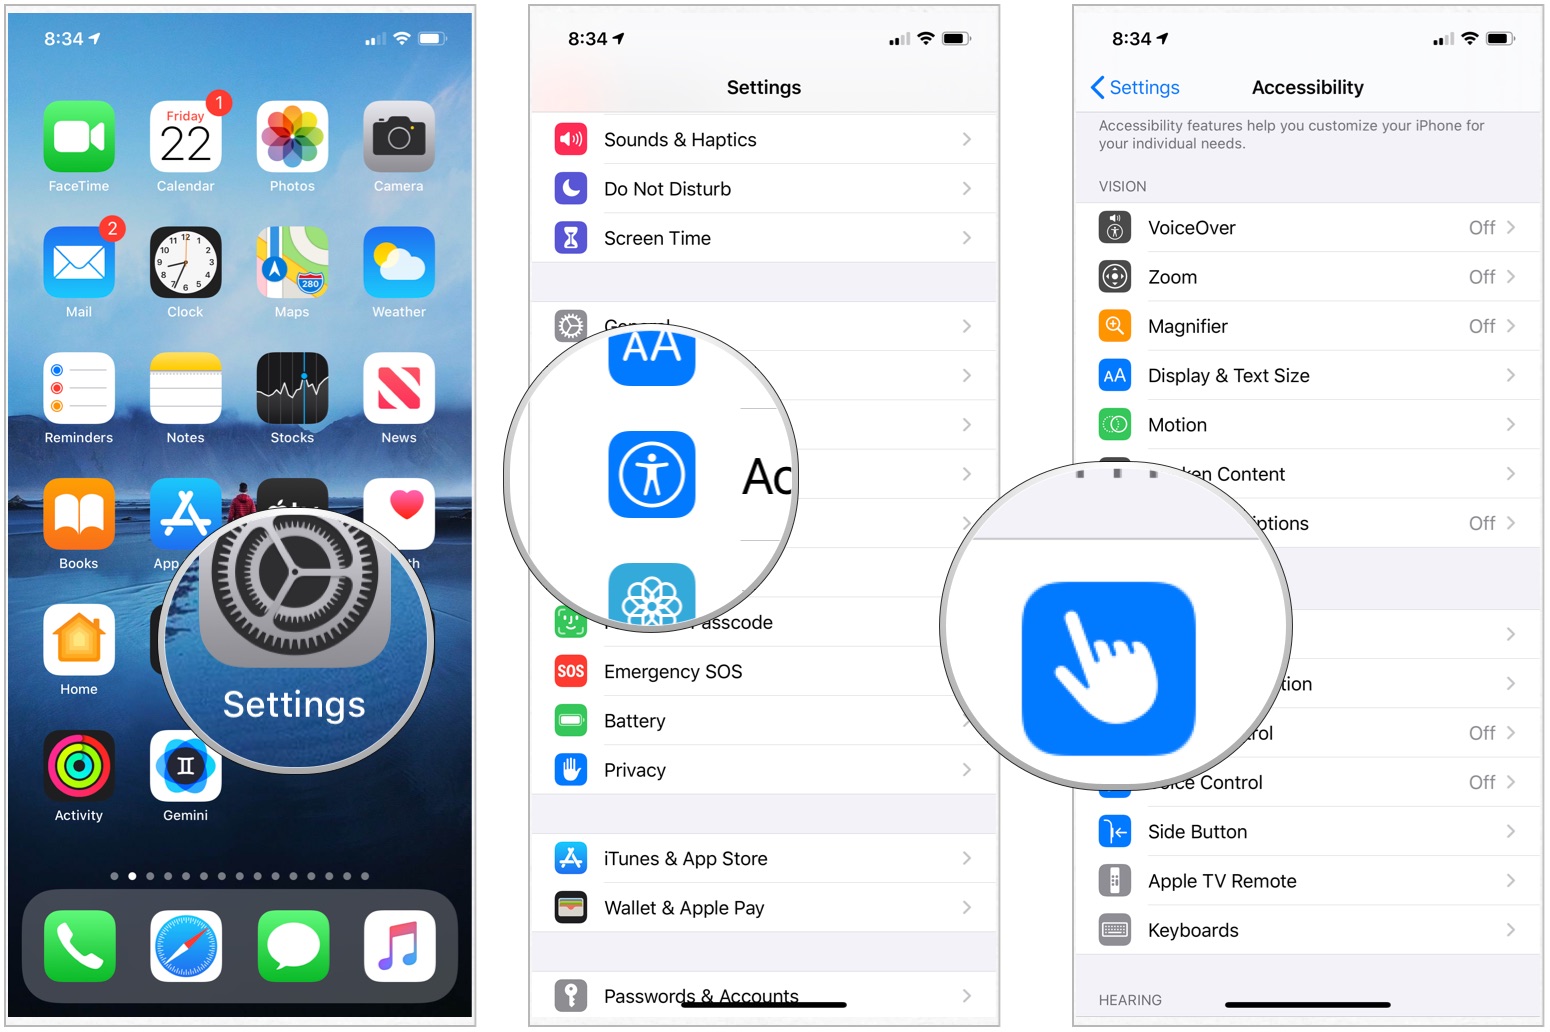
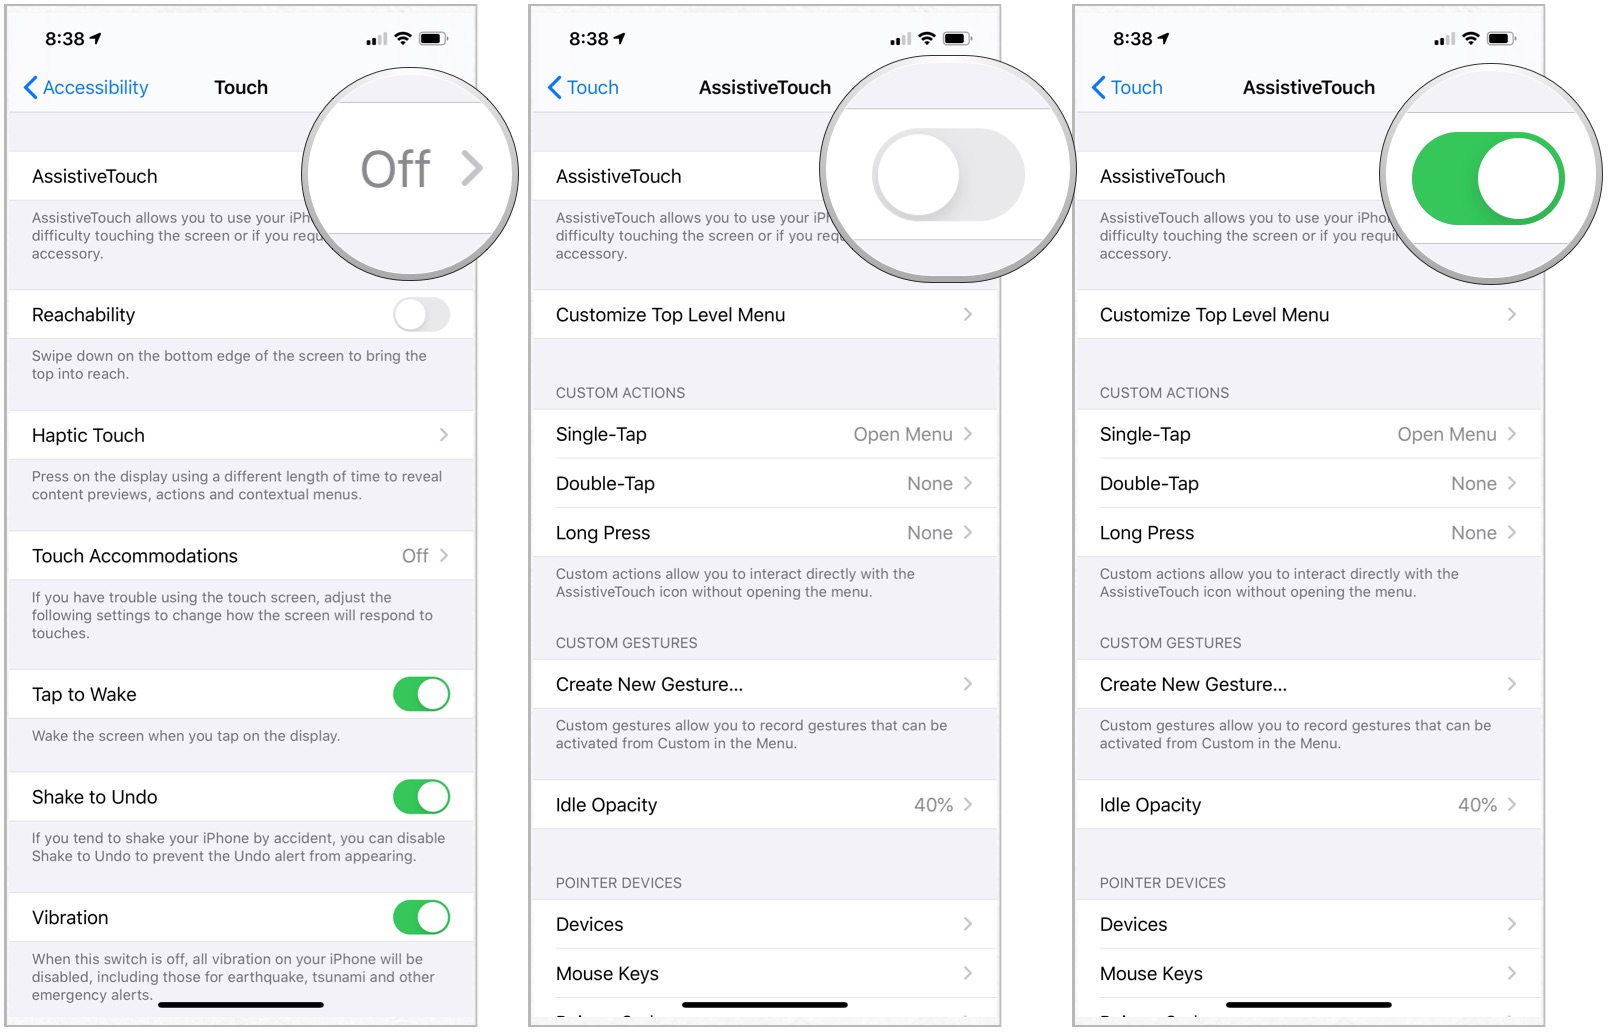
- Tap AssistiveTouch to turn it on.
-
Toggle AssistiveTouch.


A dark square with a white circle will appear on your screen. This is your shortcut to the AssistiveTouch menu, and it'll appear on every screen.
You can tap on it to open the AssistiveTouch menu or drag it around the screen and out of the way if you're trying to do something.
How to use AssistiveTouch
- Tap the AssistiveTouch shortcut on any screen.
-
Choose an option:
- Notifications: Brings up Notification Center so you don't have to swipe down from the top.
- Device: Allows you to perform various functions, like locking the screen, changing the volume, rotating the screen, and more.
- Control Center: Brings up Control Center instead of having to swipe up from the bottom.
- Home: Brings you to the Home screen without having to press the Home button.
- Siri: Activates Siri.
- Custom: Allows you to perform and add custom gestures, like zooming.
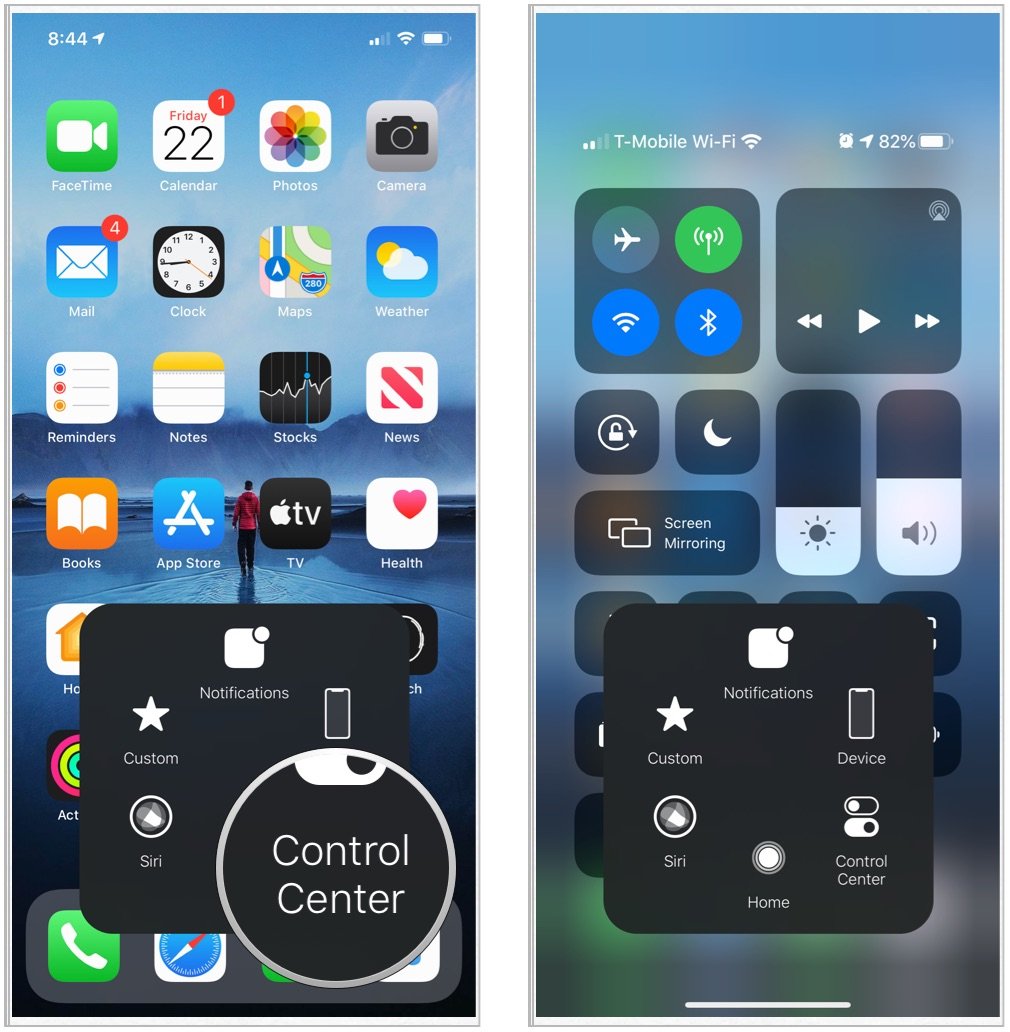

Note: These are the default buttons, but they can be changed at any time.
How to add custom gestures to AssistiveTouch
- Launch Settings from your Home screen.
- Tap Accessibility.
-
Choose Touch.
- Tap AssistiveTouch.
-
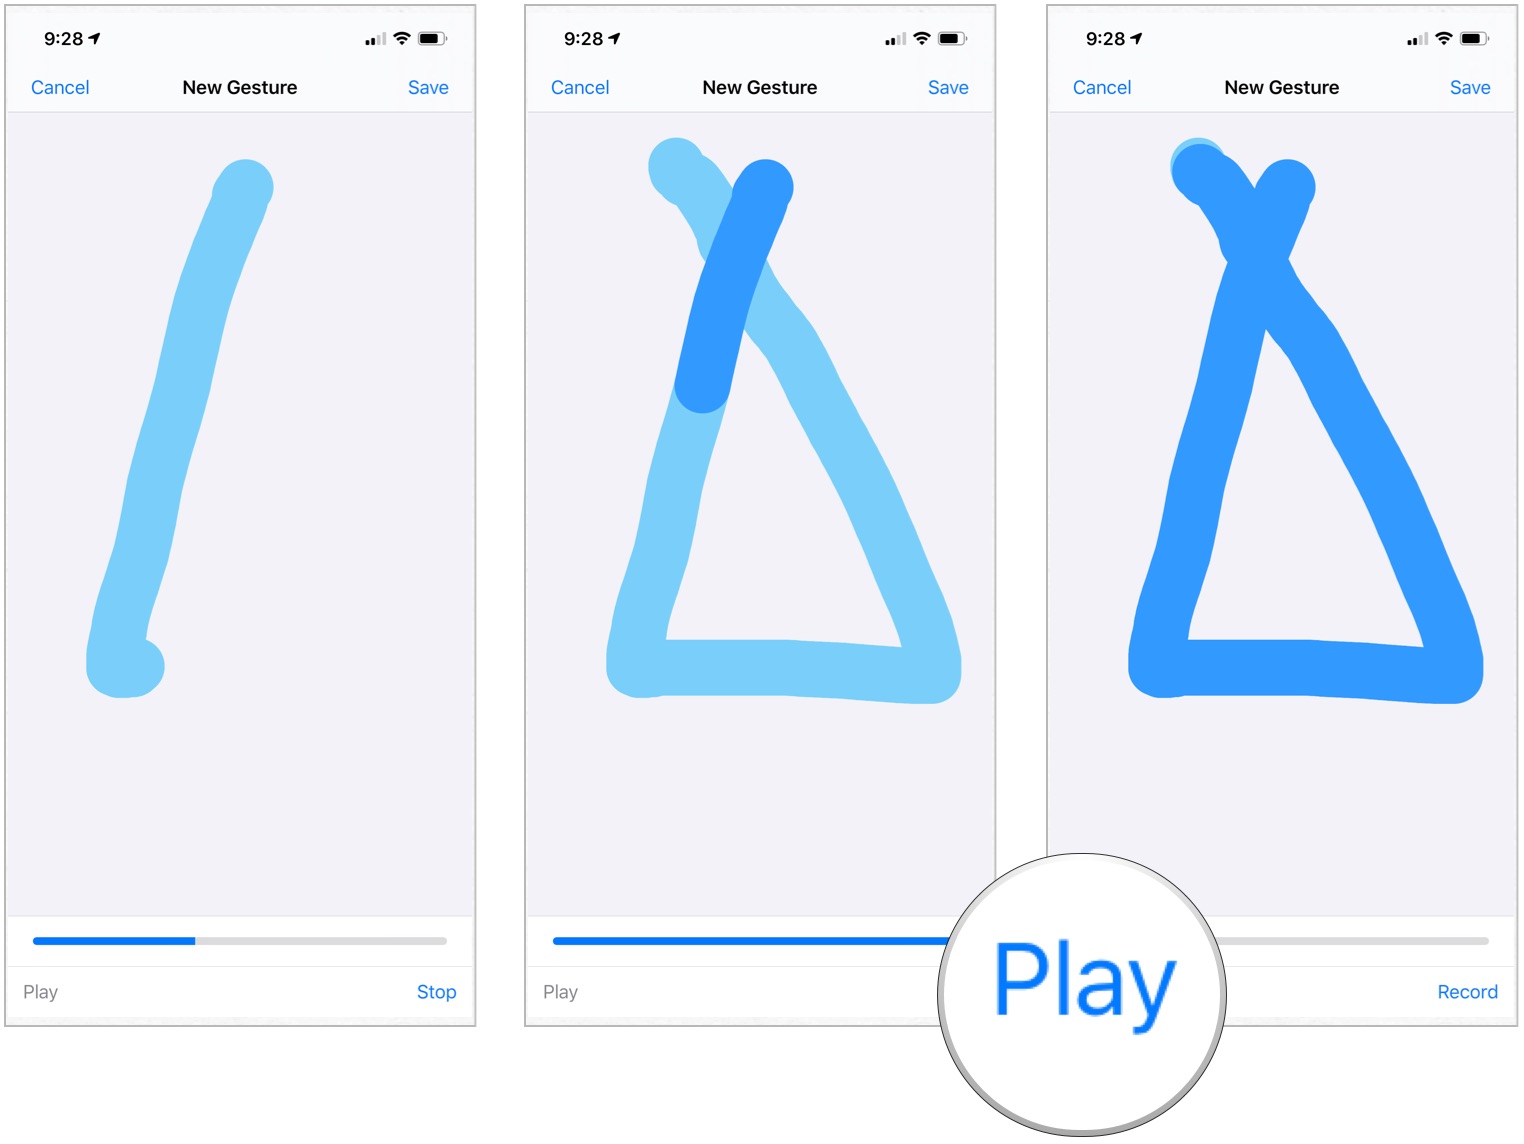
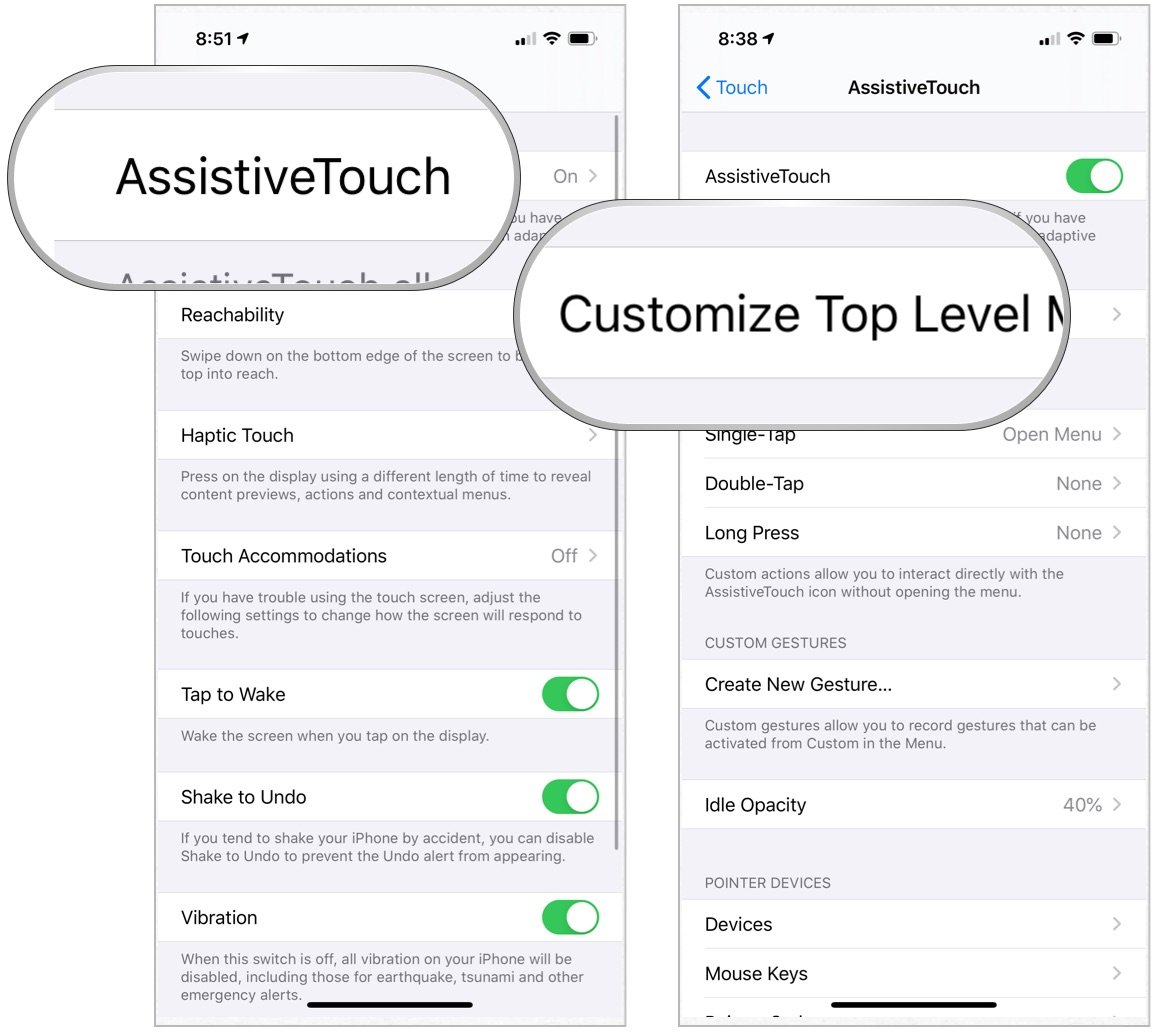
Select Create New Gesture…
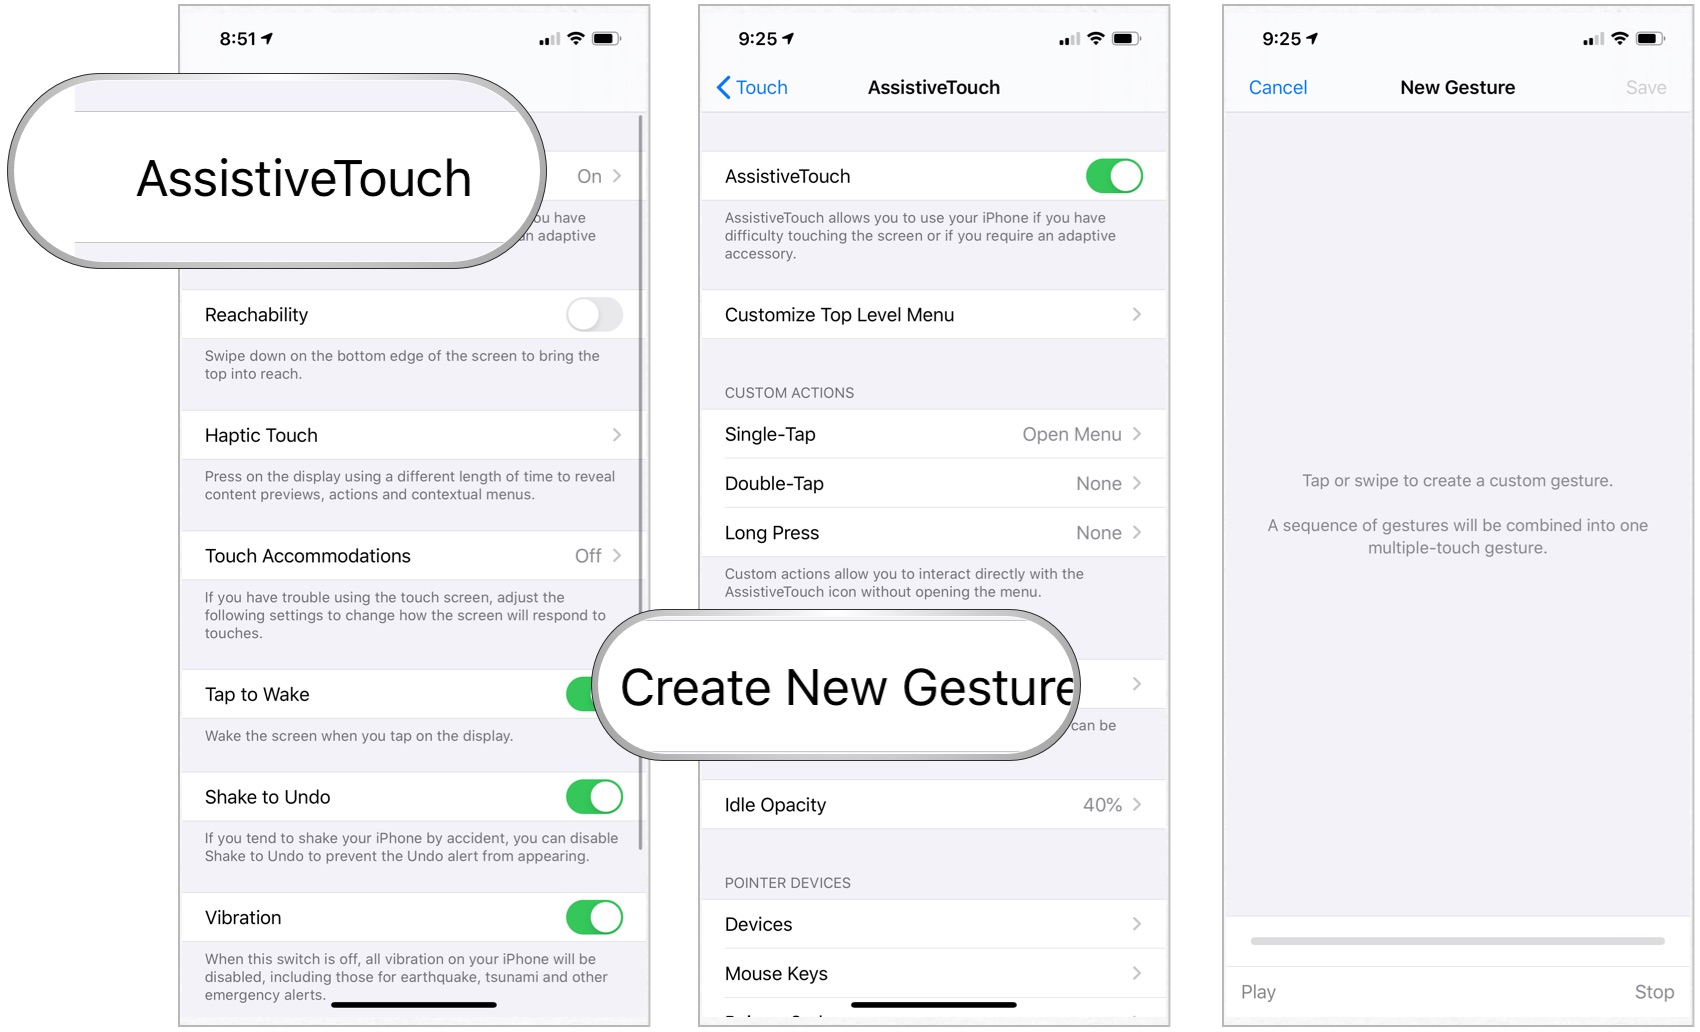
- Choose or swipe to create a new gesture. A series of taps or swipe will be combined into one multi-touch gesture.
- Selection Stop in the bottom right corner when you've finished your gesture.
-
Tap Play to preview your gesture, Record to re-record it.

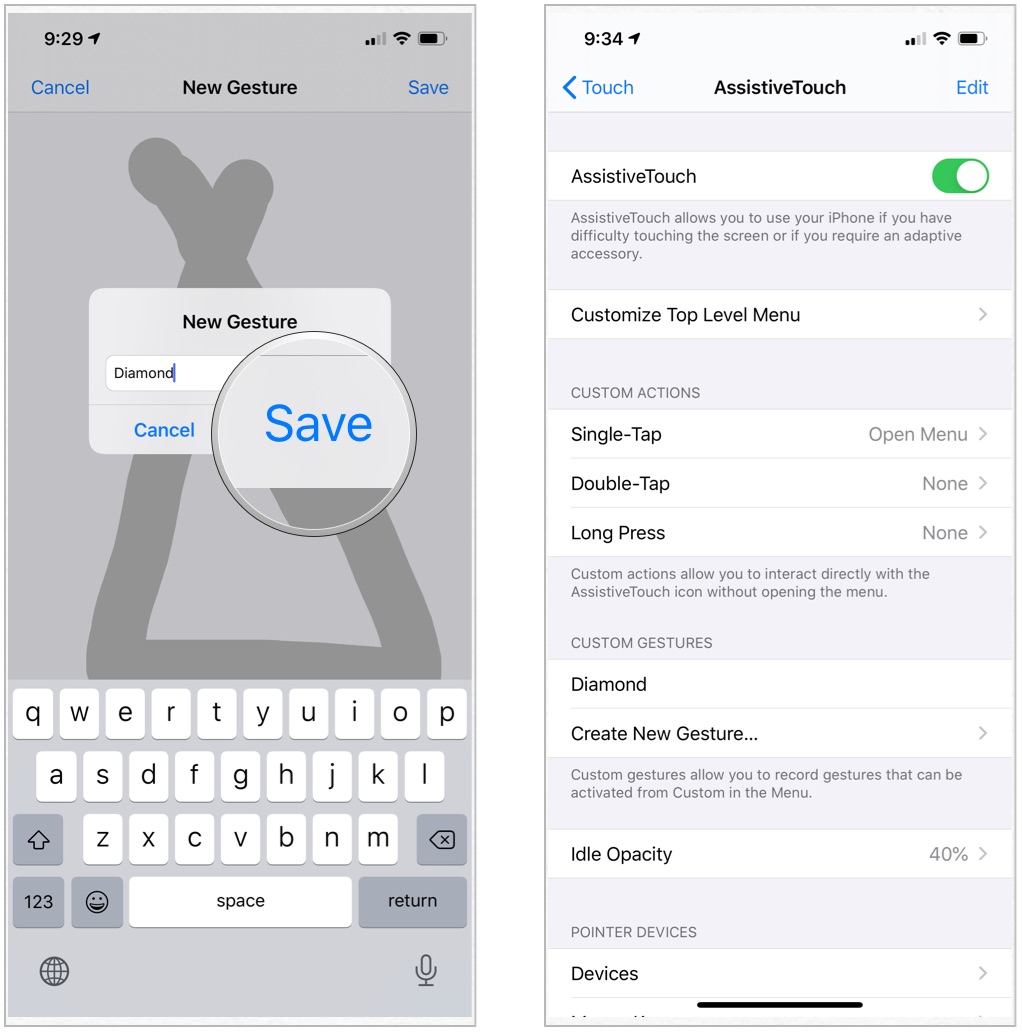
- Save in the top right corner to save the gesture.
- Add the name of the gesture in the box.
-
Tap Save.

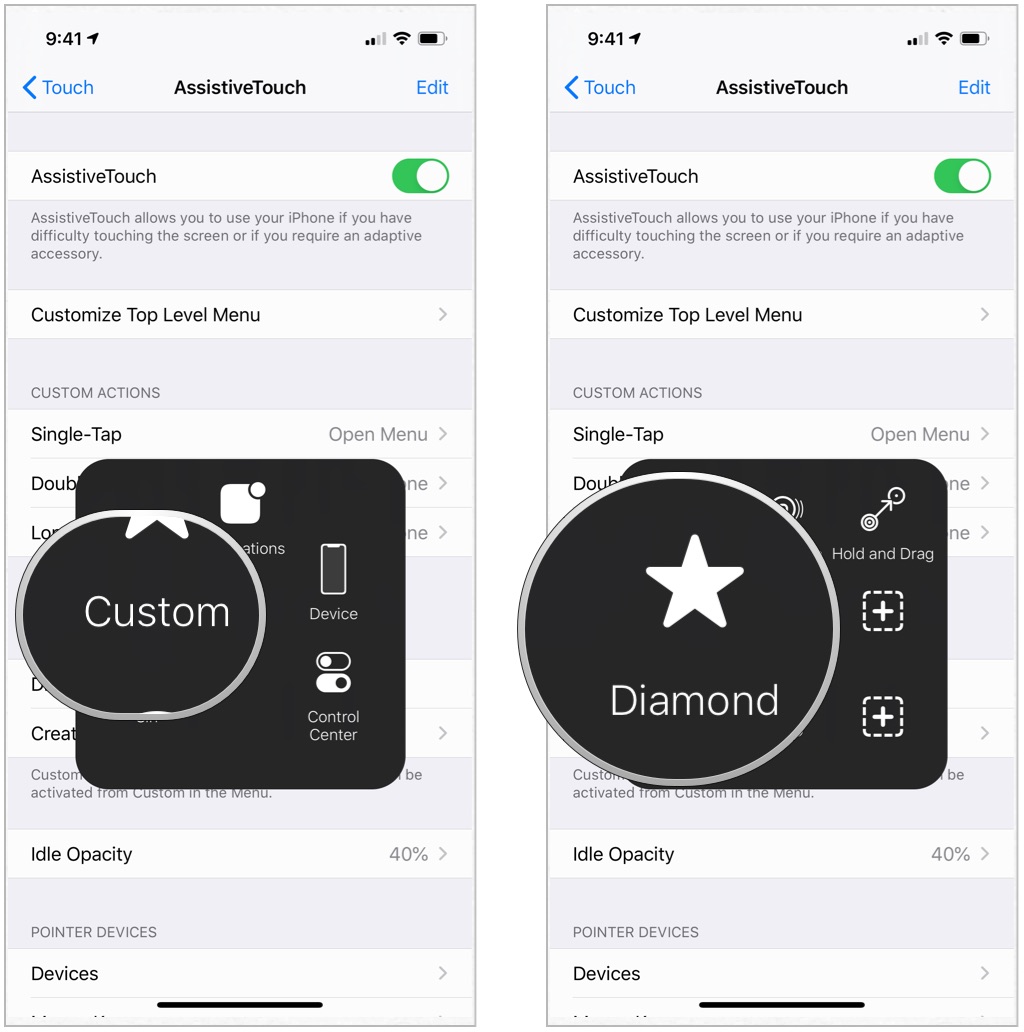
- Tap the Custom button on AssistiveTouch.
-
Choose the custom gesture to use it.


How to customize the Top Level menu for AssistiveTouch
- Launch Settings from your Home screen.
- Tap Accessibility.
-
Choose Touch.
- Tap AssistiveTouch.
- Choose AssistiveTouch.
-
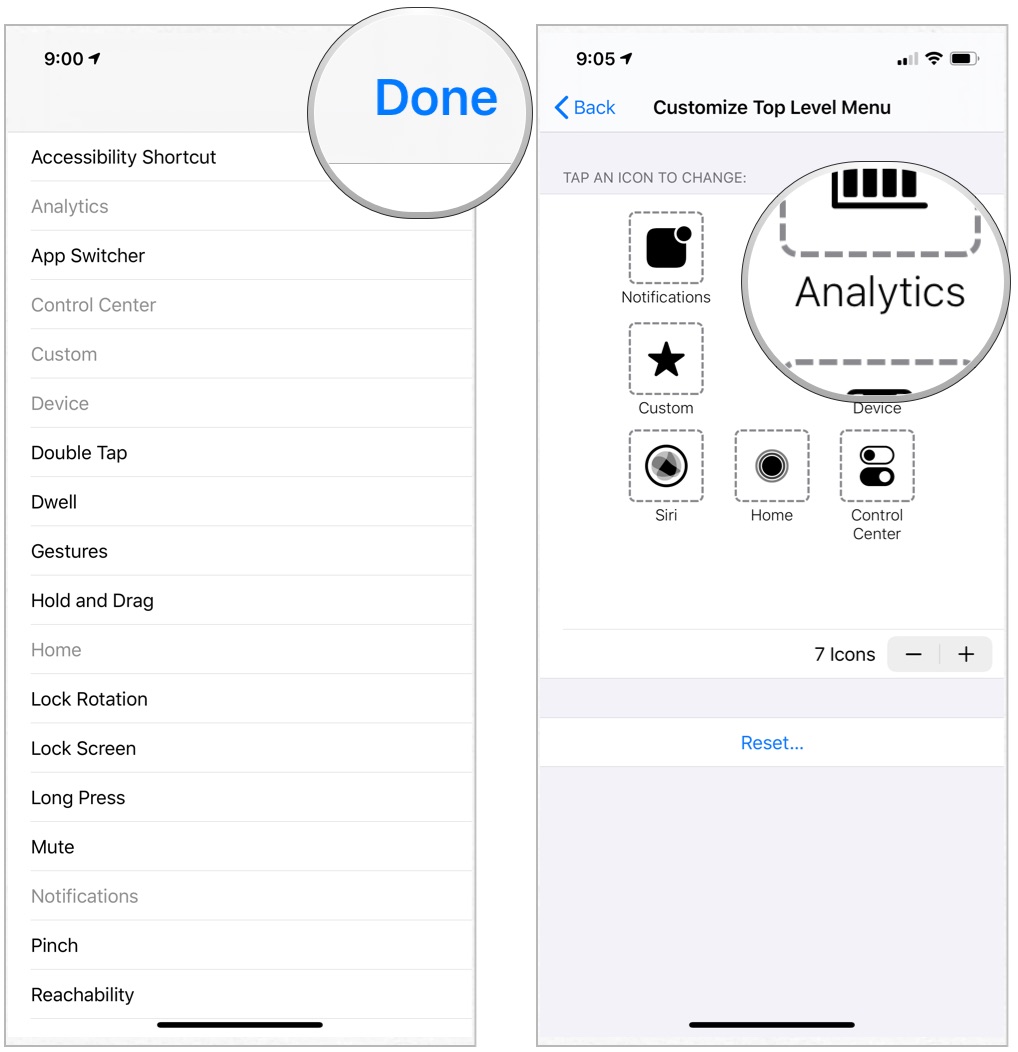
Tap Customize Top Level Menu…

To add a button
To add a new button to the AssistiveTouch:
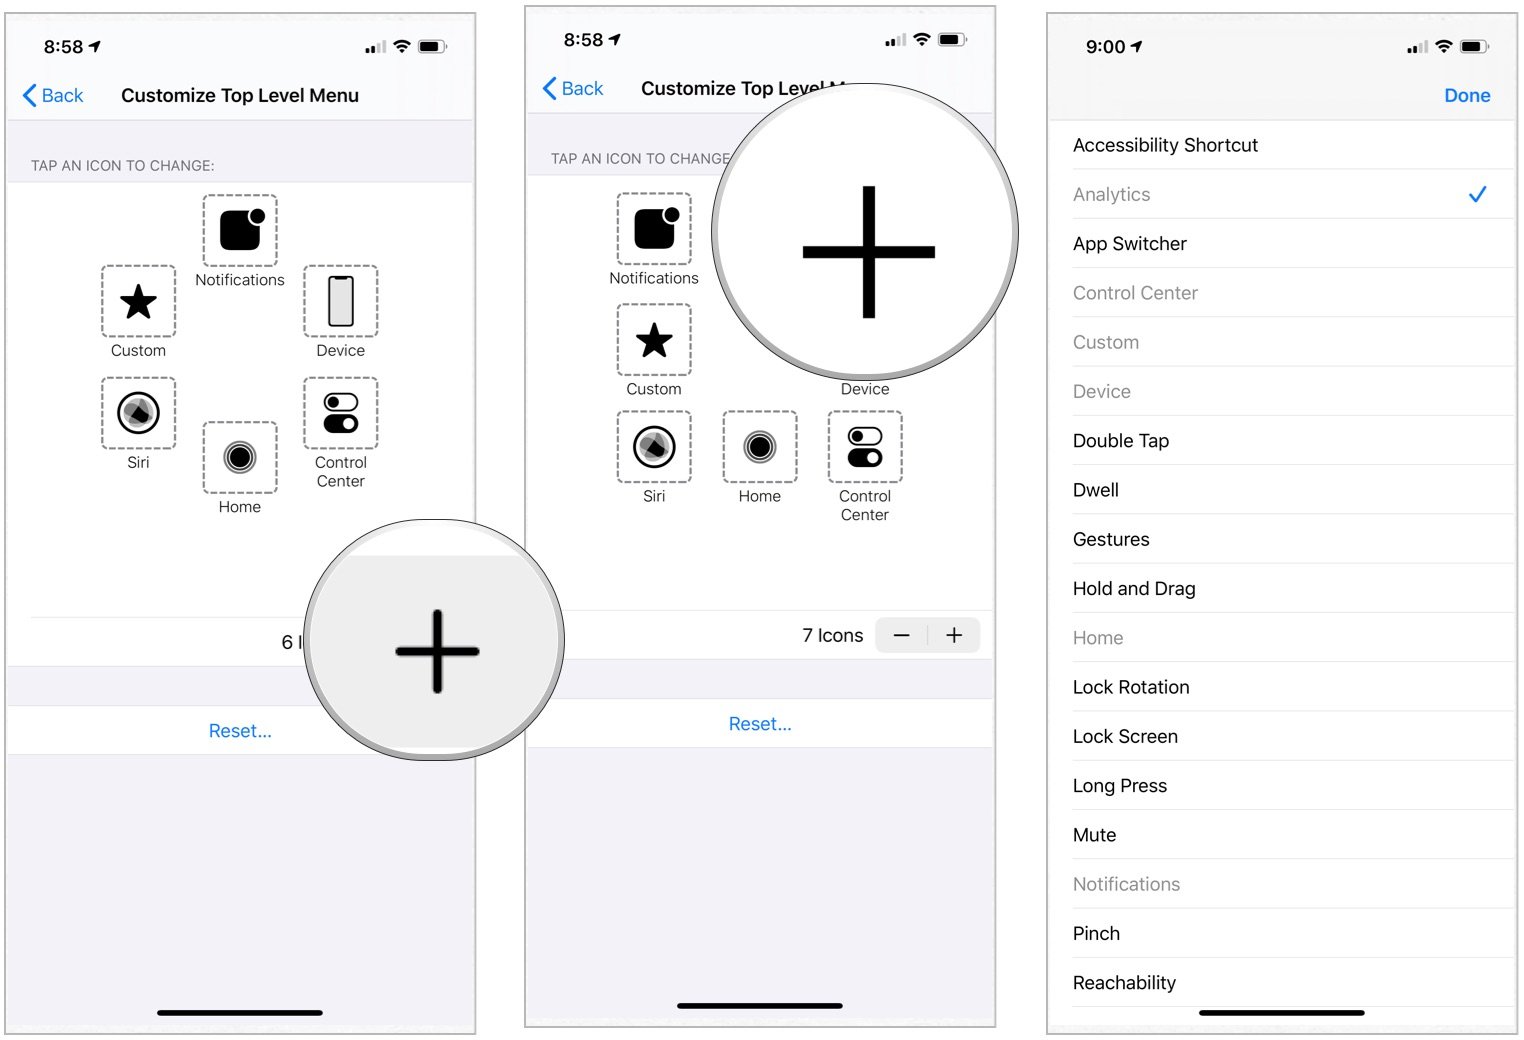
- Tap the plus at the bottom right to add a new button.
- Select the newly created button.
-
Tap a function or action.

-
Tap Done in the top right corner. Notice the new button.
To delete an existing button or reset
You can also delete current AssistiveTouch buttons or change it back to the default:
- Tap the minus at the bottom right to remove a button.
- Repeat Step 1 to remove additional buttons.
-
Tap Reset to go back to the default setting.

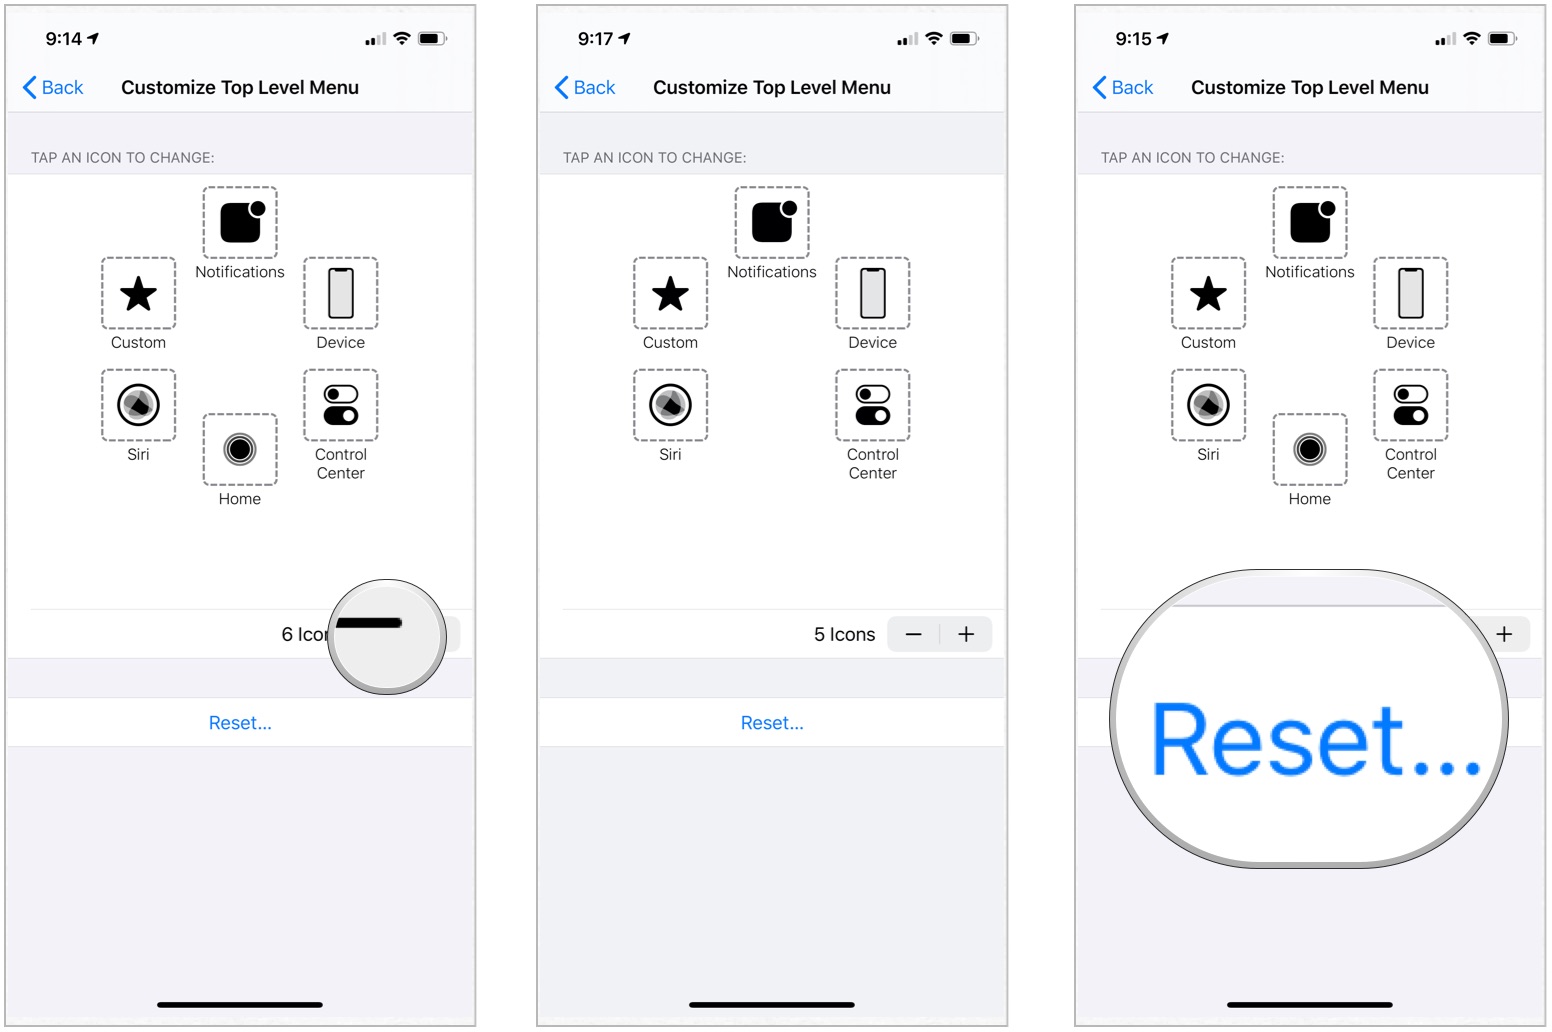
You can't choose which button to delete. Instead, it selects the one nearest to the button of the screen. If you delete the wrong button, however, you can add it back using the steps above.
How to use Custom Actions
Custom Actions allow you to interact directly with the AssistiveTouch icon without actually opening the menu.
- Launch Settings from your Home screen.
- Tap Accessibility.
-
Choose Touch.
- Tap AssistiveTouch.
- Tap Single-Tap, Double-Tap, or Long Press to customize each action.
-
Tap on the Option you would like to action to have.
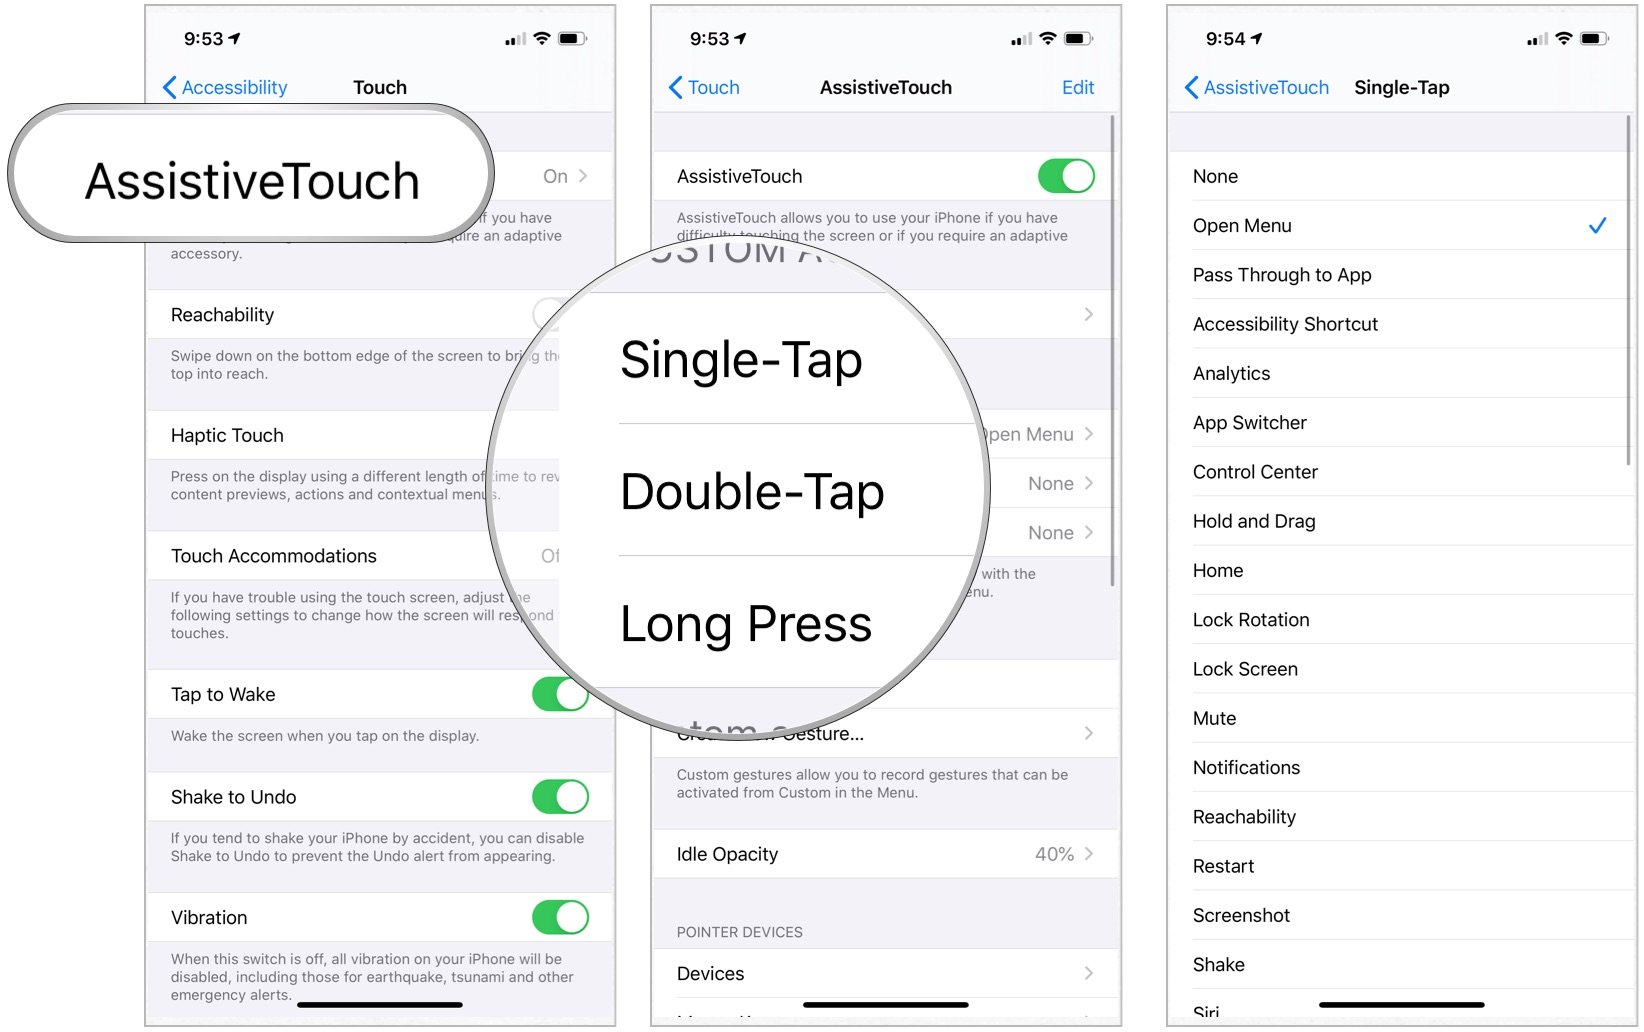
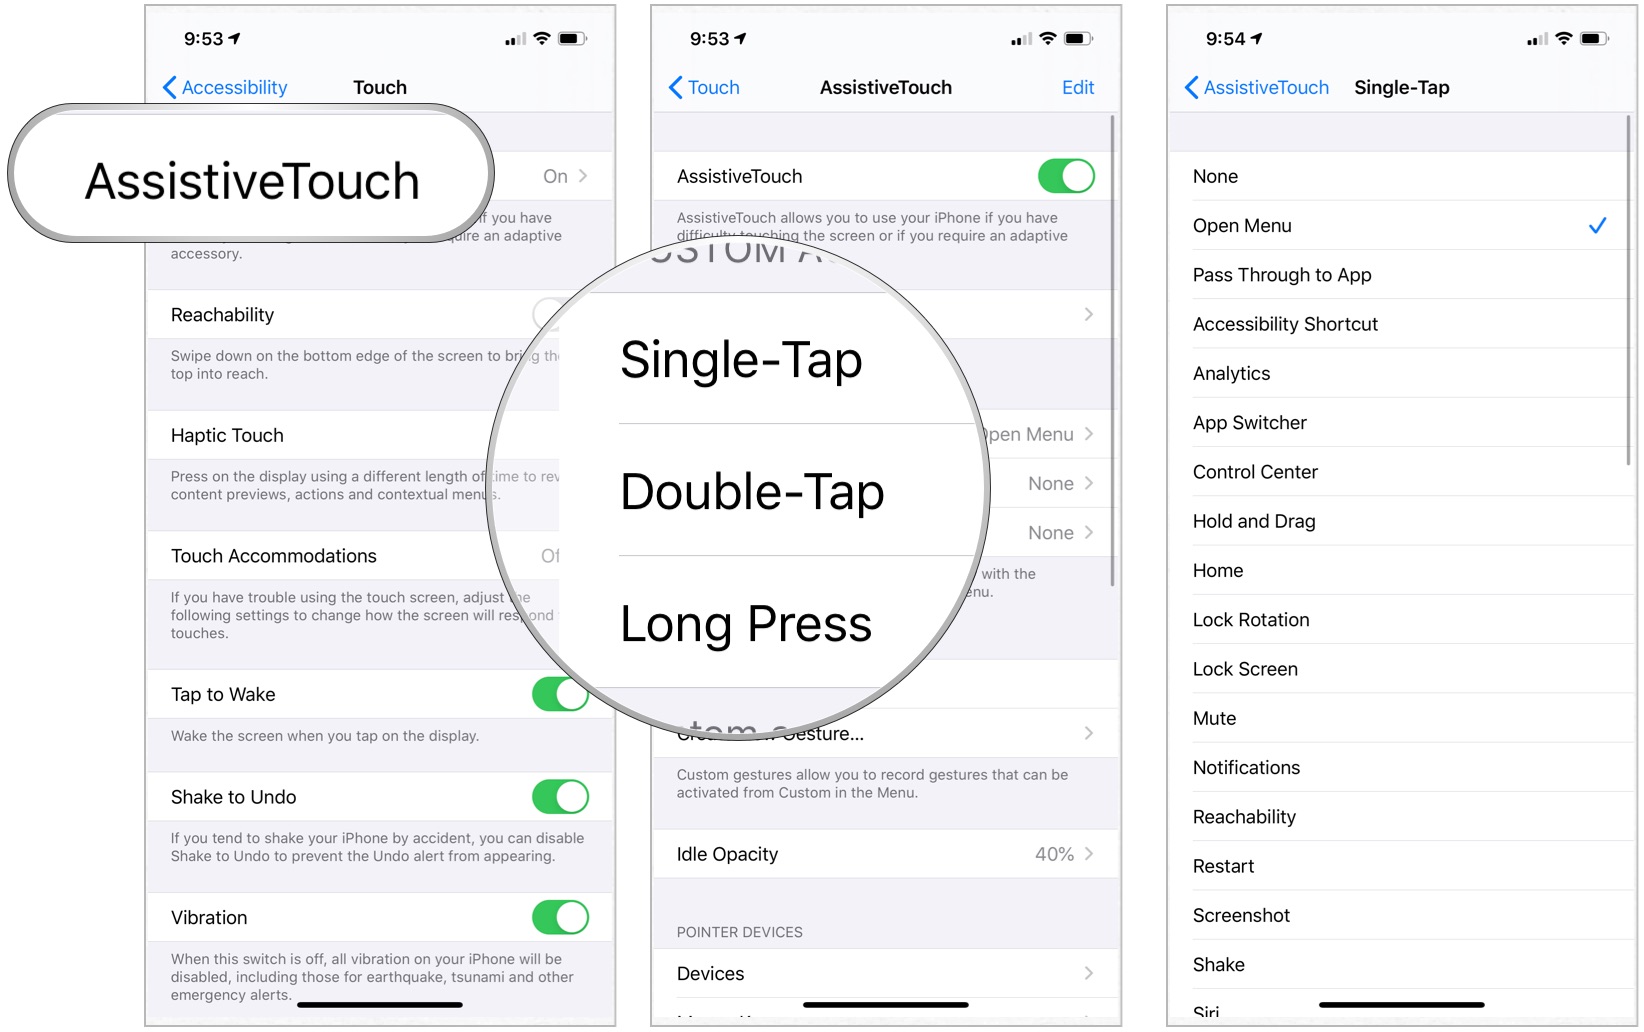
You can choose from options like none, open menu, home, notifications, Siri, control center, lock screen, volume up, volume down, mute, accessibility shortcut, shake, app switcher, screenshot, lock rotation, pinch, double-tap, SOS, analytics, reachability, restate, and speak screen.
Buy used, save big
jemjem makes it safe and easy to save money buying gently used technology for home and family.

|
 |
 |
 |