
If you like to have your photos on multiple devices, getting images off your iPhone can be a critically important task. If you have a Mac, you know that Apple makes it easy to move your photos from your iPhone to your Mac in multiple ways. But what about Windows PC owners? Are they left out in the cold?
The good news is that, no, Windows users aren't left behind. In fact, you might say it's just as easy to transfer photos from your iPhone to your Windows PC as it is with your Mac. You have a couple of options for moving over a USB-to-Lightning, as well as iCloud Photo Library, which can indeed be set up on Windows.
Here's what you need to know about how to transfer photos from your iPhone to your PC.

Download iTunes
If you're transferring photos over USB, you'll need to install iTunes for Windows 10 onto your PC. This will allow your iPhone to be recognized by your PC in the File Explorer, which you'll need for the manual transfer.
You can download iTunes for Windows from the Windows Store here.
Connecting your iPhone
Connecting your iPhone to your Windows PC requires a few more steps than just plugging it in.
- Connect your iPhone to your PC using a USB-to-Lightning cable.
- Tap Trust on your iPhone.
-
Enter your passcode on your iPhone.

You should now be able to transfer photos to your Windows PC over a wired connection.
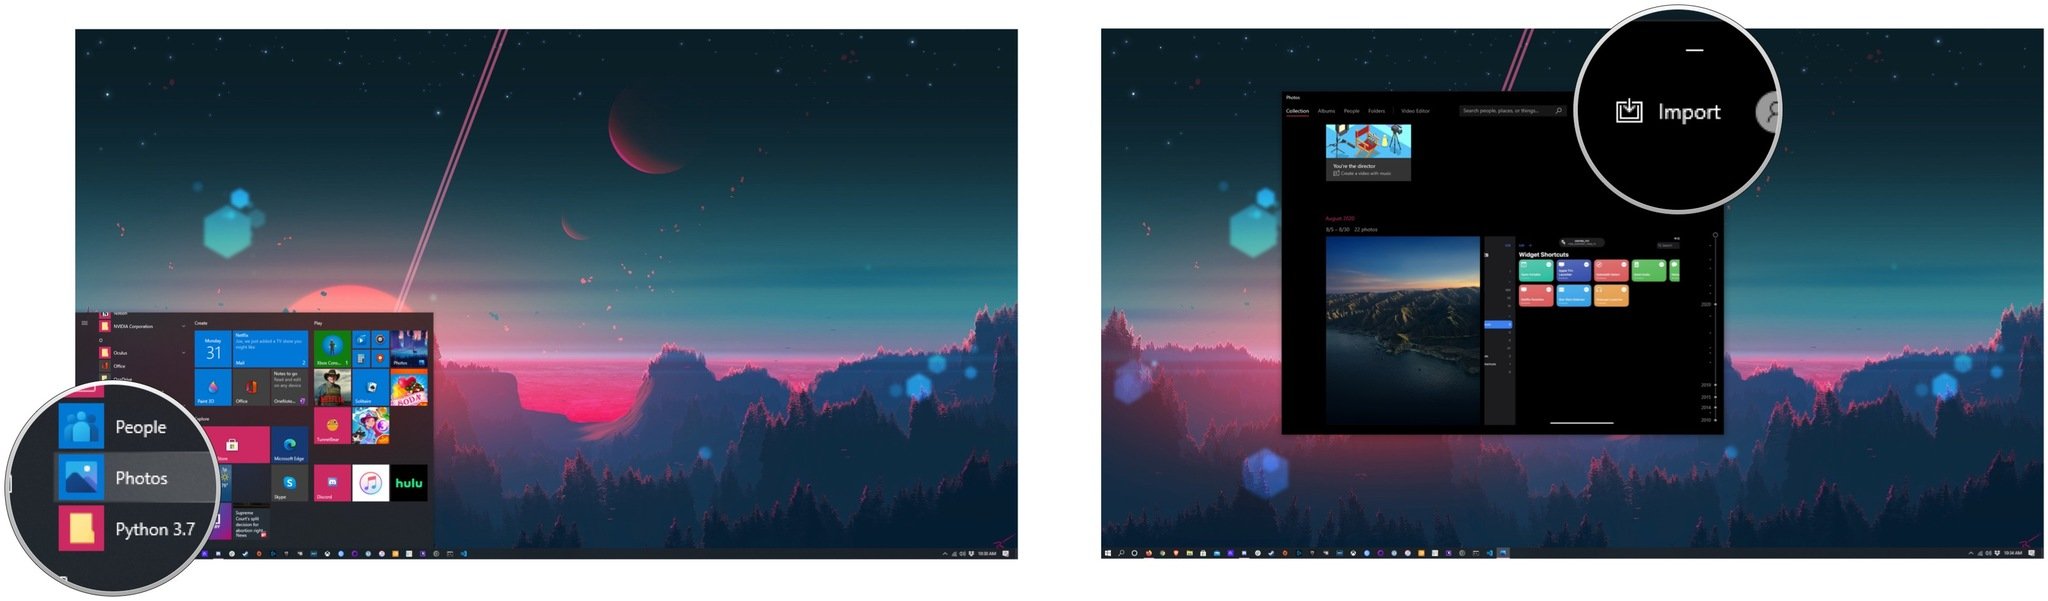
How to transfer photos from your iPhone to your PC with the Windows 10 Photos app
- Open Photos on your PC from your Start Menu, desktop, or taskbar while your iPhone is connected to your PC.
-
Click Import in the upper-right corner.
- Click From a USB device.
-
Click the photos that you'd like to import to your PC.

- Click the drop-down under Select if you want to mass-select items.
-
Click Items since last import to import all the photos taken since the last time you did this, or All items to just import all of your photos.

-
Click Import.

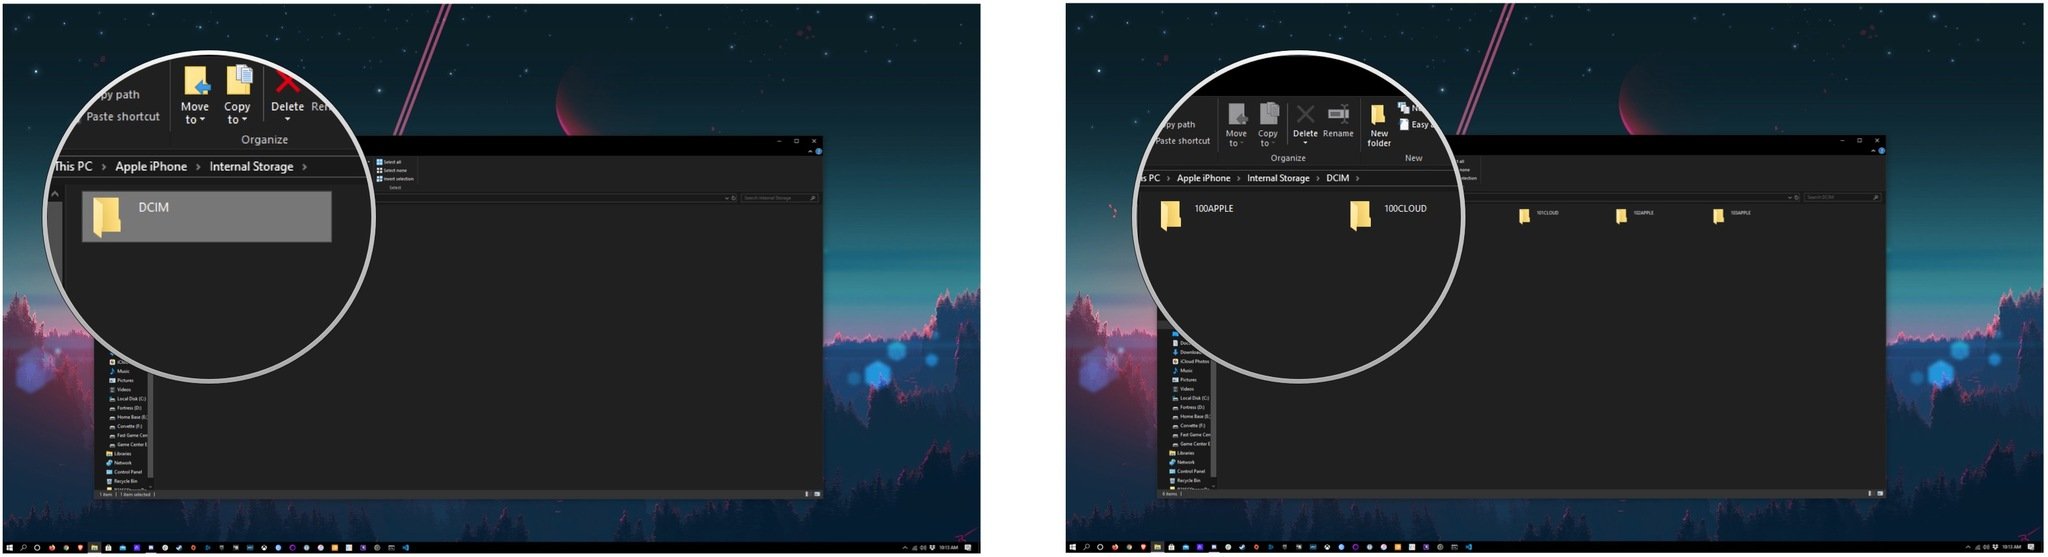
How to transfer photos from your iPhone to your PC with File Explorer
This isn't the easiest option available, but it is the one that gives you the most choices in where to store your photos.
- Open File Explorer on your PC from your Start Menu, desktop, or taskbar.
-
Click This PC in the sidebar.

- Double-click your iPhone under Devices and drives.
-
Double-click Internal Storage.
 lder.
lder. -
Double-click any of the folders. All of them should contain images.
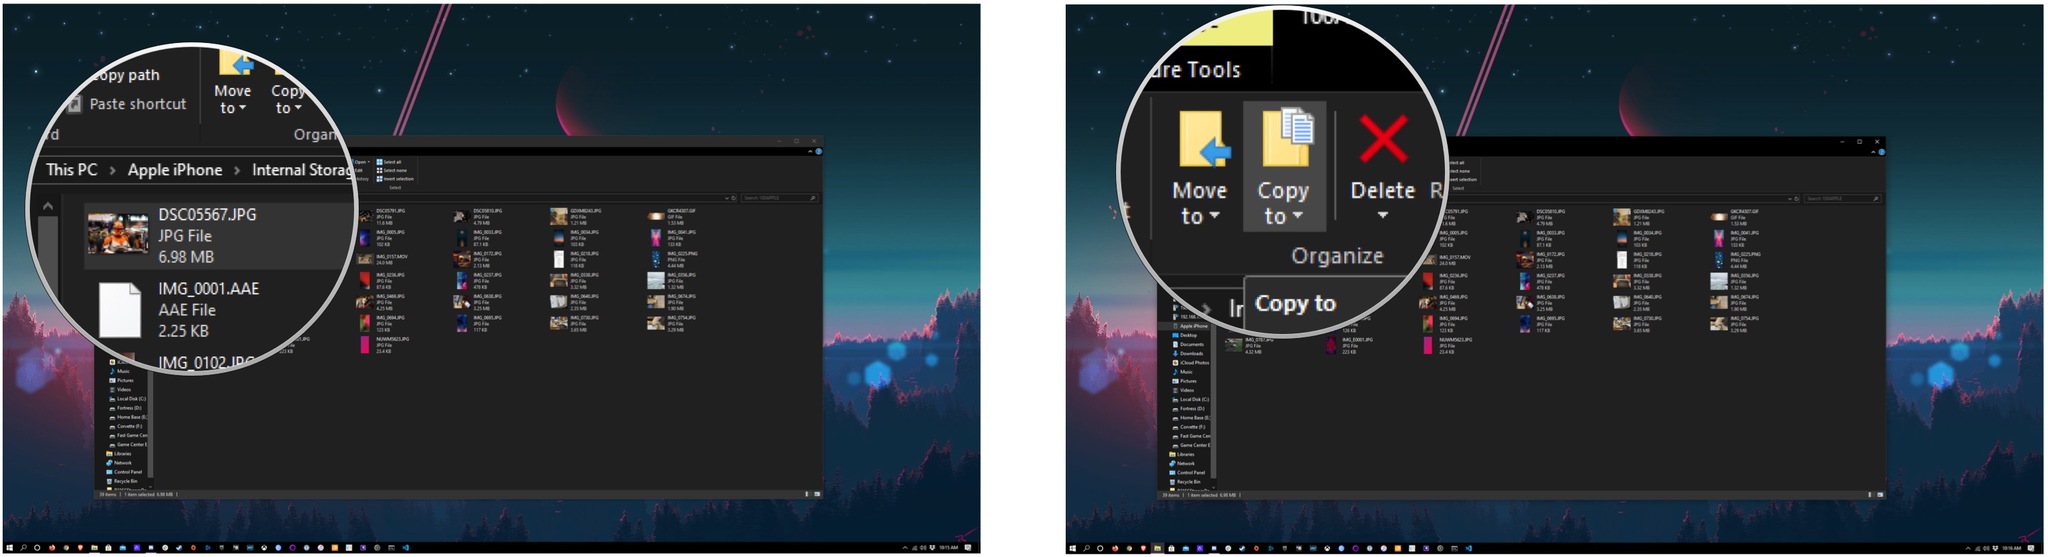
- Click an image to select it. Clicking while holding the Ctrl key on your PC's keyboard will let you choose multiple photos.
-
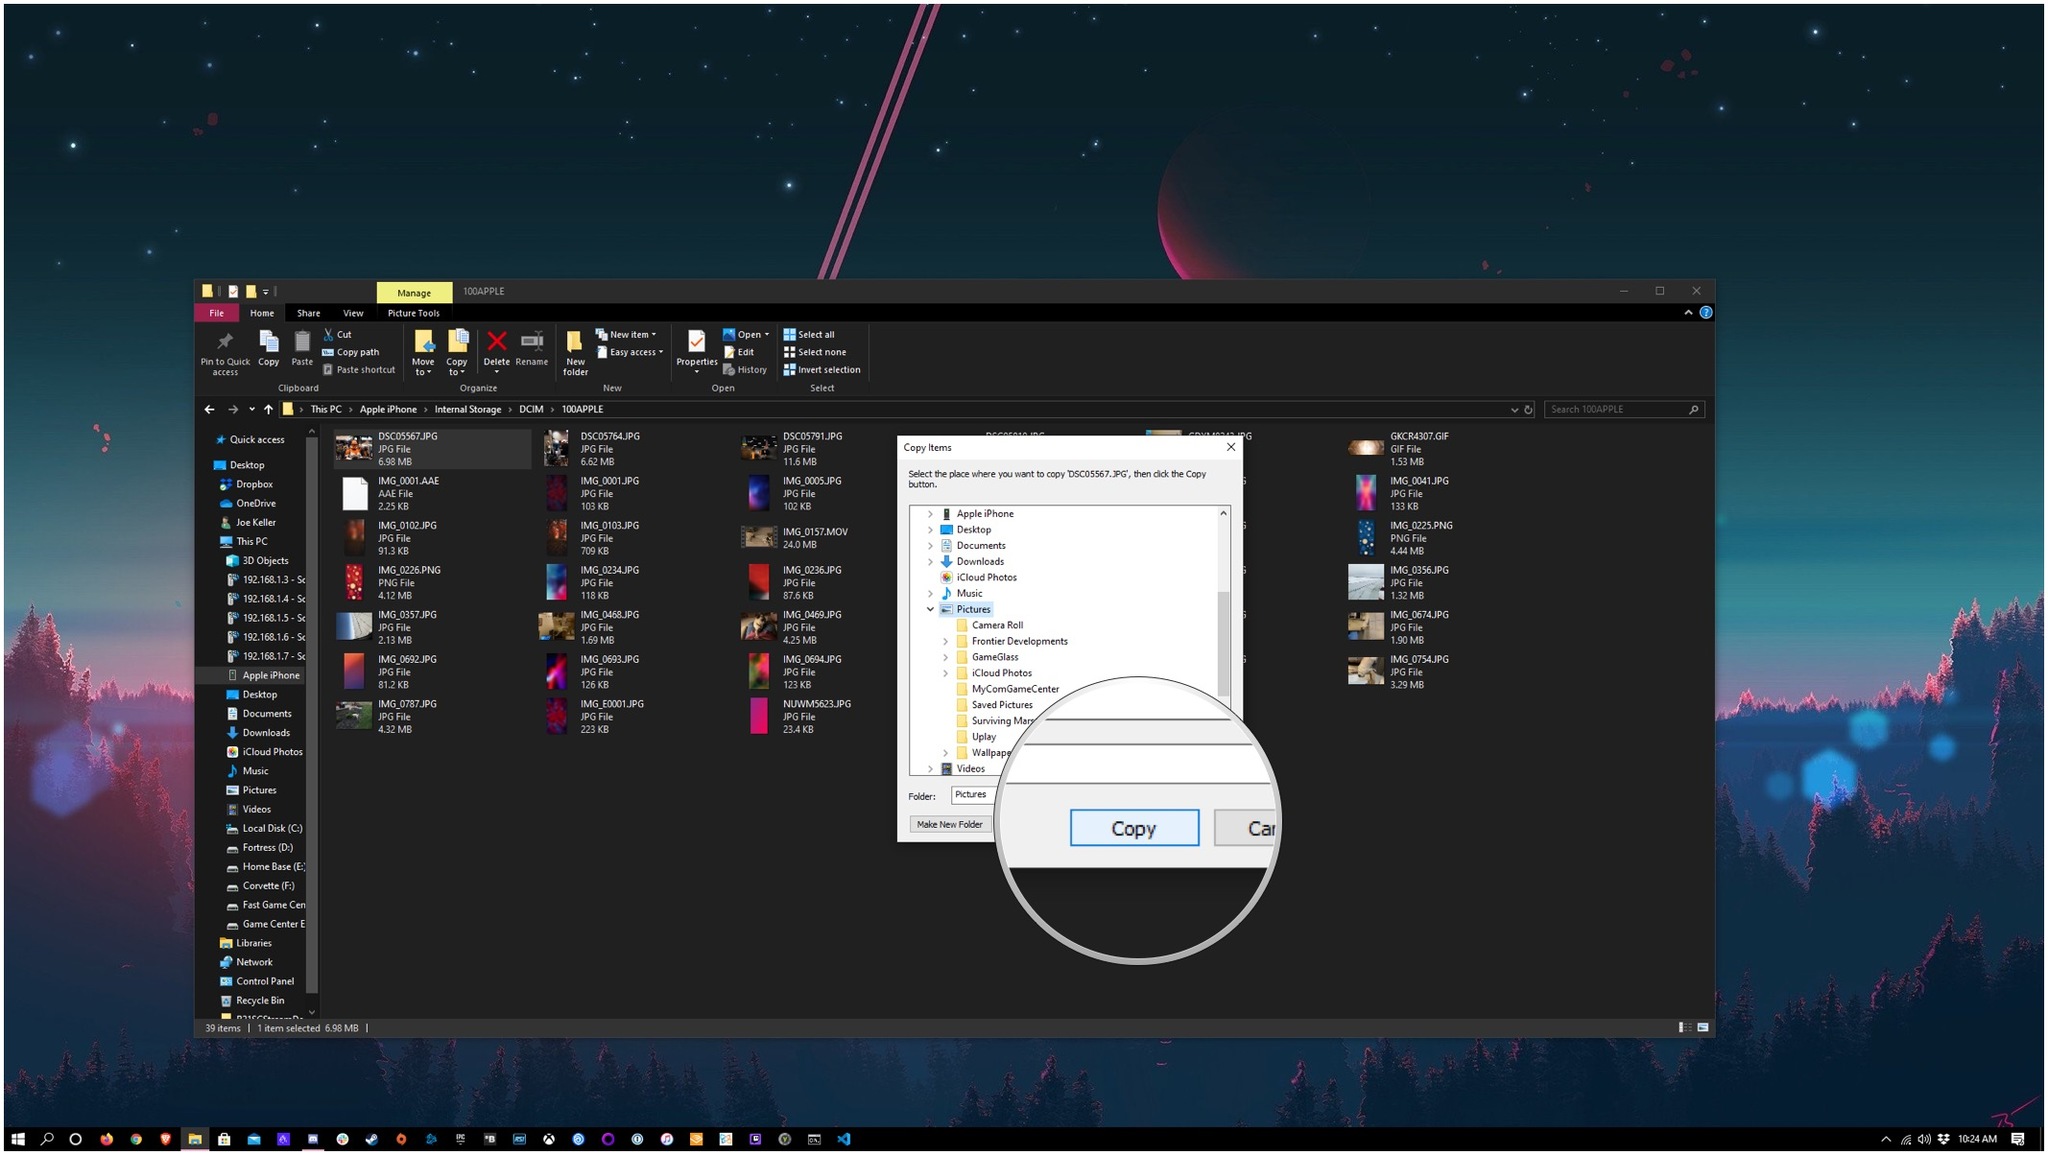
Click Copy to in the toolbar.
- Click Choose location... to select a location, or click one of the options that appear in the drop-down.
-
Click the location where you want the image or images to be saved.
-
Click Copy. Don't unplug your iPhone until the photos are done copying.
Your photos will now transfer from your iPhone to the Photos app on Windows. Remember to keep your iPhone connected to your PC until the process is complete.
Buy used, save big
jemjem makes it safe and easy to save money buying gently used technology for home and family.