Your Mac comes with some excellent tools to take screenshots and record your screen. Here's how they work.
It's never been easier to record videos of your screen or to take screenshots on your Mac. Here's what you need to know about taking screenshots in macOS Big Sur.
How to take screenshots on Mac
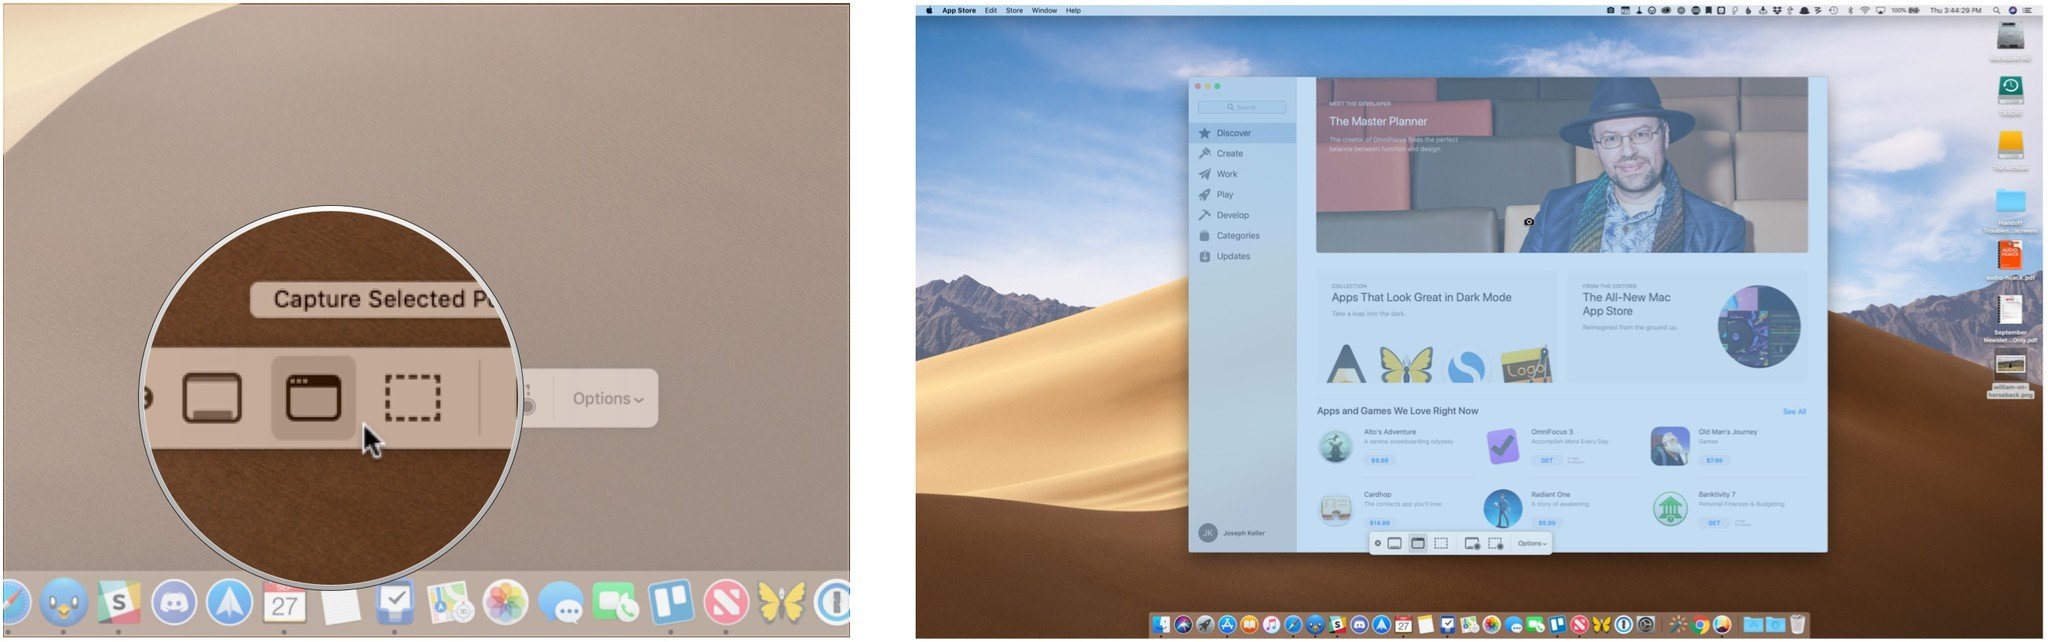
- Press Command + Shift + 5 on your keyboard to bring up the screenshot toolbar.
- Click on one of the following: Capture Entire Screen, Capture Selected Windows, or Capture Selected Portion to capture exactly what you want. Selecting Capture Entire Screen will take a screenshot immediately unless you set a timer.
-
Click on your window or select your screen portion if you chose to capture something other than your whole screen. Your screenshot will be taken as soon as the selection is made.
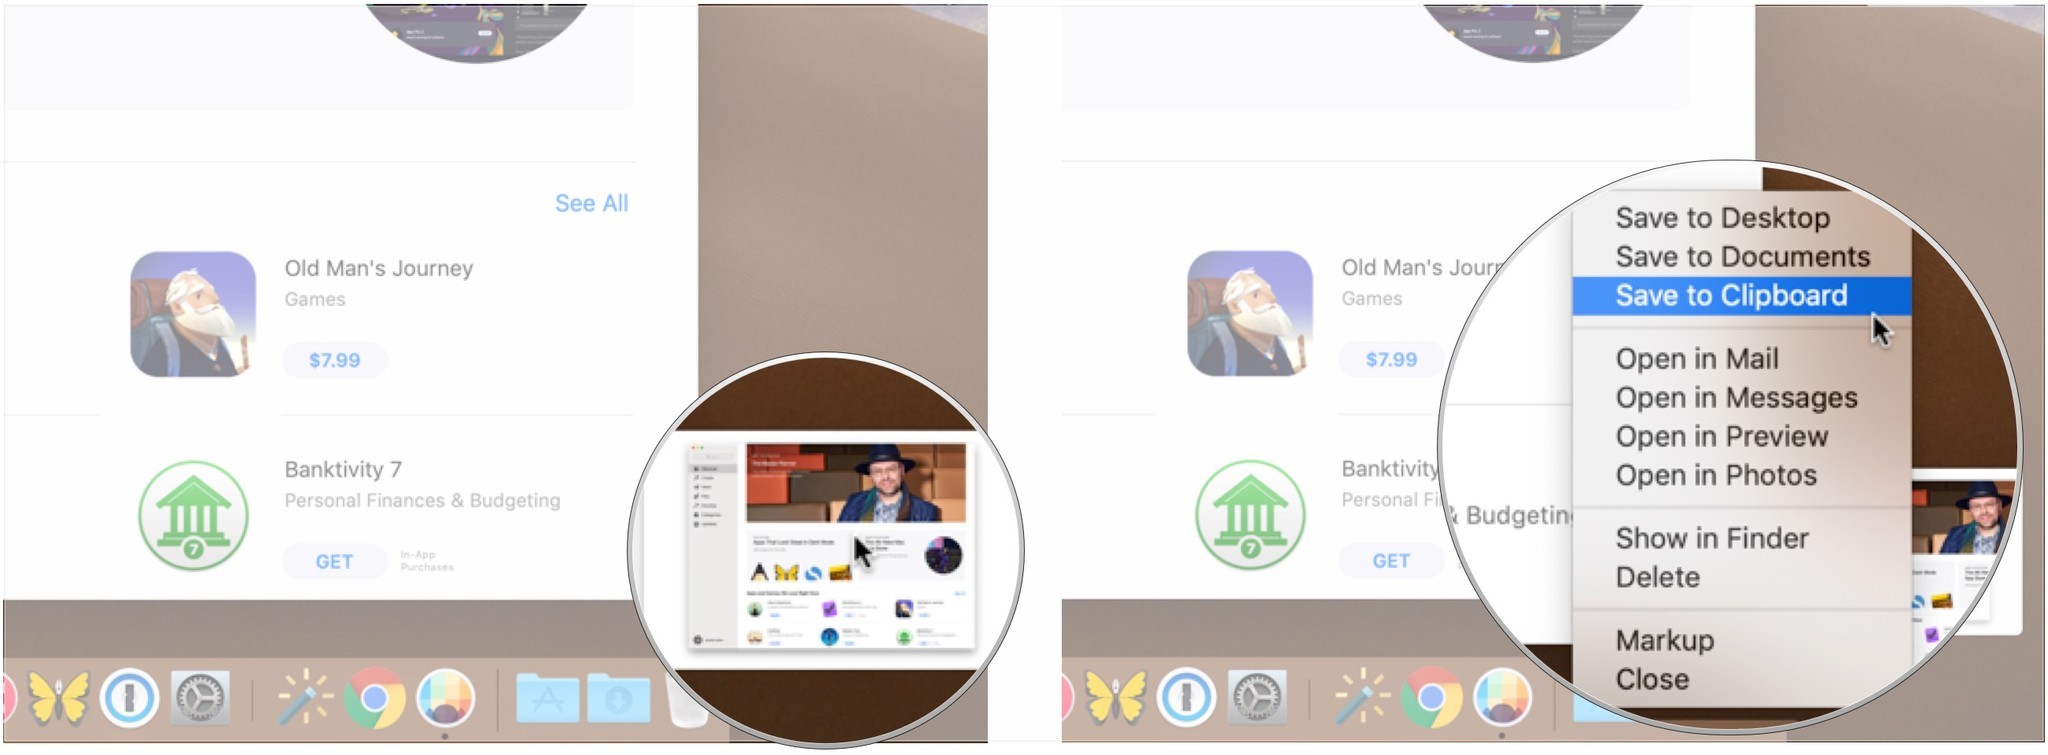
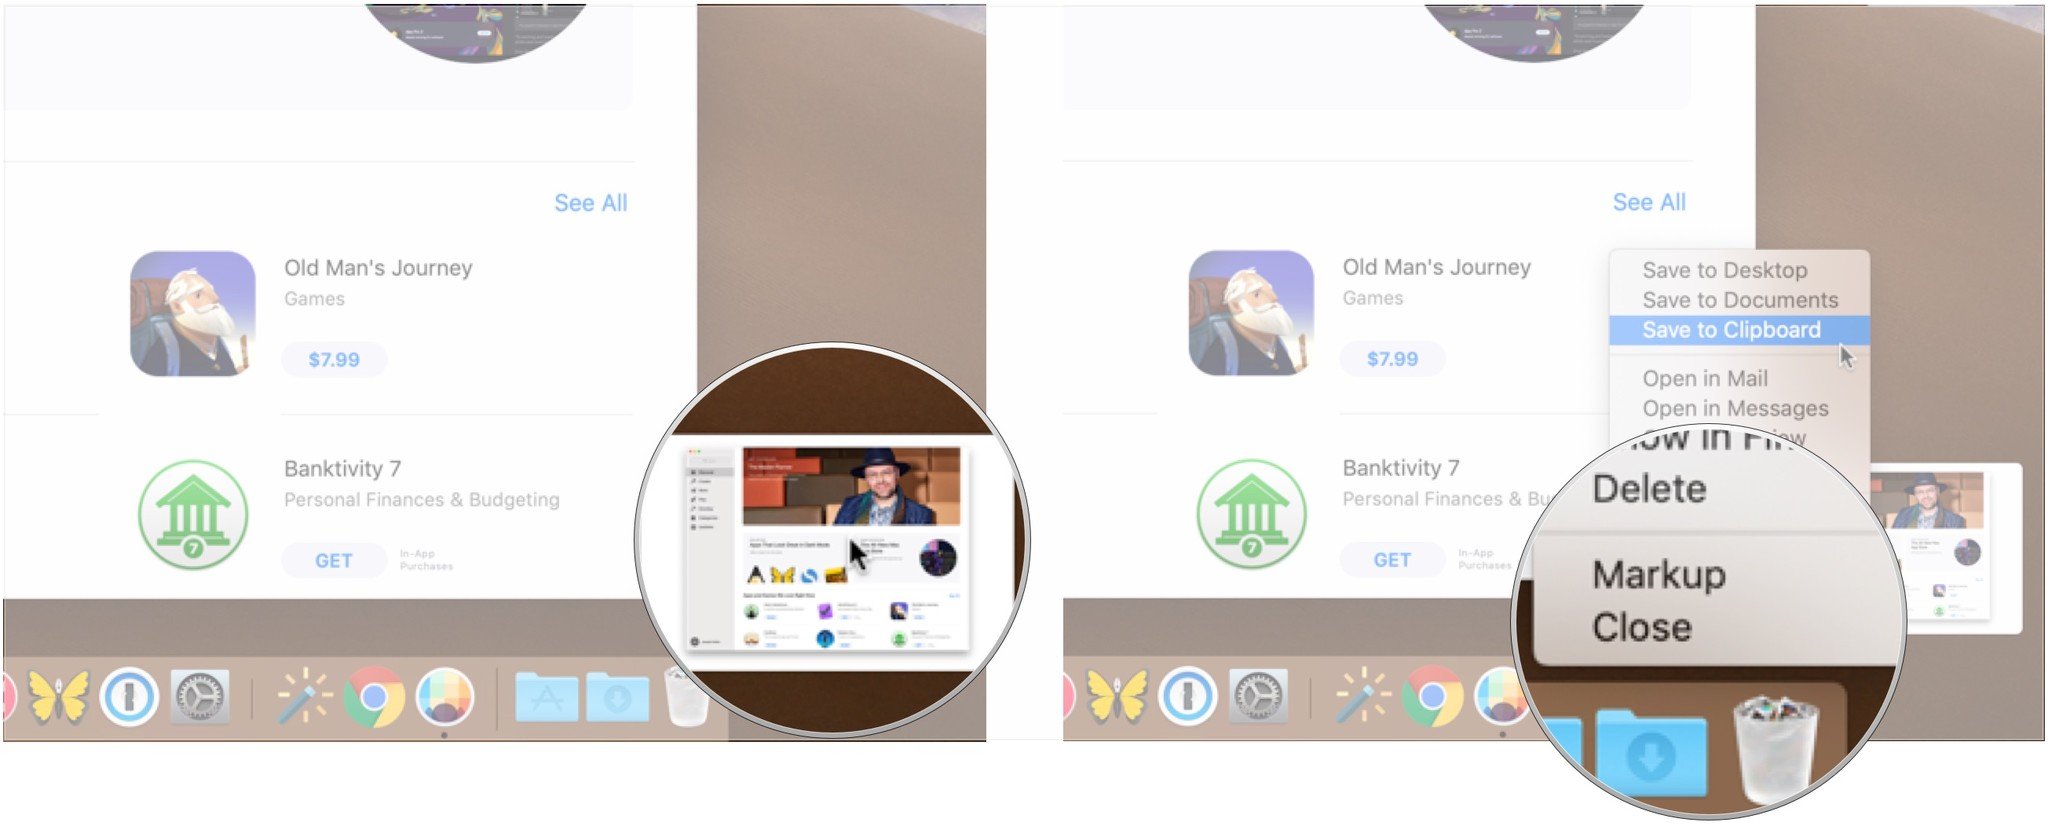
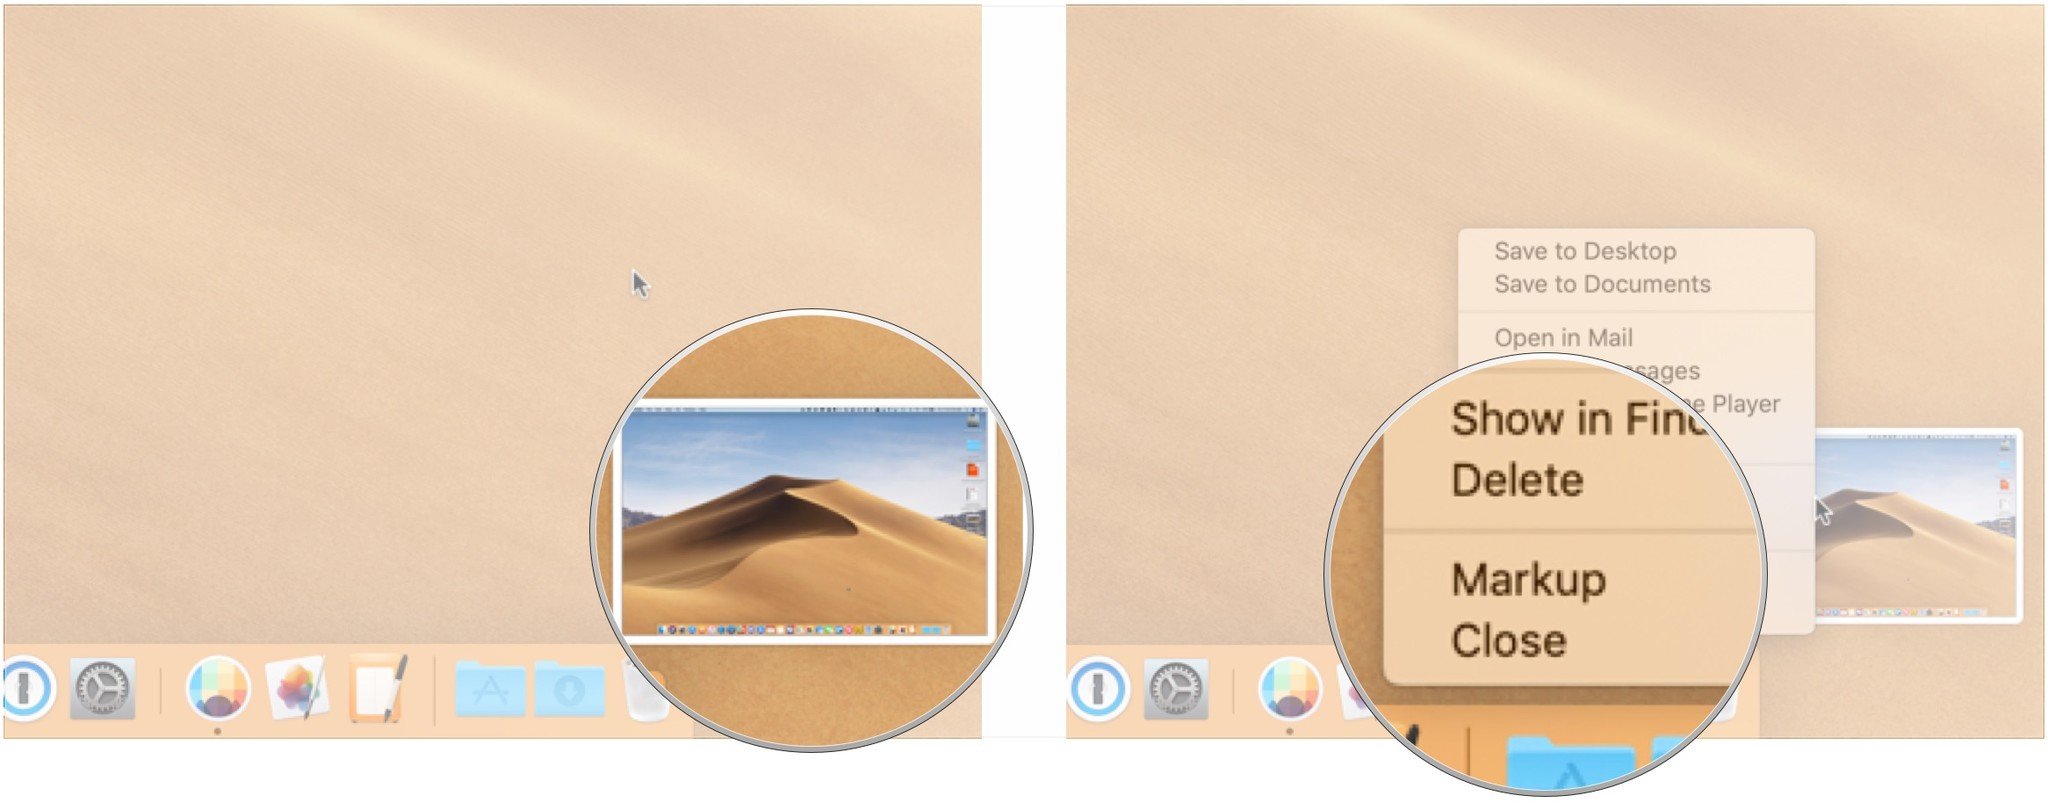
- Control-click, right-click, or two-finger-click on the screenshot that appears in the bottom-right corner of your screen.
-
Use the contextual menu to choose where to save the screenshot, send it, show it in the Finder, delete it, or mark it up.
How to record your screen on Mac
Screen recording is simple on Mac. You no longer have to rely on QuickTime to record screens. Instead, you bring up the same toolbar as you do for screenshots.
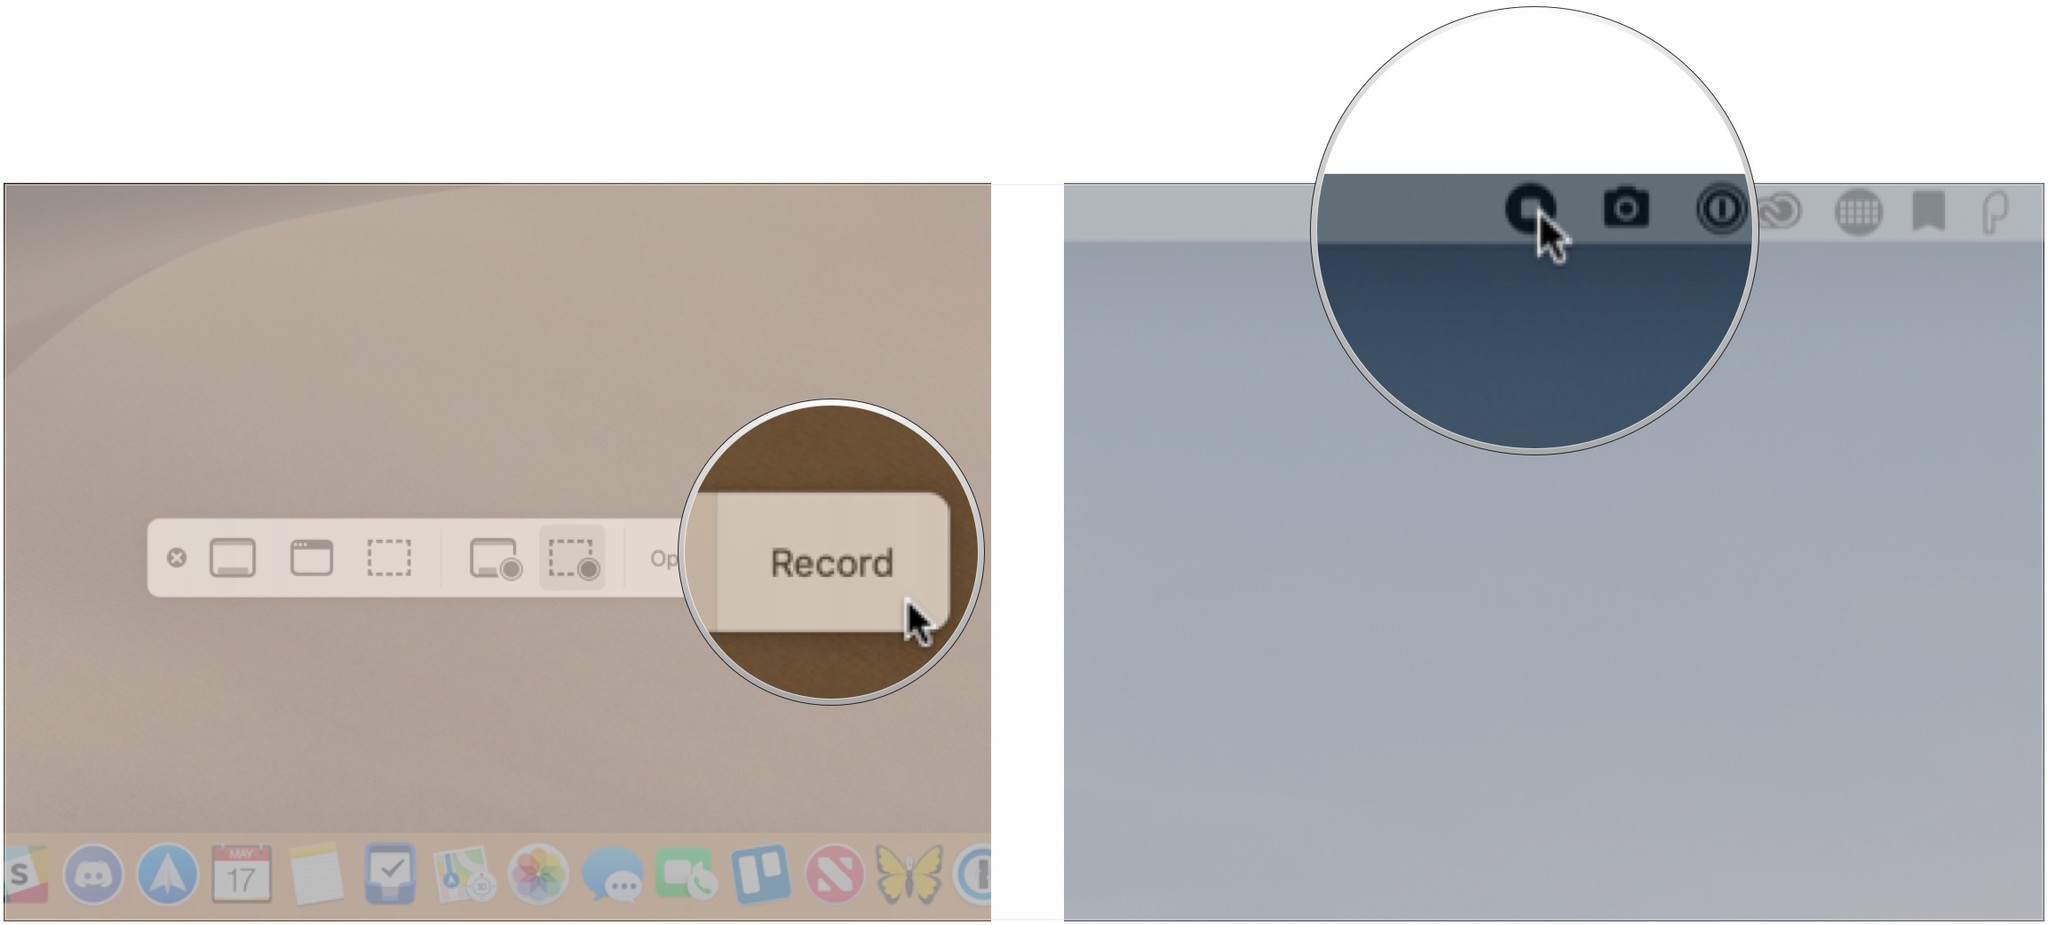
- Press Command + Shift + 5 on your keyboard to bring up the screenshot toolbar.
- Click either Record Entire Screen or Record Selected Portion. Your recording will begin immediately if you select Record Entire Screen.
-
Select the portion of the screen you wish to record if you're only recording a part of it.
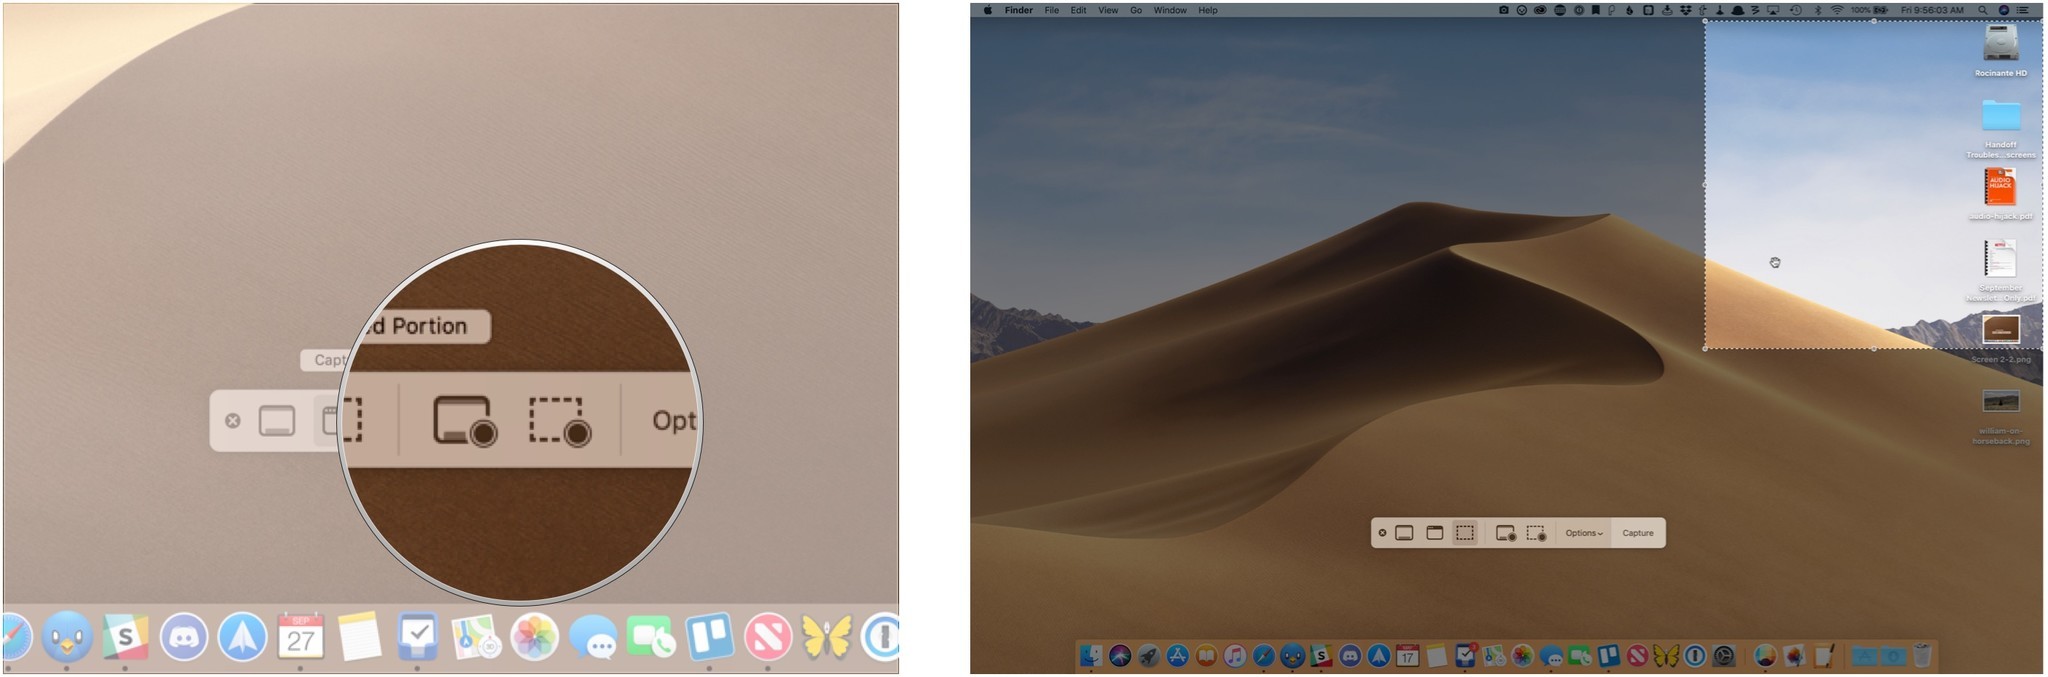
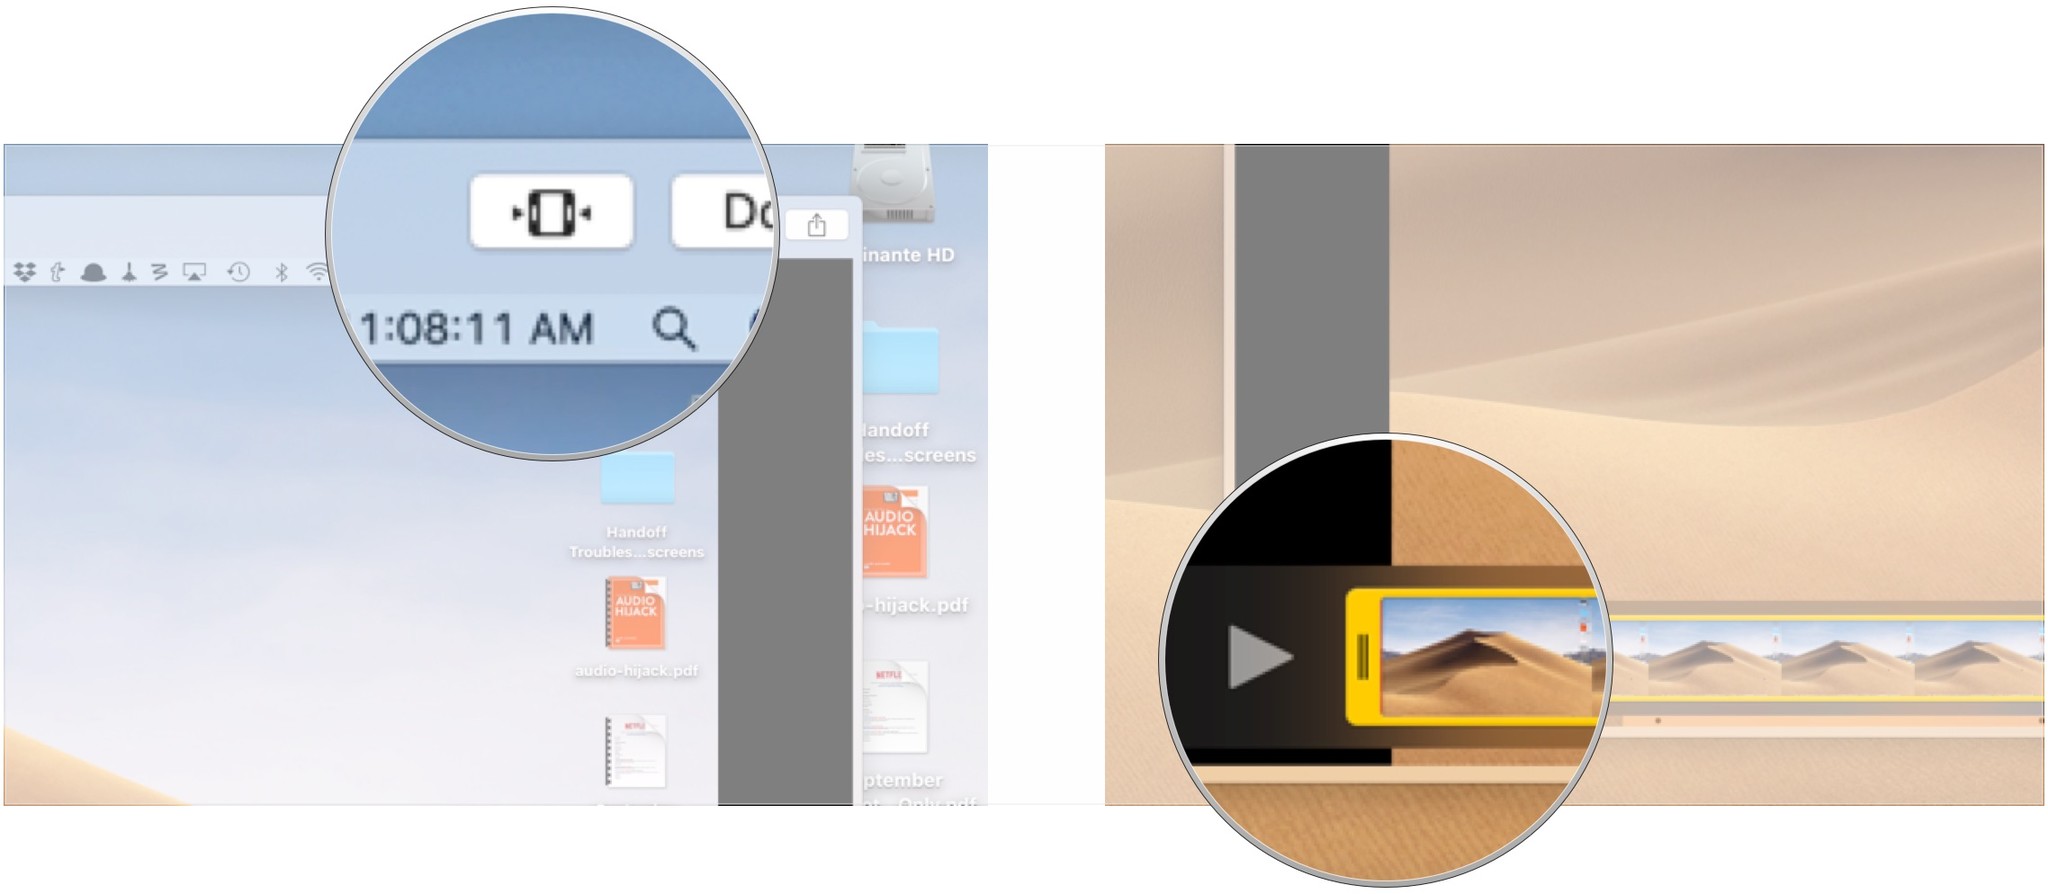
- Click Record on the screenshot and recording control bar.
-
Press the Stop button in the Menu bar to stop the recording.
- Control-click, right-click, or two-finger-click on the recording that appears in the bottom-right corner of your screen.
-
Use the contextual menu to choose where to save the screenshot, send it, show it in the Finder, delete it, or mark it up.

How to choose a save location for screenshots and screen recordings on Mac
Although you can choose from a limited set of locations to save your screenshots and recordings after making them, you can also pre-select a destination beforehand.
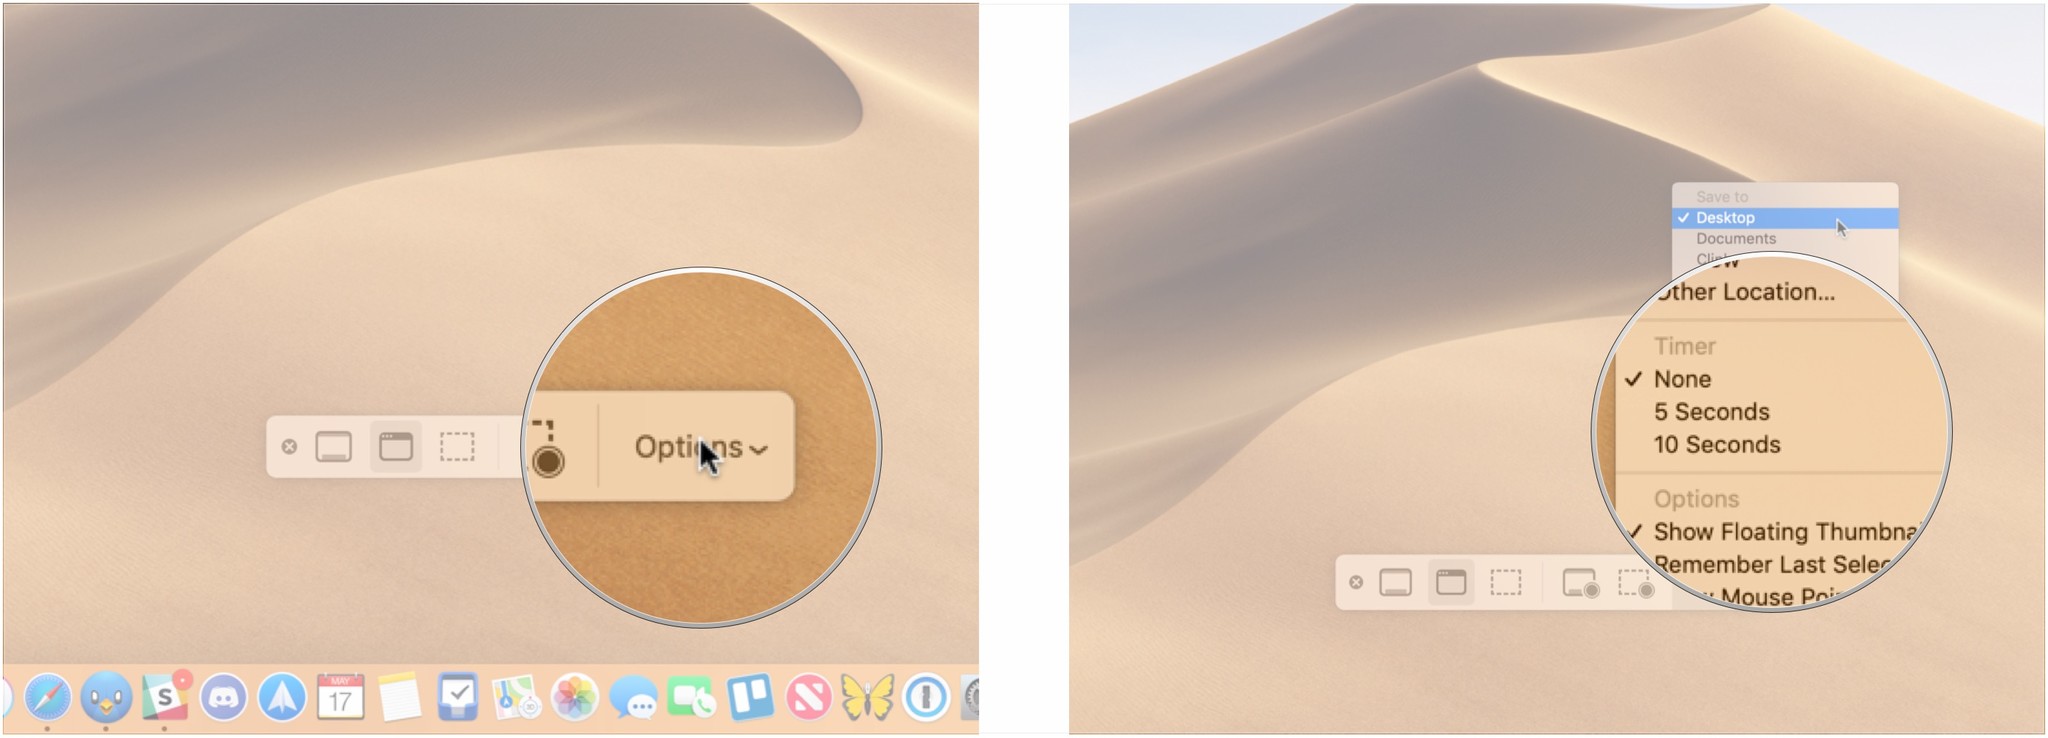
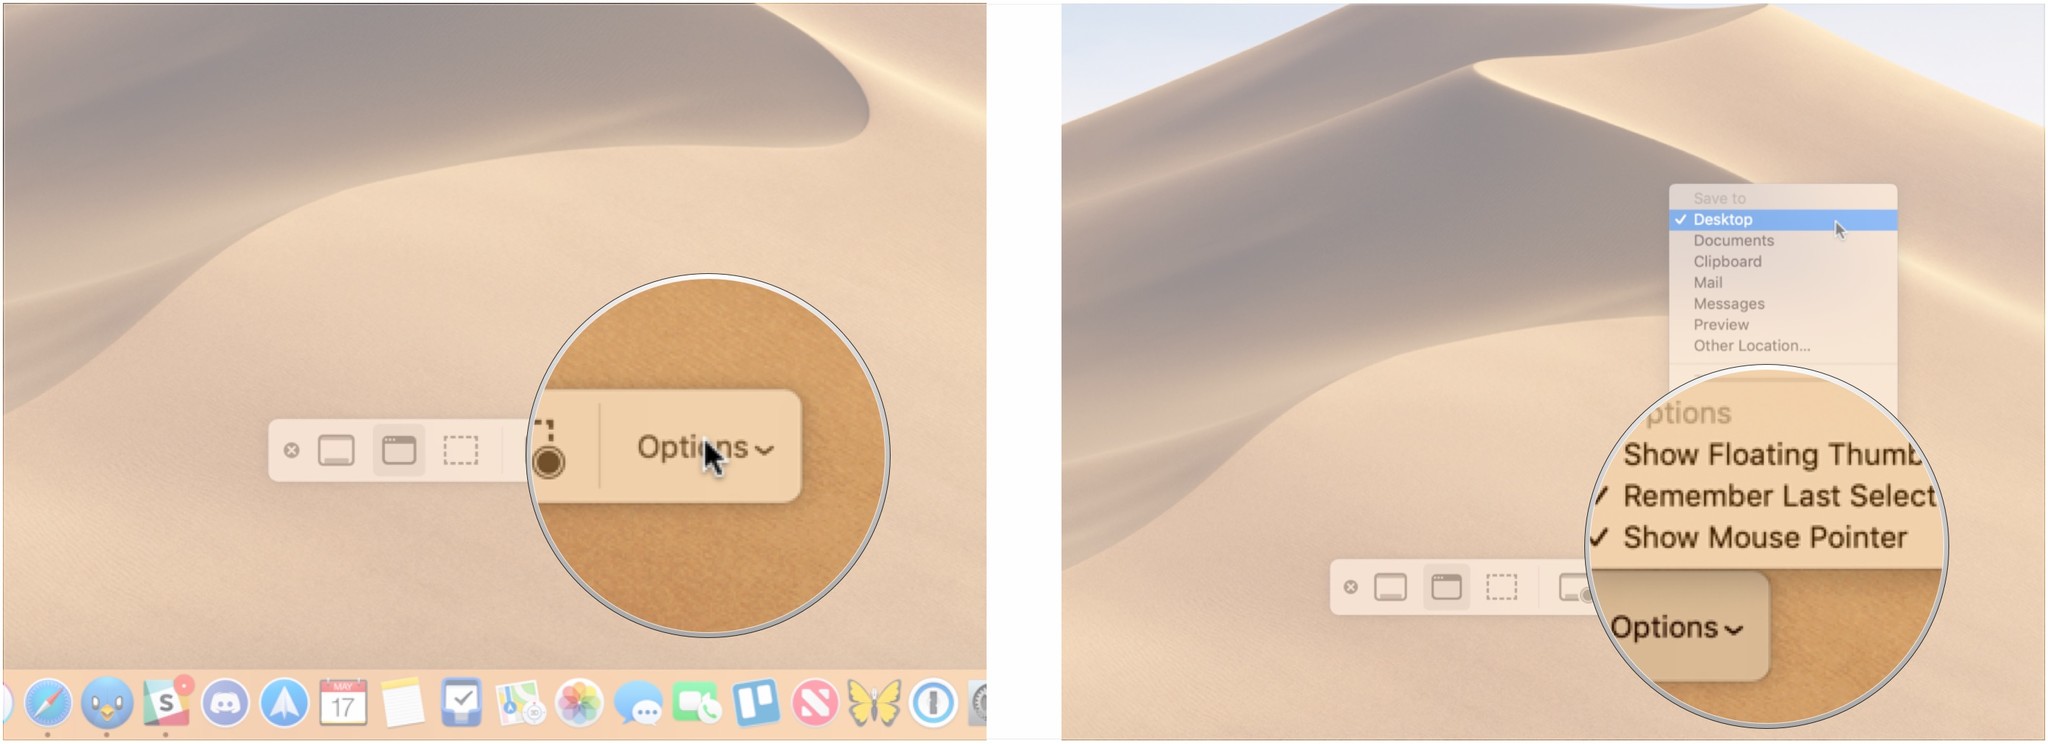
- Press Command + Shift + 5 on your keyboard to bring up the screenshot toolbar.
- Click Options.
-
Select Desktop, Documents, Clipboard, Mail, Messages, or Preview under Save to to set a save location.

How to set a timer for screenshots and screen recordings on Mac
- Press Command + Shift + 5 on your keyboard to bring up the screenshot toolbar.
- Click Options.
-
Select None, 5 Seconds, or 10 Seconds under Timer to set a timer.
How to show the mouse pointer in screenshots on Mac
- Press Command + Shift + 5 on your keyboard to bring up the screenshot toolbar.
- Click Options.
-
Click Show Mouse Pointer.
How to edit a screenshot on Mac
- Control-click, right-click, or two-finger-click on the screenshot that appears in the bottom-right corner of your screen after taking a screenshot or screen recording.
-
Click Markup.
- Use the toolbar to draw or write, highlight, add shapes, insert text or a signature, rotate, or select text styles using the toolbar at the top of the Quick Look window.
-
Click Done when you're finished.

How to edit a screen recording on Mac
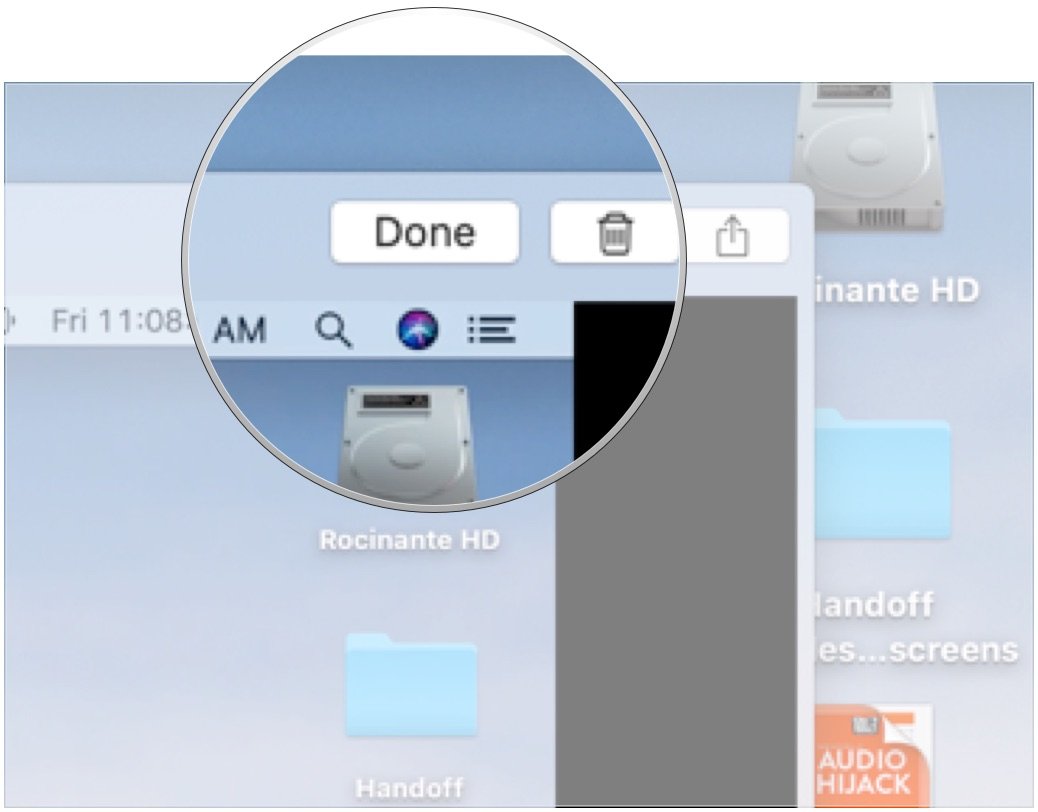
- Control-click, right-click, or two-finger-click on the recording that appears in the bottom-right corner of your screen after taking a screenshot or screen recording.
-
Click Markup.
- Click the trim button close to the top-right corner of the Quick Look window.
-
Grab the hold points at either end of the recording's timeline, and adjust their position to change the recording's length.
-
Click Done.
Buy used, save big
jemjem makes it safe and easy to save money buying gently used technology for home and family.