
Using Restrictions is a great way to allow your kids to use all the apps and features you want them to use and none of the ones you don't.
Parental Controls, also known as Restrictions, let you manage which features, apps, and content your kids can and can't access on the iPhone, iPod touch, or iPad. As of iOS 12, it also lets you set Screen Time for specific apps that you'd rather your kids not spend all day on. If you want to disable specific apps altogether, here's how!
How to set Restrictions on iPhone and iPad in iOS 11 and earlier
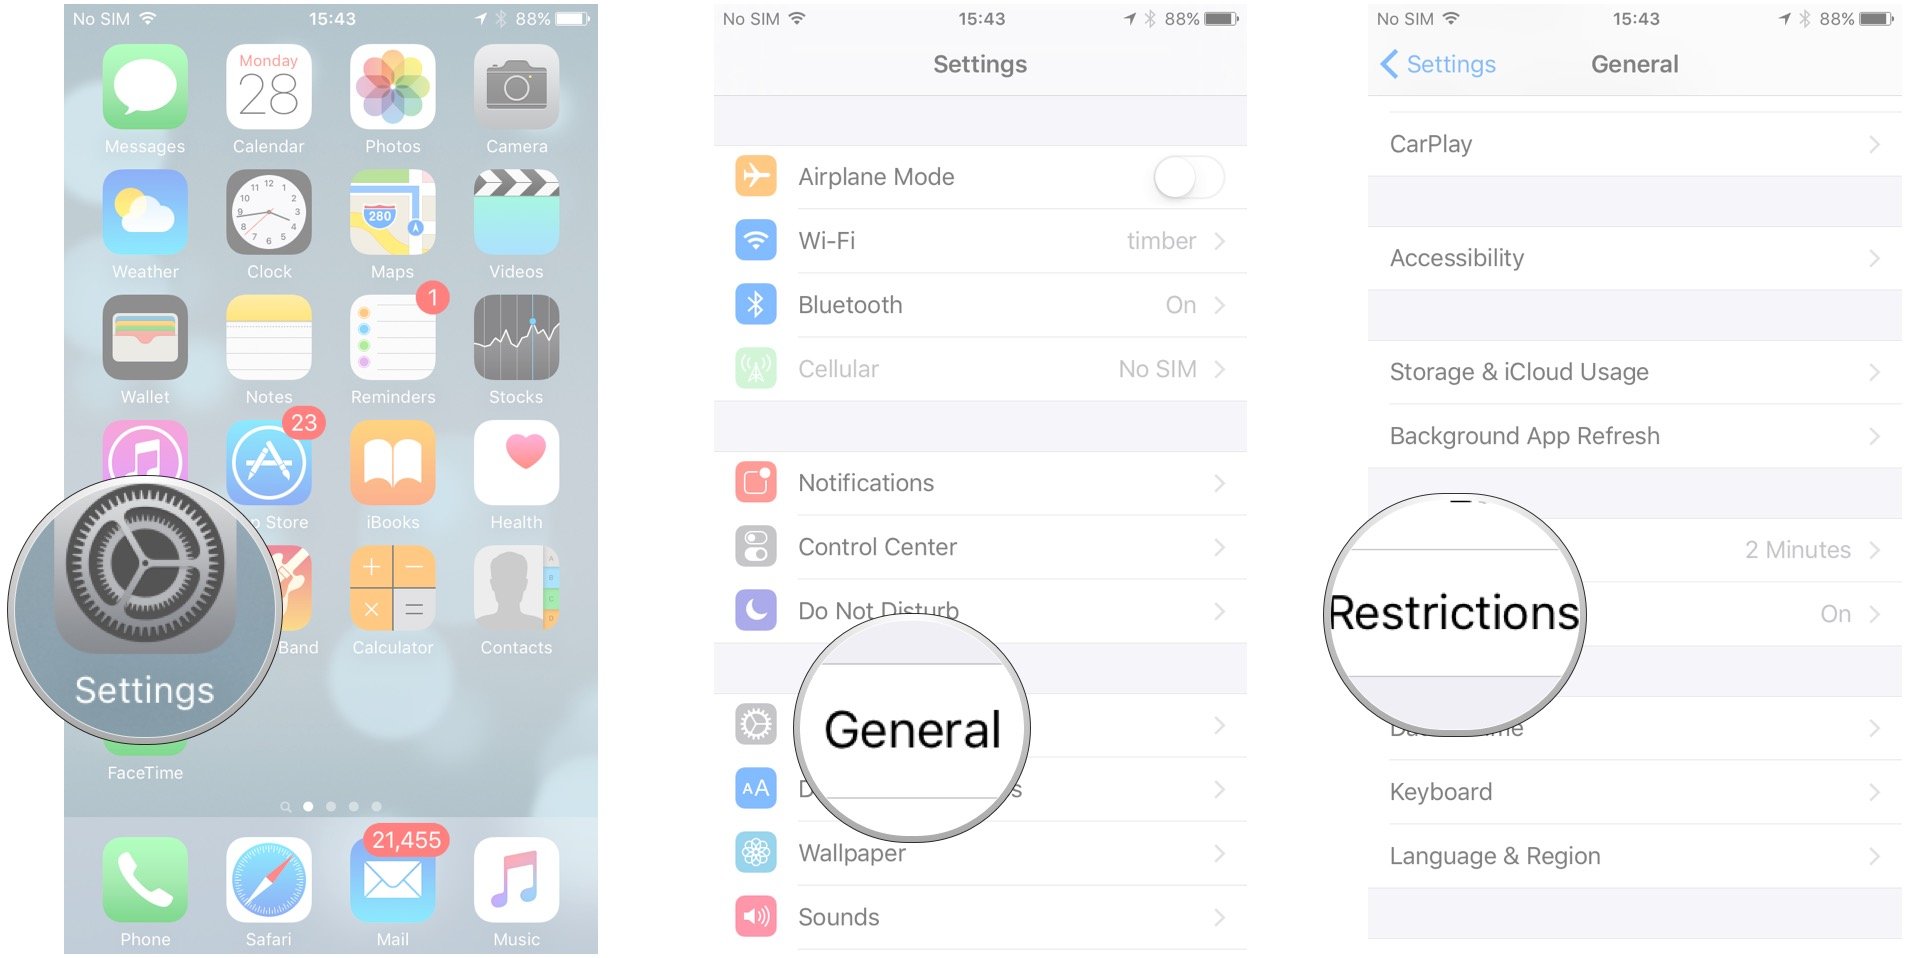
- Launch the Settings app on your iPhone or iPad.
- Tap on General.
-
Tap on Restrictions.
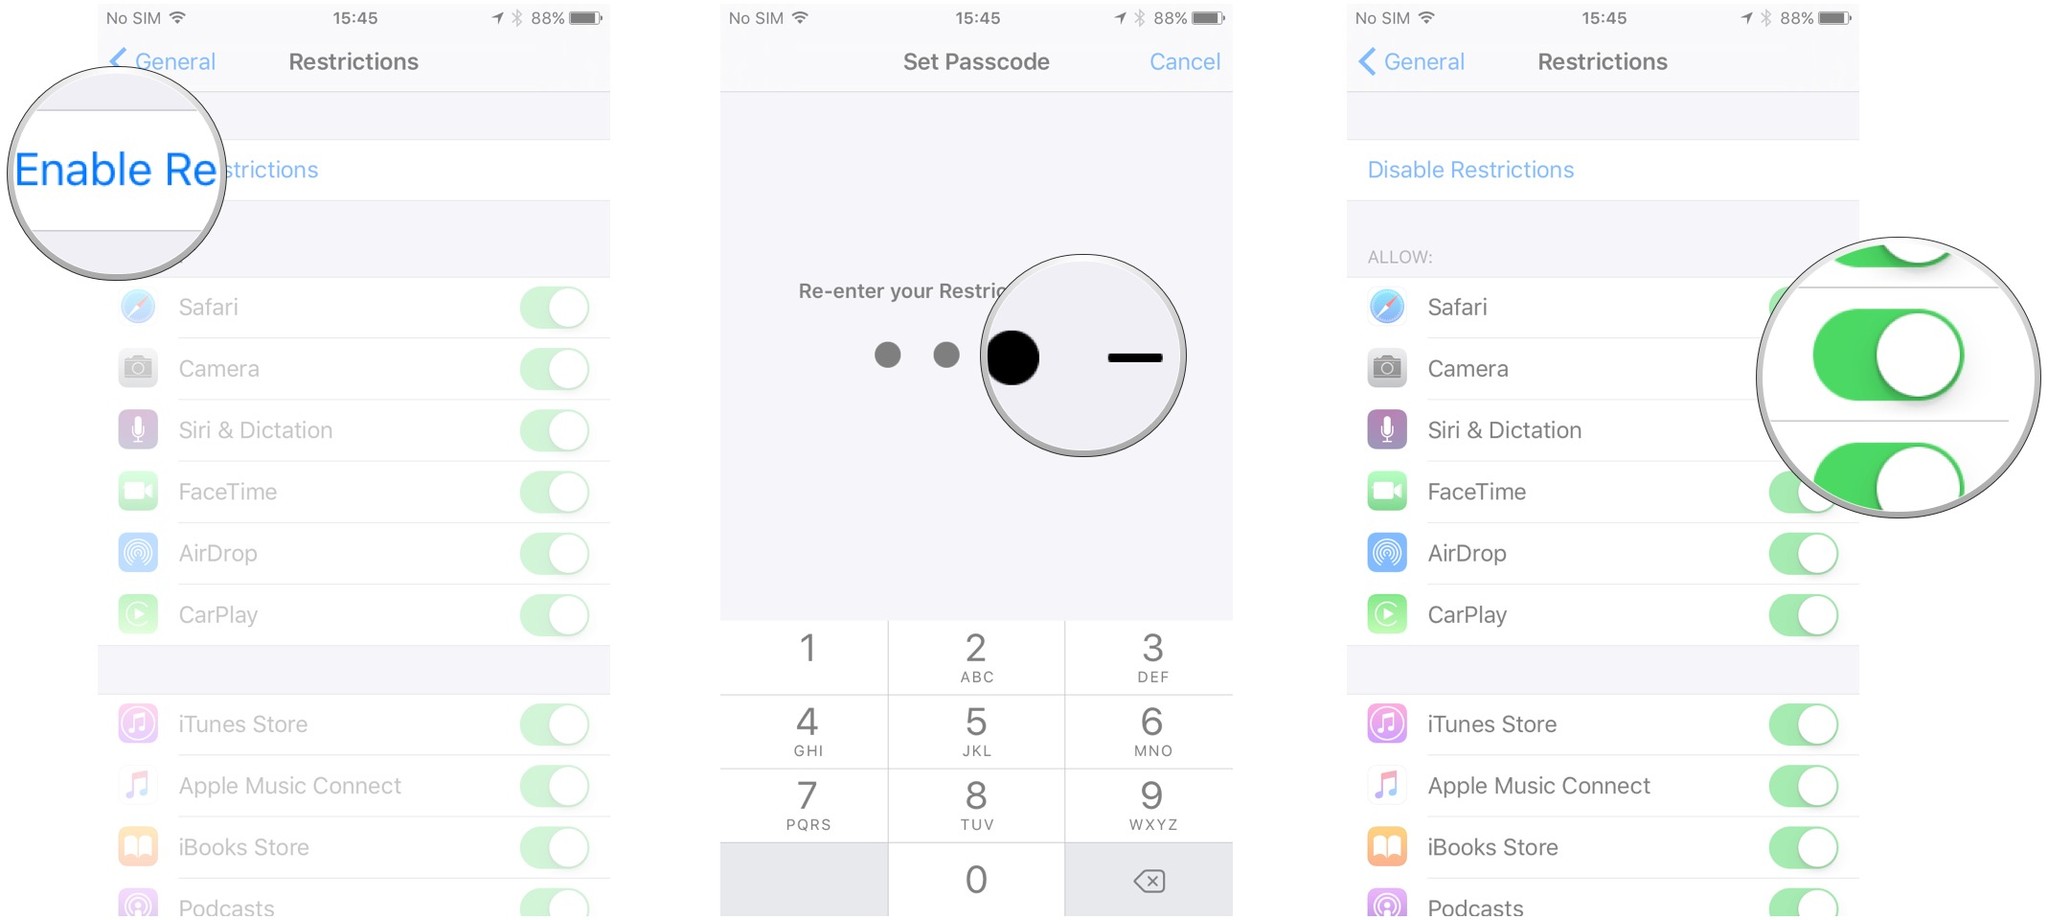
- Tap on Enable Restrictions at the top if you don't already have them turned on. If you do, skip down to step 6.
- Enter a passcode that you'll use to enable and disable apps.
-
Tap the switch next to each app that you'd like to turn off.
How to set Restrictions on iPhone and iPad in iOS 12
Restrictions have moved in iOS 12 — they're now under Screen Time in your Settings. Here's how to get there.
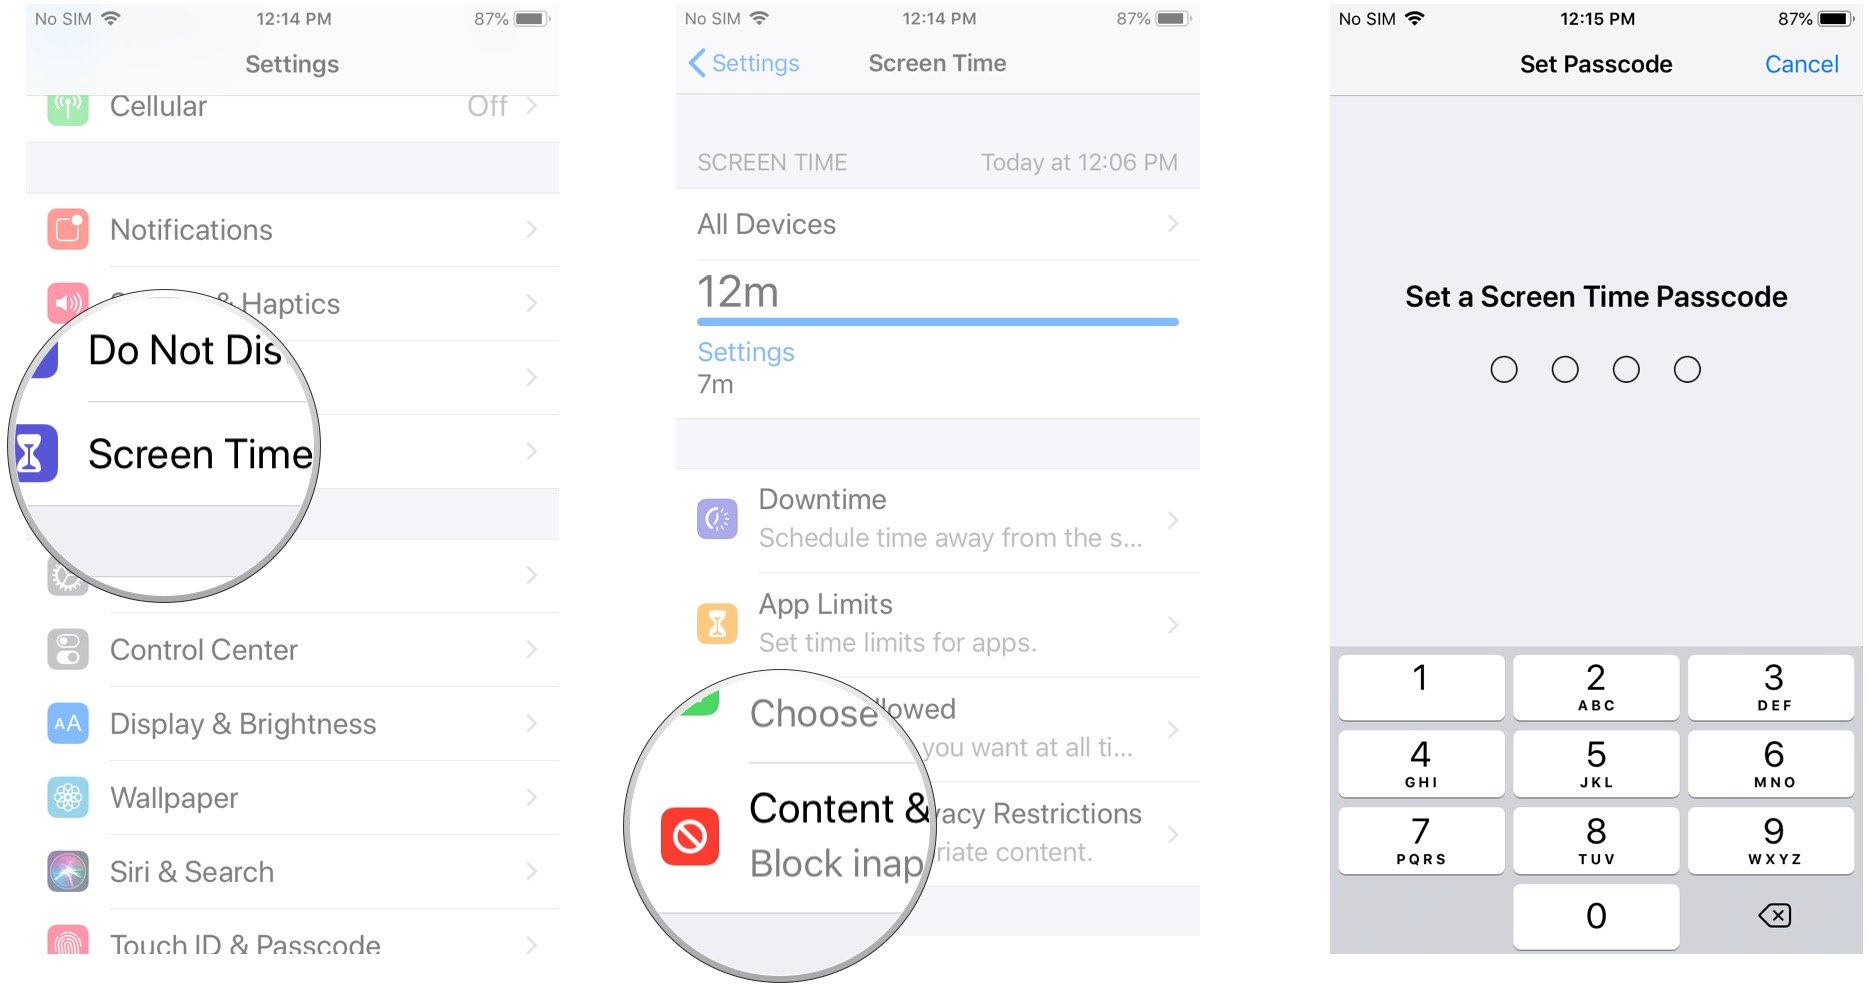
- Launch Settings from your Home screen.
- Tap Screen Time.
- Tap Content & Privacy Restrictions.
-
Enter a four-digit passcode and then confirm it.
- Tap the switch next to Content & Privacy.
- Tap Allowed apps.
-
Tap the switch(es) next to the app or apps you'd like to disable.


These apps will no longer appear on your Home screen. To re-enable them, you'll just have to follow the above steps and turn the switches back on.