When you make big changes to your iPhone or iPad, like installing a beta or a major operating system, it can potentially make your device unusable, even if temporarily. Backing up your iPhone or iPad before installing or updating to a major new operating system isn't enough. You actually want to make an archived backup. This ensures you have a version of the operating system, and all of your settings and data, carefully protected and locked down. If you change your mind or need to downgrade back to a public release or previous operating system at a later time, this archived backup will be what you reinstall.
How to backup your iPhone or iPad on your Mac
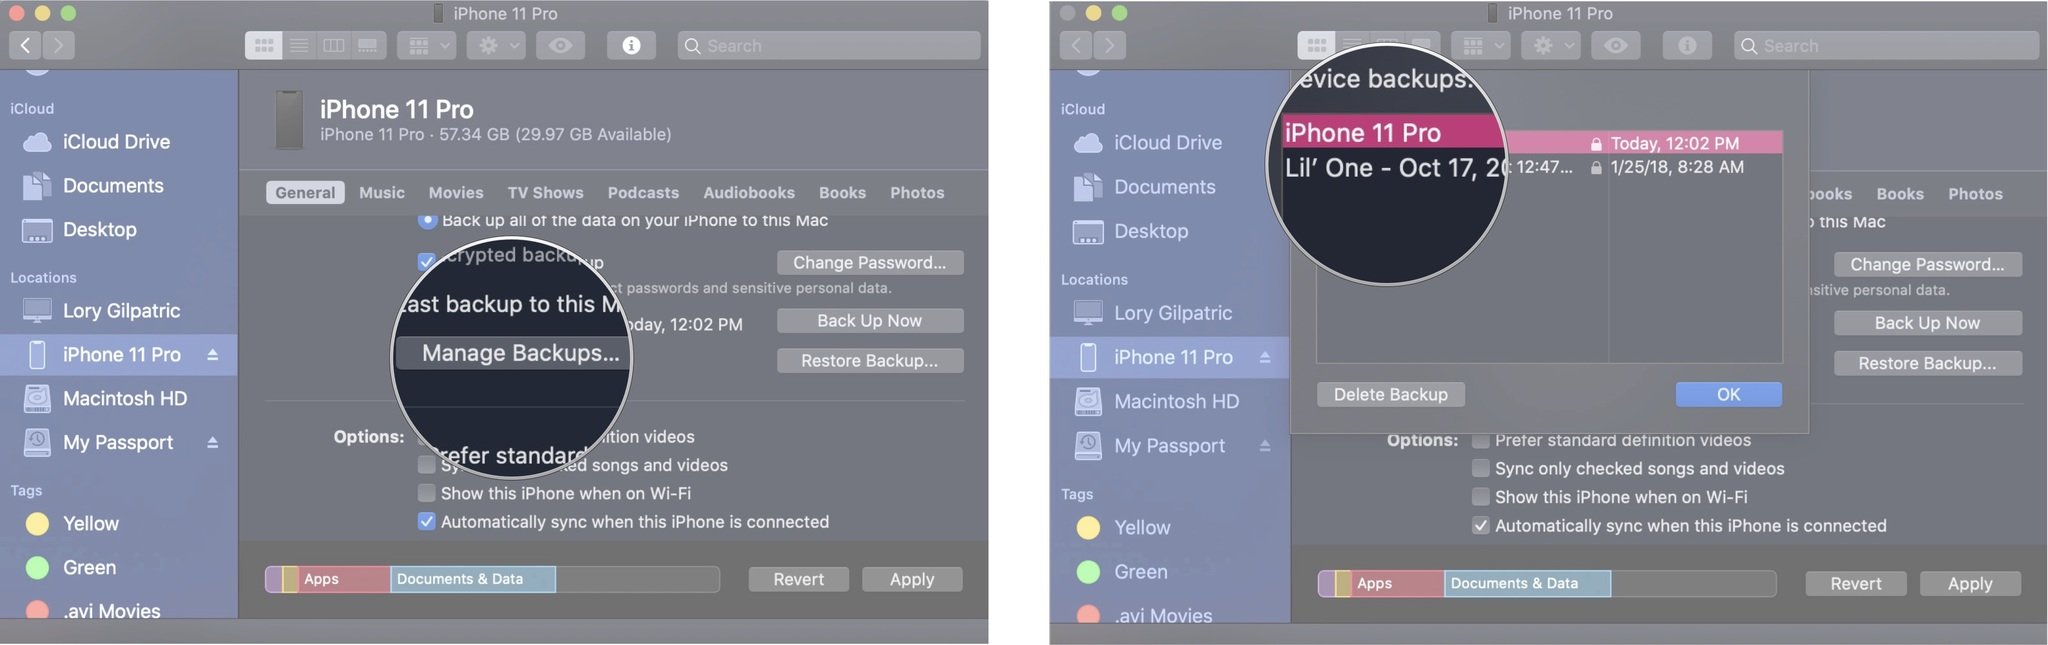
In order to make an archived backup, you'll first need to back up your iPhone or iPad to your Mac. It's OK if you usually back up your iPhone or iPad using iCloud. You can enable this once and then disable it if you want to go back to automatically updating with iCloud.
- Connect your iPhone or iPad to your Mac using your USB Lightning cable.
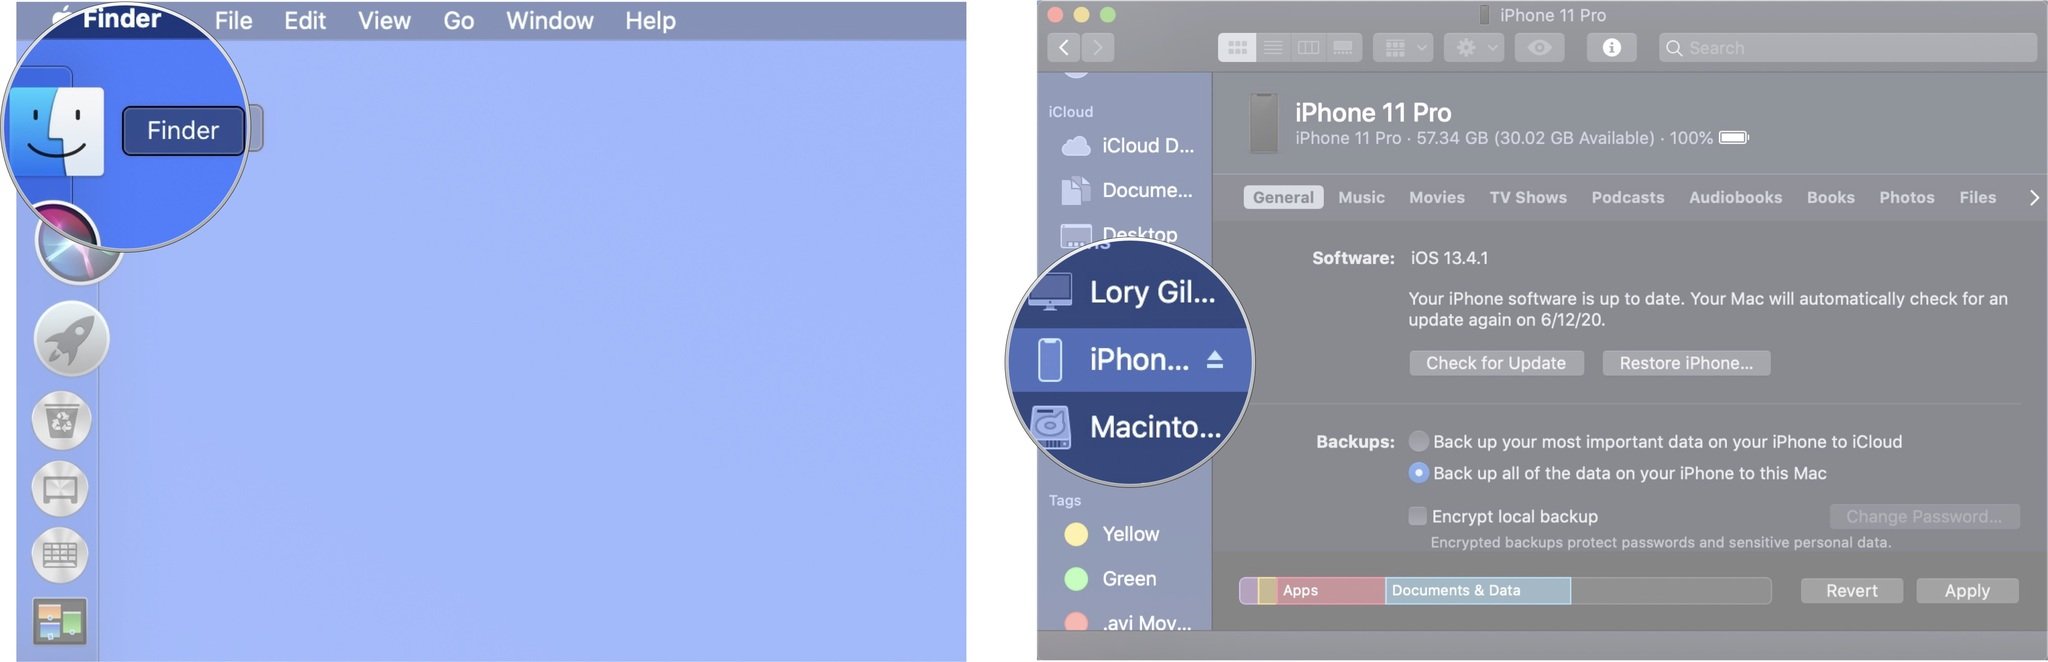
- Open a Finder window.
-
Click on your iPhone or iPad under the Location section in the sidebar of your Finder window.
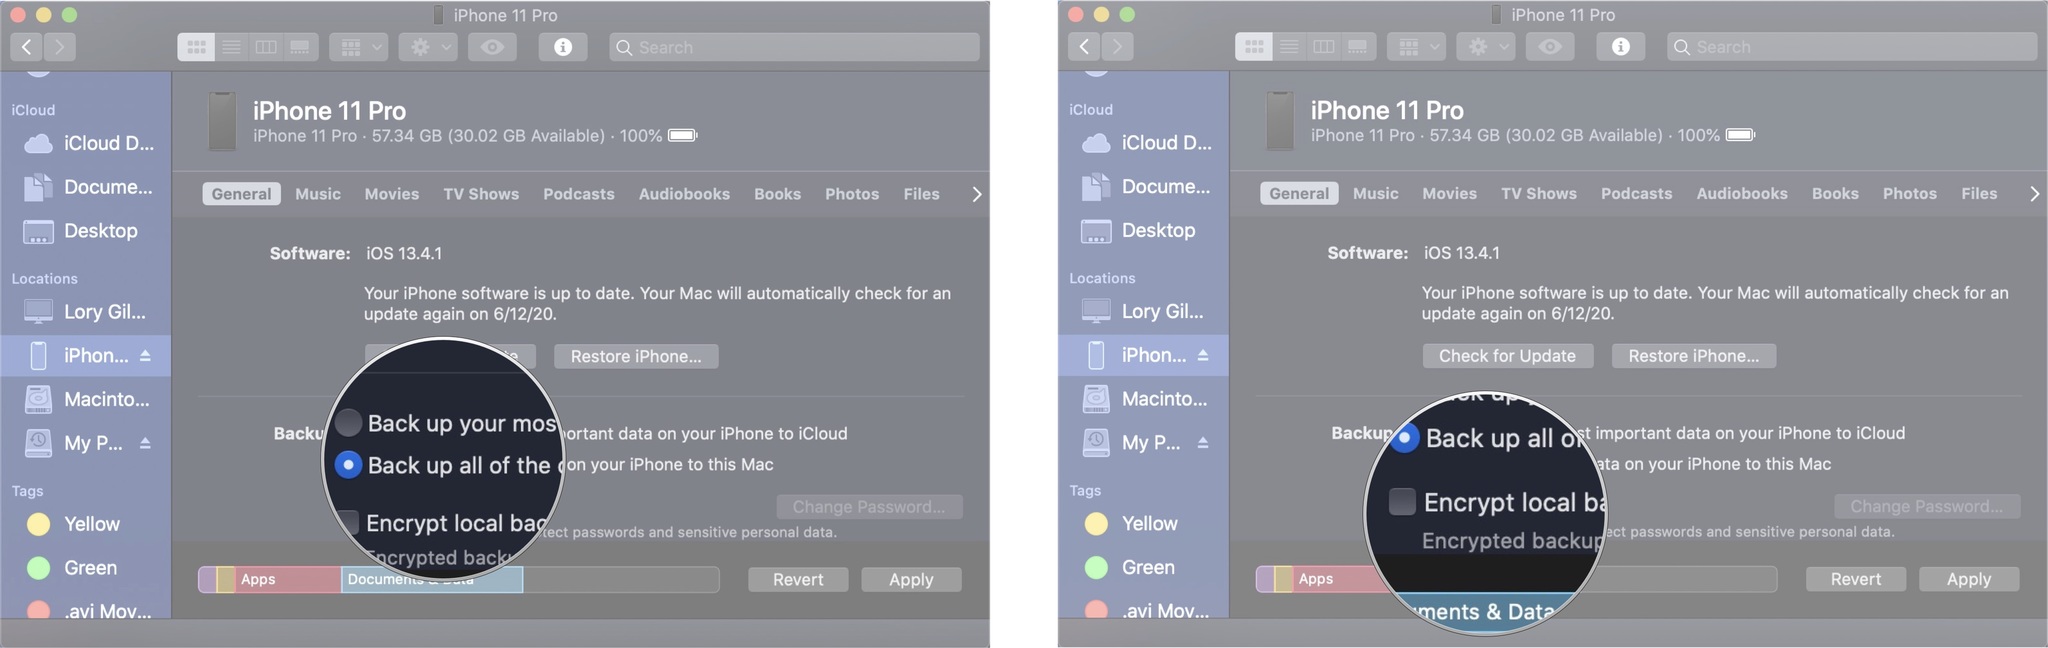
- Tick the box for Back up all of the data on your iPhone/iPad to this Mac.
-
Tick the box for Encrypt local backup.

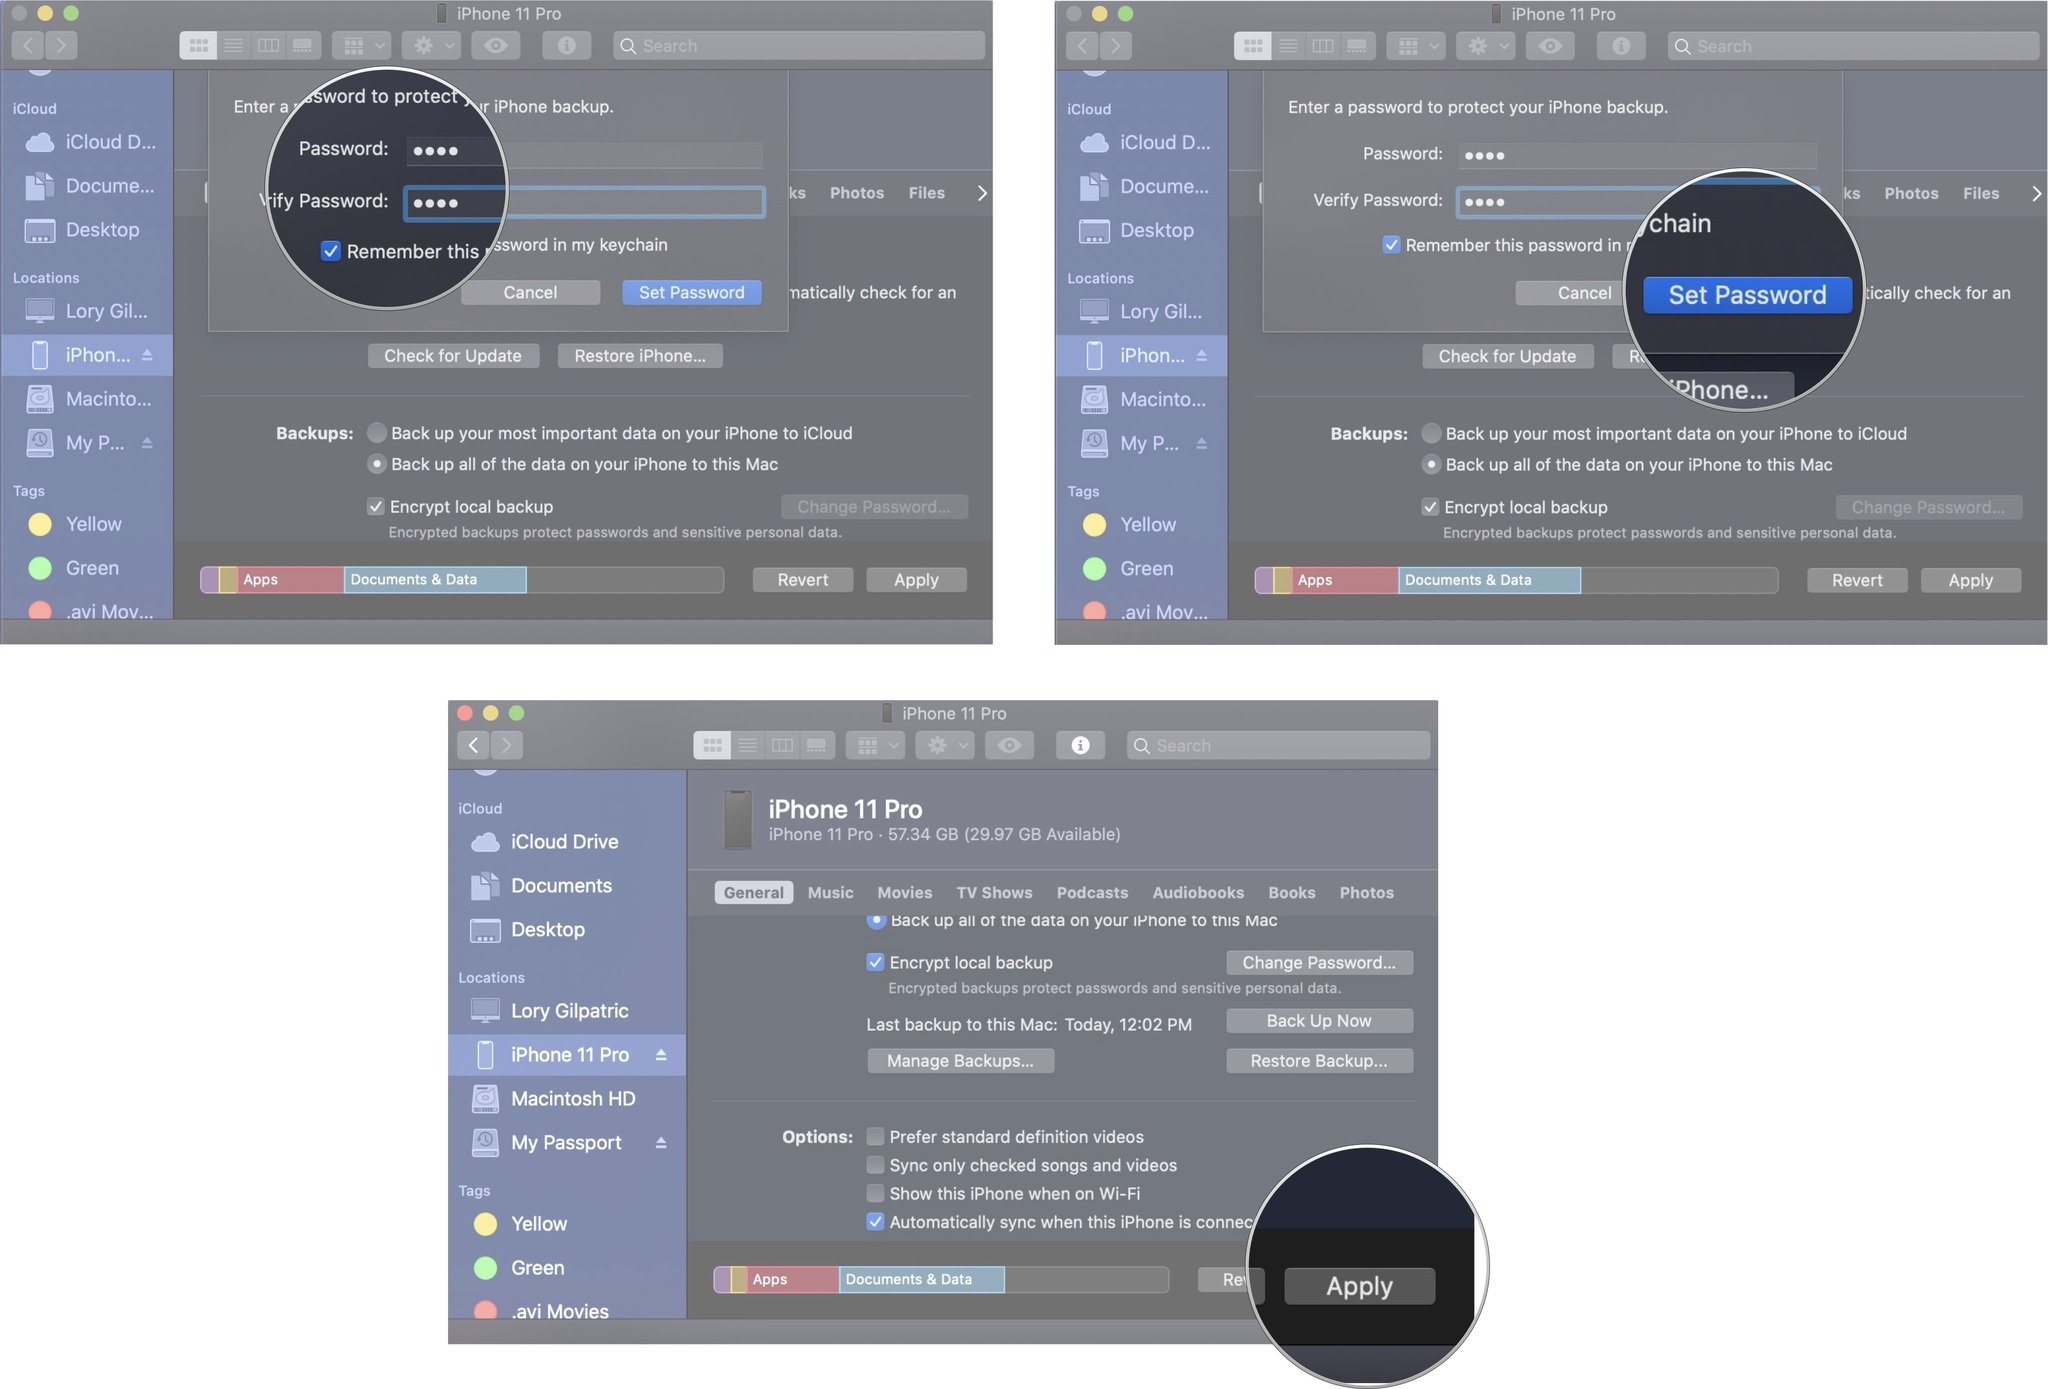
- Enter a password to protect your iPhone or iPad backup (this does not have to be your Apple ID or Passcode to lock your iPhone).
- Click Set Password.
-
Click Apply. You may be asked to enter your iPhone or iPad's passcode at this point.


Wait for your iPhone to back up to your Mac. This may take a few minutes.
How to make an archived backup of your iPhone or iPad
Once your iPhone or iPad has completed its backup process, you'll want to turn that backup into an archived backup. This backup will not be overwritten when you manually or automatically back up your iPhone or iPad in the future.
- Click on Manage Backups in the same Finder window that you backed up your iPhone or iPad.
-
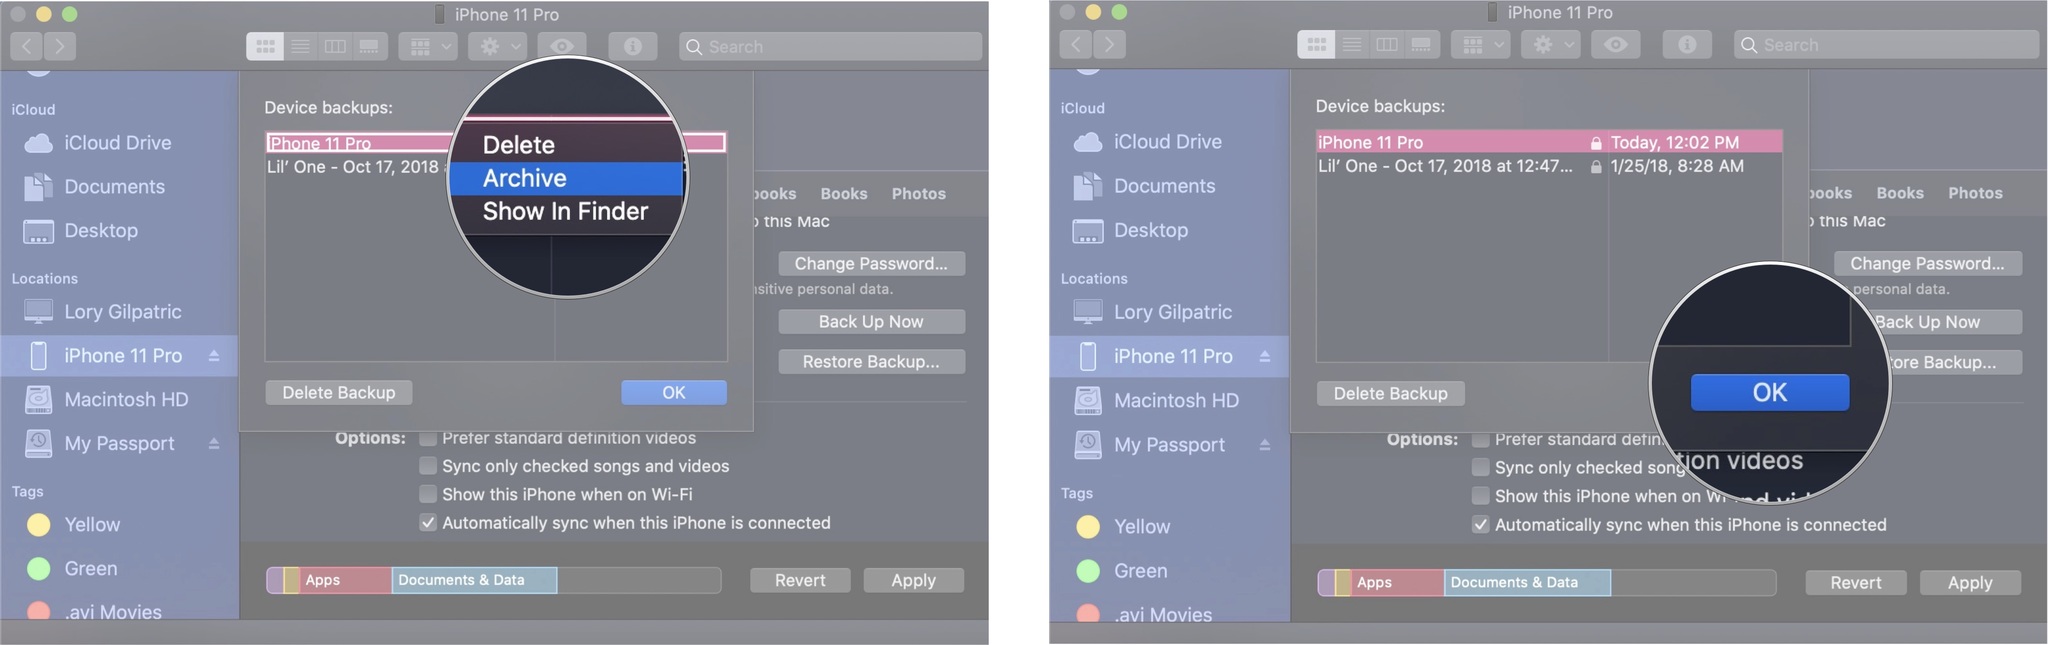
Select the backup you want to archive. This should be the most current backup.
- Right-click or Control + click on the backup. This will call up a new set of options
- Click on Archive.
-
Click on OK.


You now have an archived backup of your iPhone or iPad. If you install a beta or a new version of iOS or iPadOS, and then change your mind and want to revert back to an earlier operating system, this is the backup you'll want to use.
How to re-enable iCloud backups for your iPhone or iPad
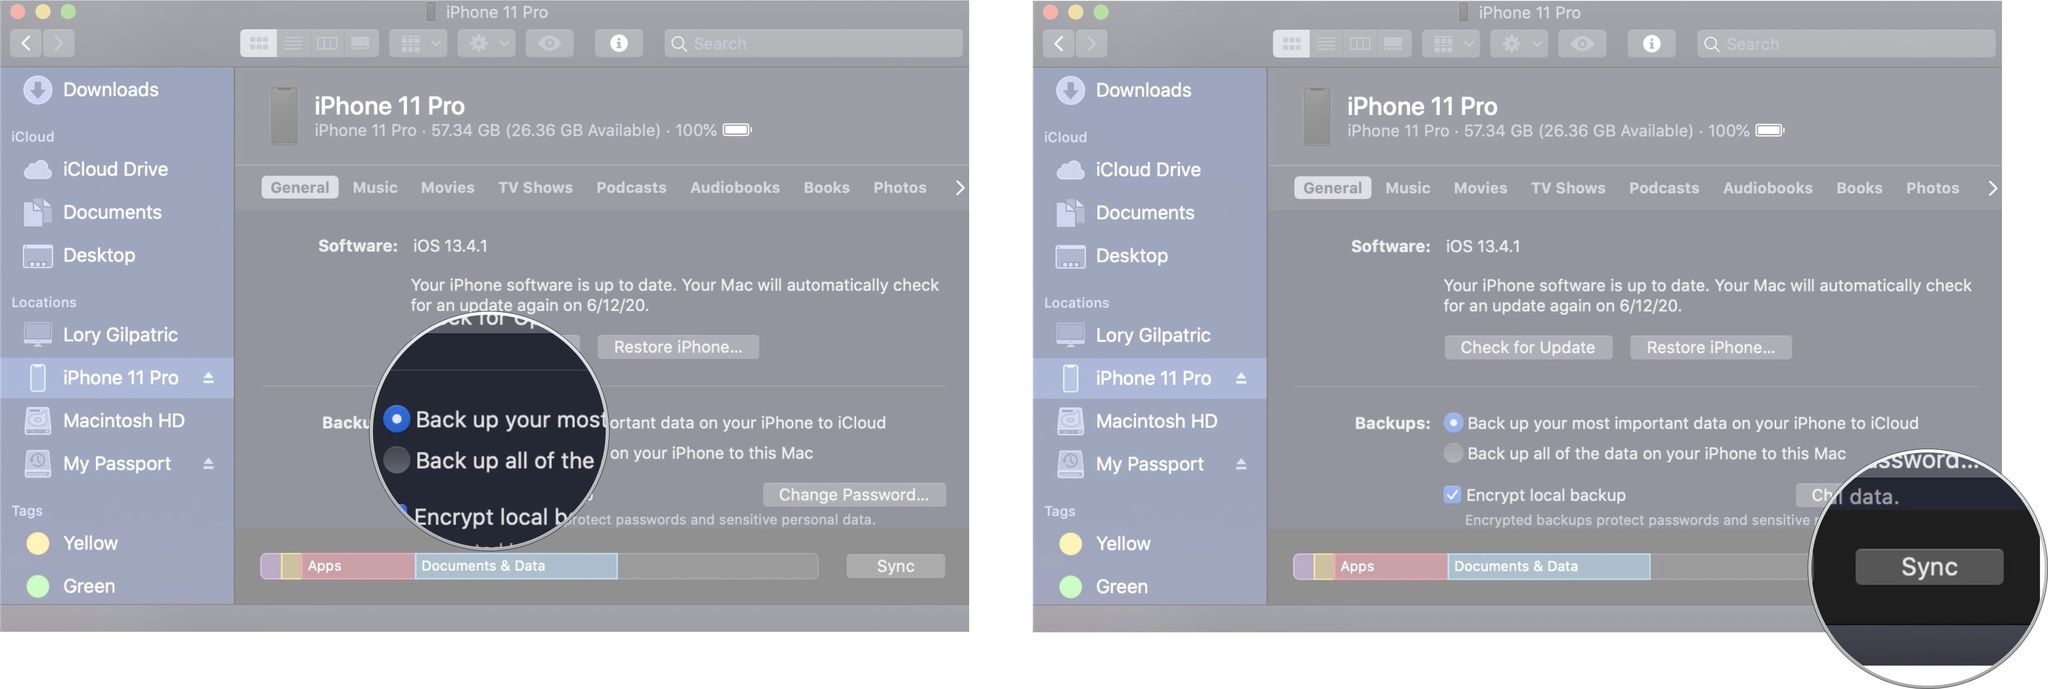
When you're done creating an archived backup of your iPhone or iPad, you can switch back to backing it up via iCloud, if that's your standard method.
- From the Finder window again, Click on your iPhone under the Location section in the sidebar of your Finder window.
- Tick the box for Back up your most important data on your iPhone/iPad to iCloud.
-
Click Sync.

Wait for your iPhone to sync. This may take a few minutes.
Buy used, save big
jemjem makes it safe and easy to save money buying gently used technology for home and family.