
If you don't like the way your mouse works, you can change it!
When it comes to using a mouse, everyone is different—some like fast double-clicking, others like natural scrolling. Maybe you prefer a traditional button mouse to Apple's Magic Mouse. Maybe you want to use right-clicking again. Whatever your preferences are, you can customize them to suit you better in macOS. Here's how.
How to change the scroll direction, right-click, and tracking speed of your mouse settings on a Mac
The Mac operating system makes it possible for you to make adjustments to your mouse's basic actions with just a few simple steps.
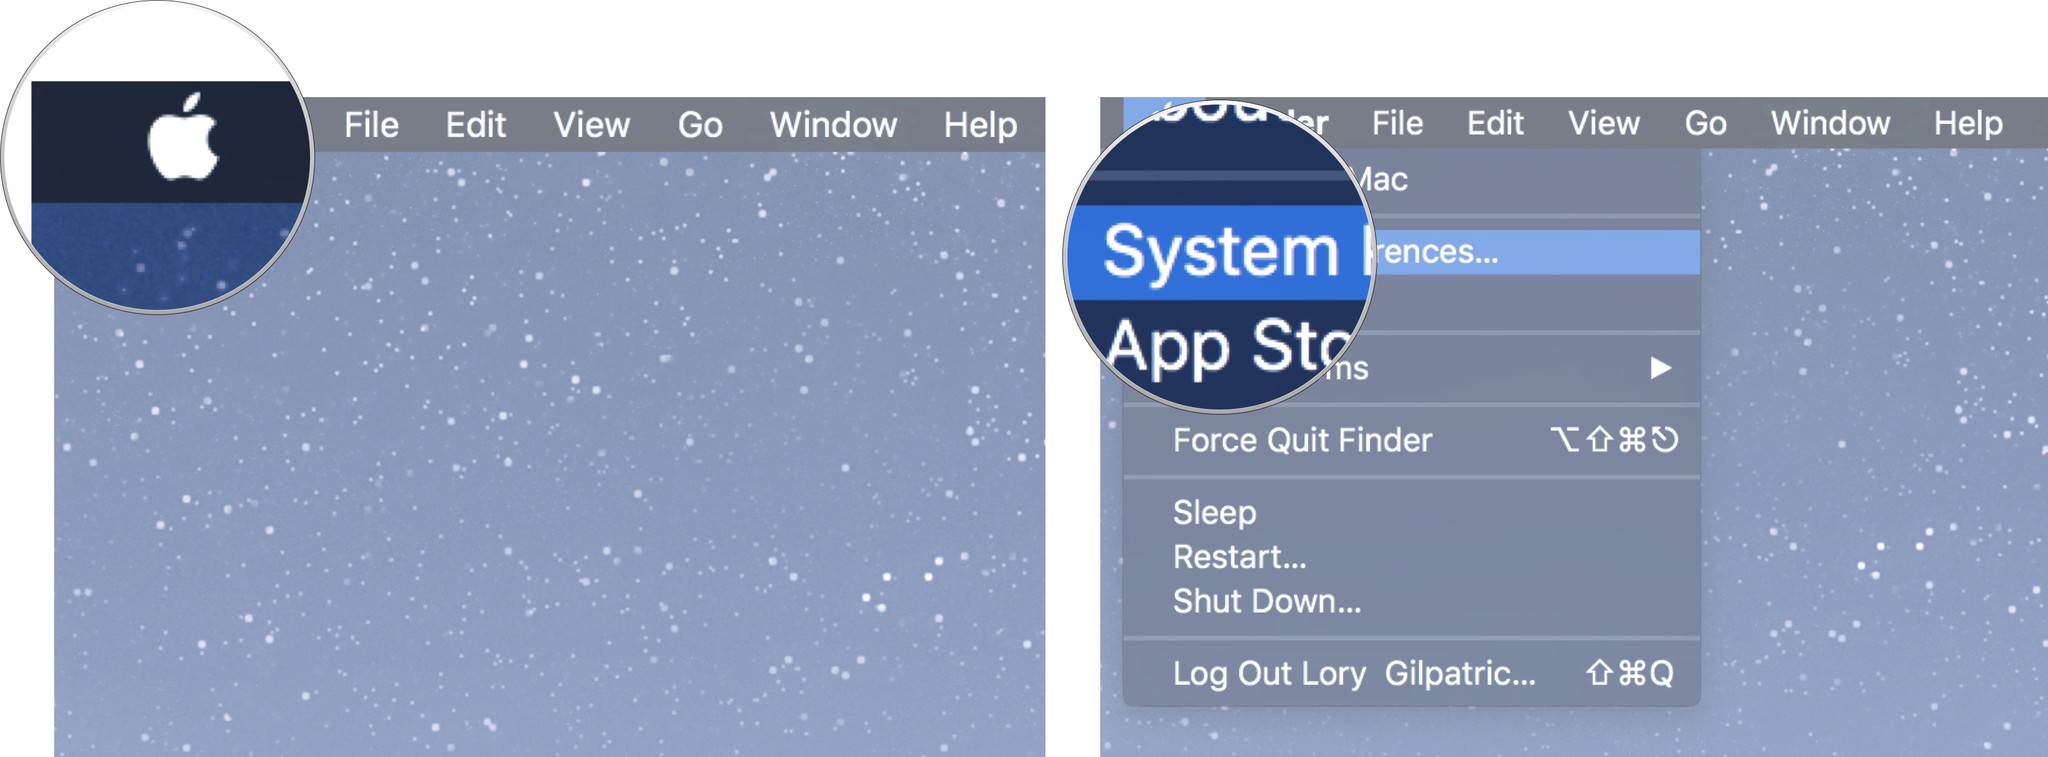
- Click the Apple icon in the upper-left corner of your screen.
-
Select System Preferences... from the dropdown menu.
- Click on Mouse in the System Preferences window.
-
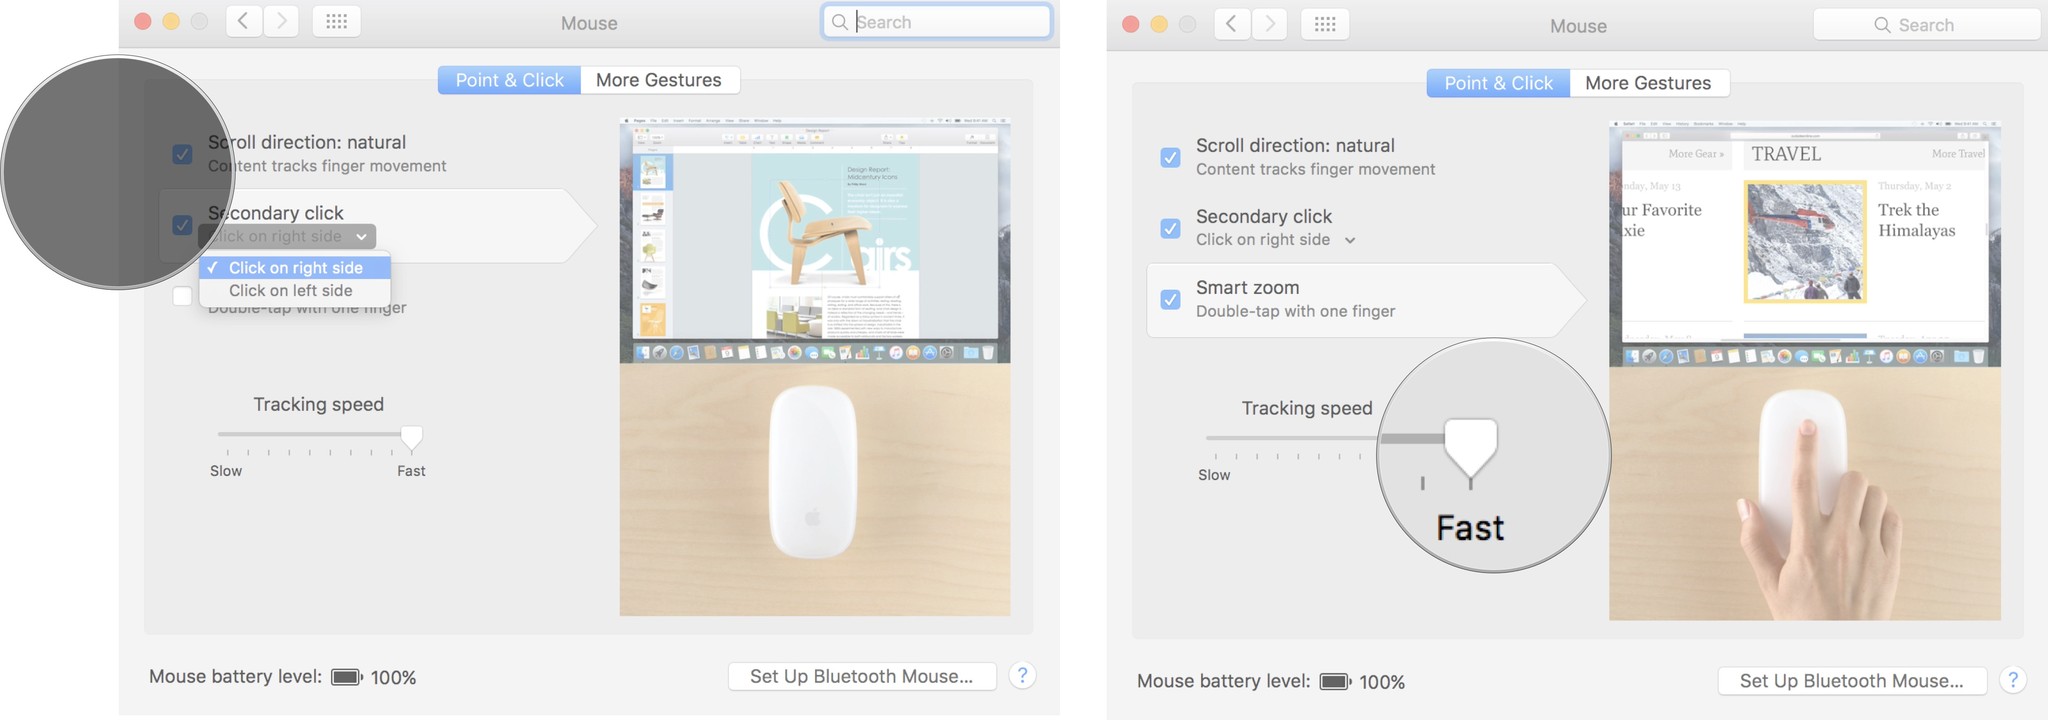
Select Point & Click.
- Tick the box for Scrolling direction: natural to make the mouse scroll in the same direction that your finger moves.
-
Tick the box for Secondary click to enable right-clicking.

-
Click the arrow below Secondary Click to choose whether you use the mouse's right or left side to trigger secondary clicking.
Note: you cannot change the secondary clicking side on a non-Apple mouse.
-
Drag the Tracking Speed slider left or right to increase or decrease the speed at which your mouse pointer moves across the screen.
How to change the speed of double-clicking your mouse settings on a Mac
If you are a fast mover, you may sometimes accidentally trigger double-clicking when you didn't mean to. You can change how fast or slow you need to click a second time to trigger double-clicking on the Mac operating system.
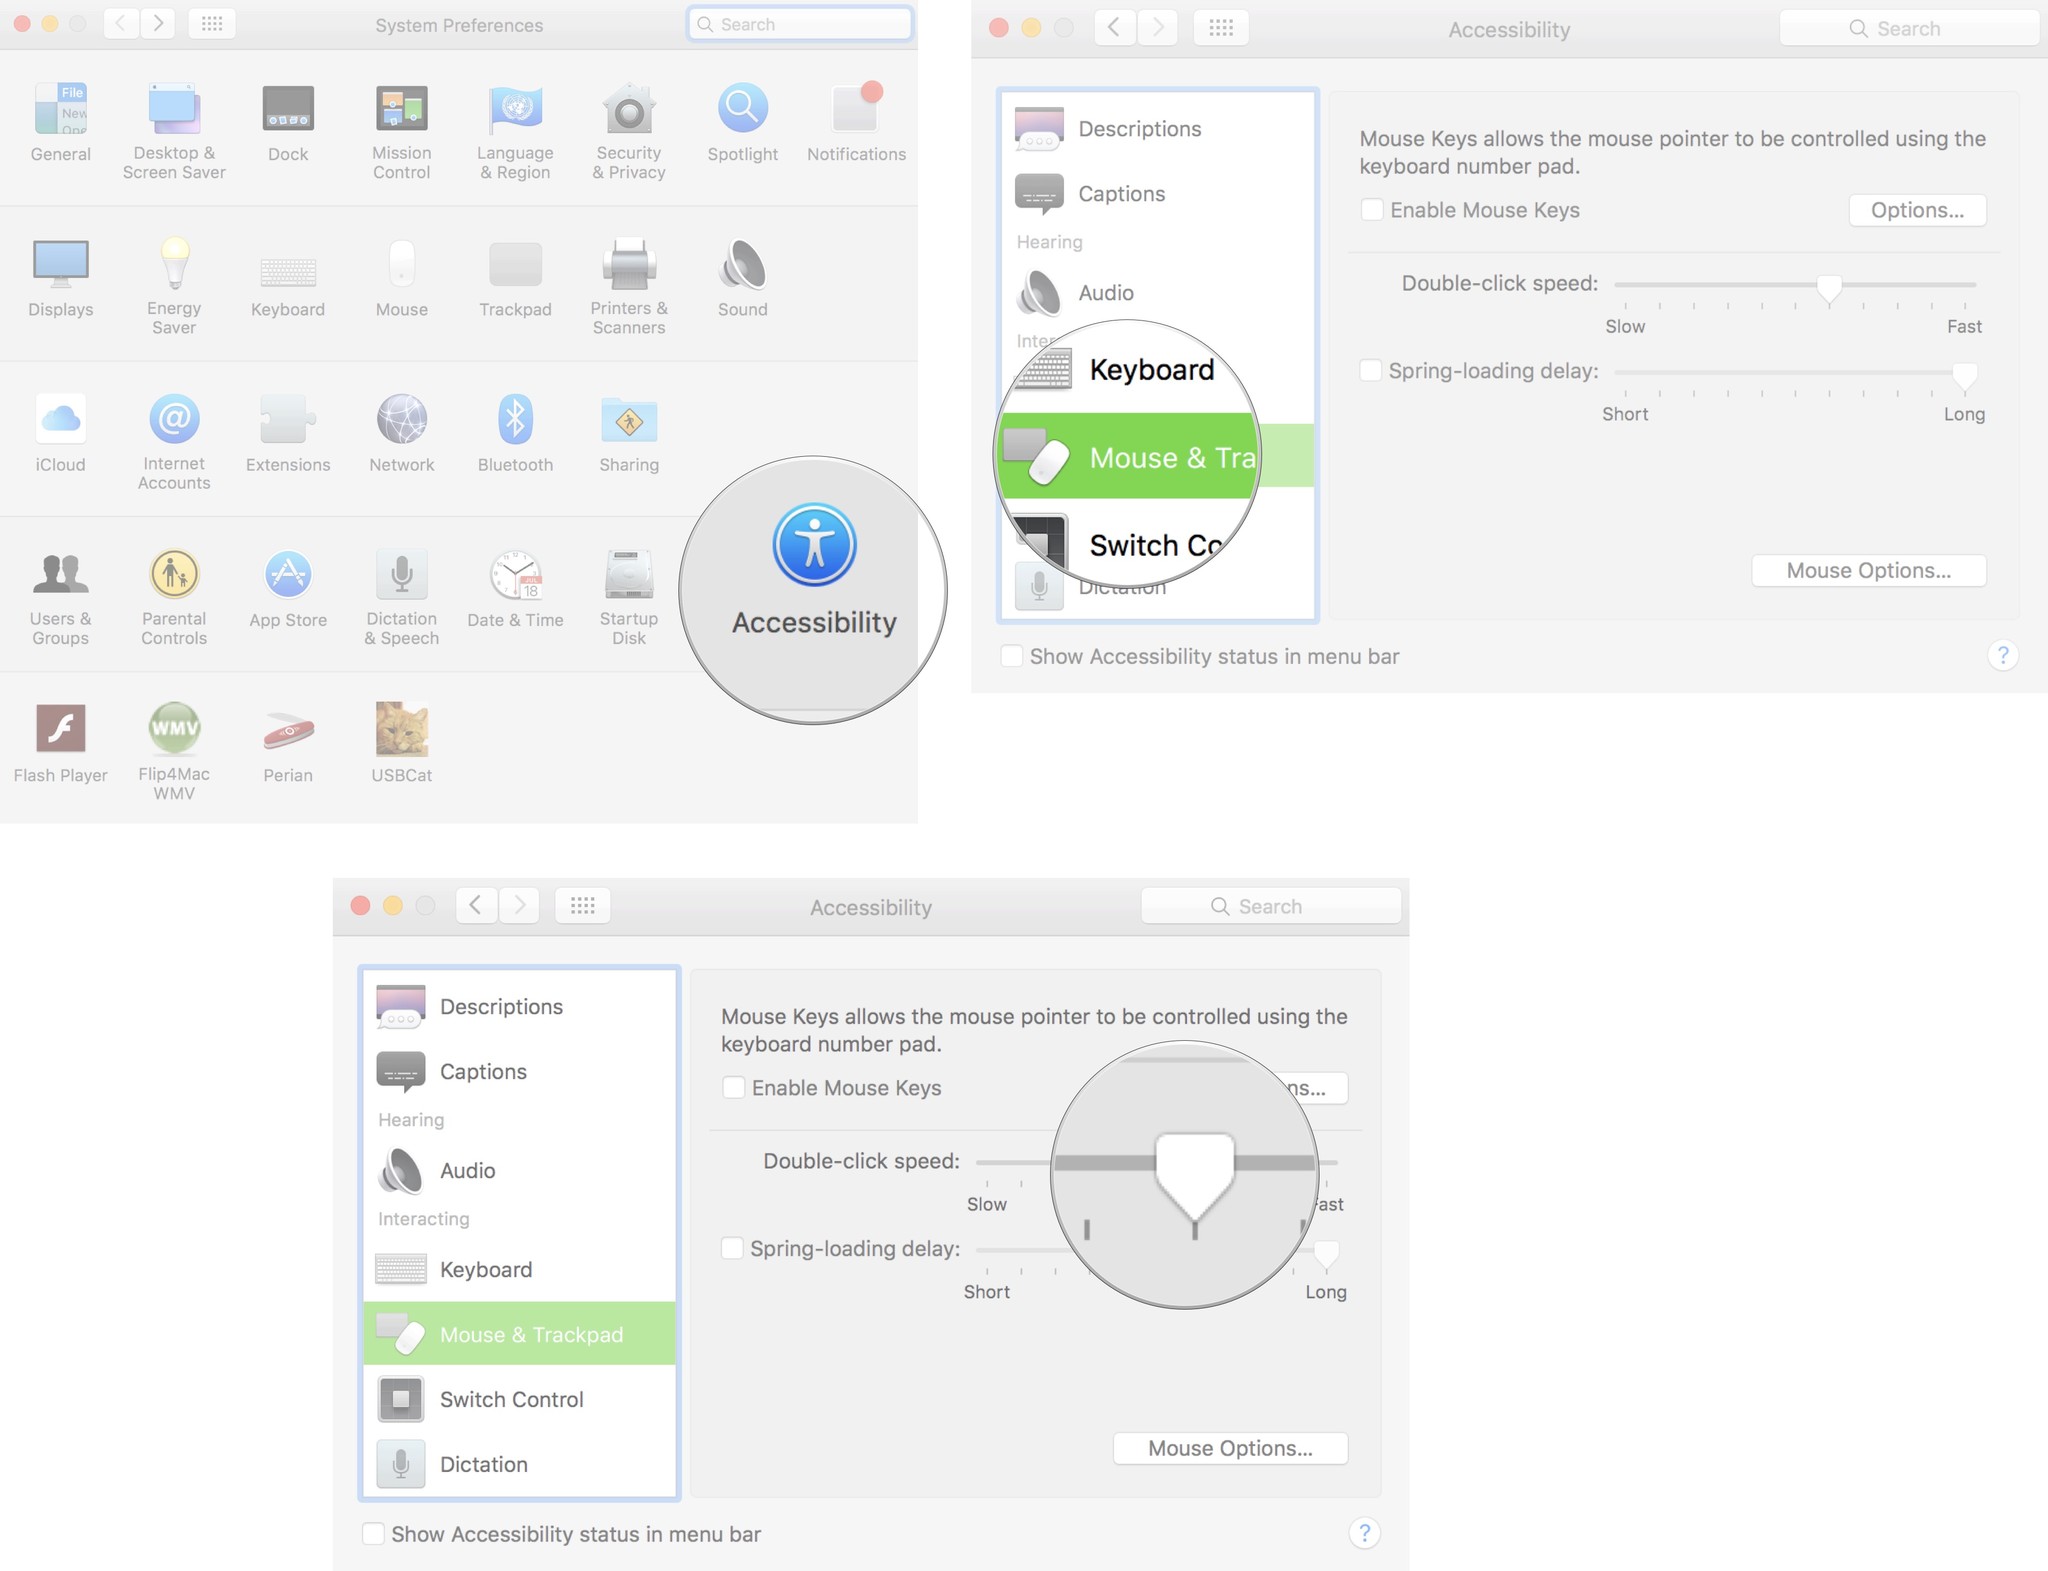
- Click the Apple icon in the upper-left corner of your screen.
-
Select System Preferences... from the dropdown menu.
- Click on Accessibility in the System Preferences window.
- Scroll down and select Mouse & Trackpad from the menu on the left side of the Accessibility window.
-
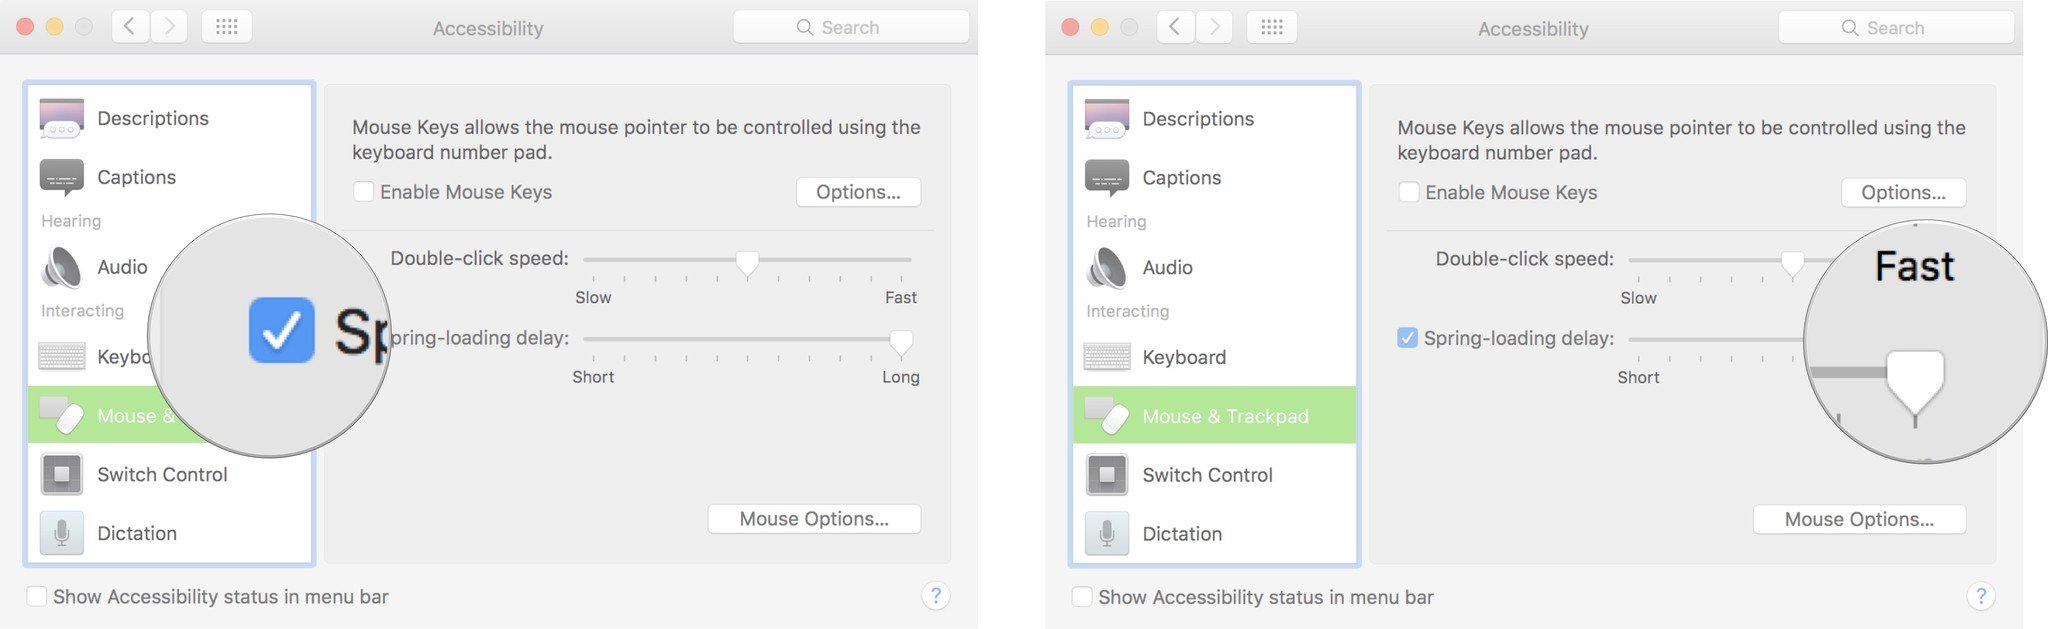
Drag the Double-click speed slider to the right or left to increase or decrease how fast you must click the mouse to trigger the double-click feature.
Note: At its slowest, you can wait as long as four seconds between clicks to trigger double-clicking.
-
Tick the box for Spring-loading delay to enable the feature that opens a folder when you hover over it with a file.
Note: This feature is usually enabled by default.
-
Drag the Spring-loading delay slider right or left to increase or decrease how long you have to hover over a folder with a file before it opens.
Buy used, save big
jemjem makes it safe and easy to save money buying gently used technology for home and family.