Apple's document scanner might be the only scanner you'll ever need, ever again.
If you've been using an iPhone for a few years, you probably have tried a number of document scanner apps in your lifetime. I know I have. I have my favorites. I keep a couple of them in my Productivity folder on my iPhone and iPad.
If you're tired of storing extra apps, just for the purposes of scanning a business card, flier, or document every once in a while, you're about to be free of the multi-app grind.
Apple's document scanner is hidden inside the Notes app, and because it supports in-app sharing, you can store the newly scanned document anywhere you want. Here's how.
How to scan a document on iPhone and iPad
The document scanner is tucked away in the Notes app on iPhone and iPad. With just a couple of taps, you'll have a solidly scanned document ready to mark up, covert to PDF, and share with another app.
- Open Notes on your iPhone or iPad.
- Create a new note or tap on an existing one to add a document to it.
-
Tap the camera button at the bottom of the screen or above the keyboard.

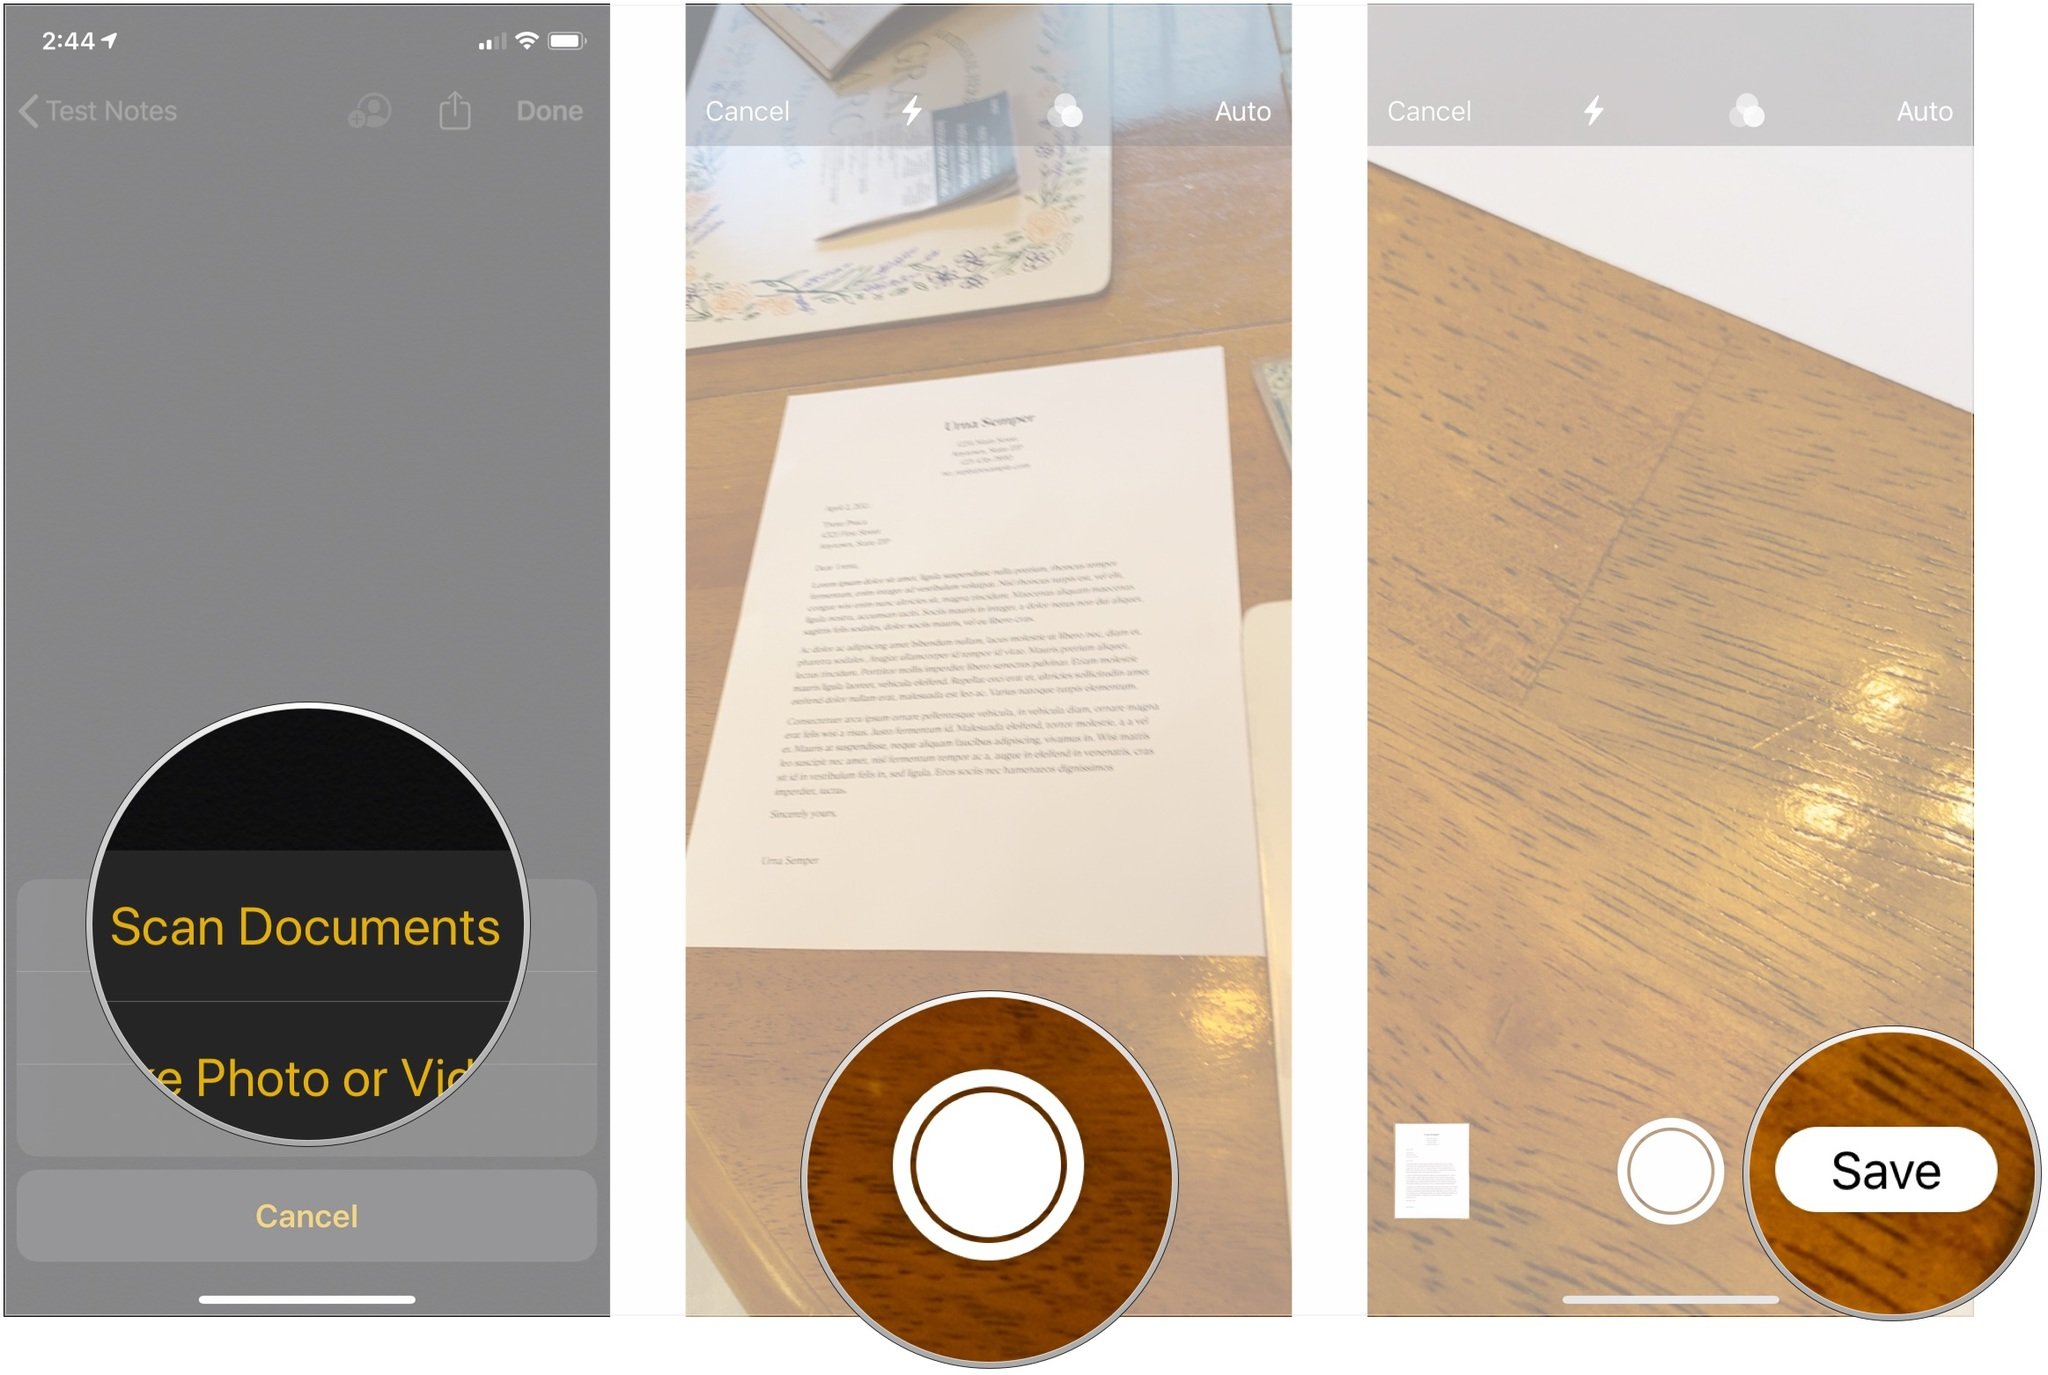
- Tap Scan Documents.
- Line up the document you want to scan.
- Tap the shutter button if the scanner doesn't automatically scan the document. Repeat this step for every document you want to scan.
-
Tap Save after you've scanned all of the necessary pages. The button will have a count of how many pages you scanned.


The scanned pages will populate in a new note in the Notes app.
Buy used, save big
jemjem makes it safe and easy to save money buying gently used technology for home and family.

|
 |
 |
 |